













Seedream 5.0 Pro Review: Image Editing Enters the Era of Controllable Modifications
ByteDance's new Seedream 5.0 Pro brings interactive editing with point marks, region selection, and doodles, enabling precise local control. From cluttered rooms to complete home designs, it transforms image generation into a visual editing tool.
ByteDance recently released its next-generation image model, Seedream 5.0 Pro.
After a brief hands-on experience, my immediate impression is that this is no longer just a model that "takes a prompt and generates an image" — it's approaching a true image editing tool.
It's not just good at generation; it also offers more explicit local control. You can mark objects in an image, select regions, draw arrows, paint colors, and then tell the model via prompts:
- What to modify;
- What to change it into;
- What must remain unchanged.
This interaction style turns image editing from "the model guessing" to "the user directly specifying."
In terms of overall capability, Seedream 5.0 Pro is now in the top tier. Its performance is quite stable in tasks like multi-image editing, local modifications, product visuals, text layout, and style consistency.
But more important than rankings: it presents a workflow much closer to actual design work.
1. The real highlight is not generation, but "editability"
In the past, when using image models for modifications, the biggest issue was often not that the model couldn't make changes, but that it didn't know which part you actually wanted to change.
For example, if you write: Turn the left sofa white.
The model might encounter several issues:
- It can't determine which sofa you mean;
- While modifying the sofa, it also changes the wall, window, or floor;
- It keeps the sofa's position but regenerates the entire room;
- Details of products or people drift during the modification.
Seedream 5.0 Pro's solution is to directly incorporate "position selection" into the prompt workflow.
The user can first mark areas in the image, then let the model execute modifications based on those marks.
Currently, there are three main interaction methods.
First, find Draw to enter precise editing mode
After uploading an original image, a Draw button appears above the thumbnail. Click it to enter the image annotation and precise editing interface.
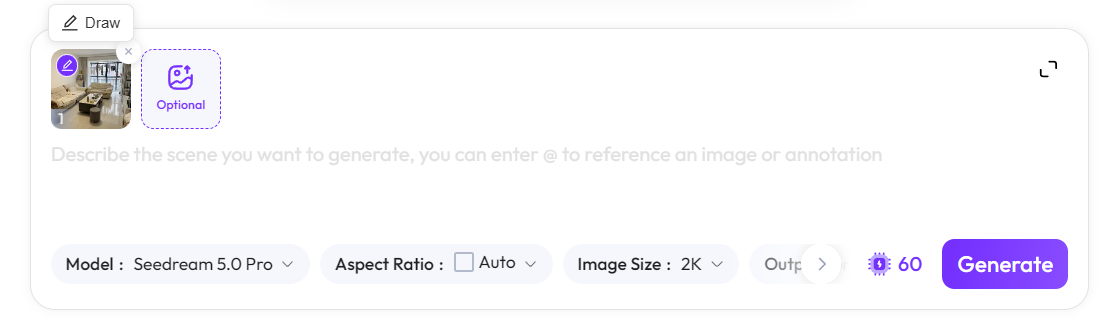
Once in the image annotation and precise editing interface, choose one of the three marking methods below based on the task.
1. Point Mark: Mark
Click on a specific object to create a marker point.
Suitable for specifying:
- A particular sofa;
- A piece of clothing;
- A person;
- A product;
- Text;
- A specific part or accessory.
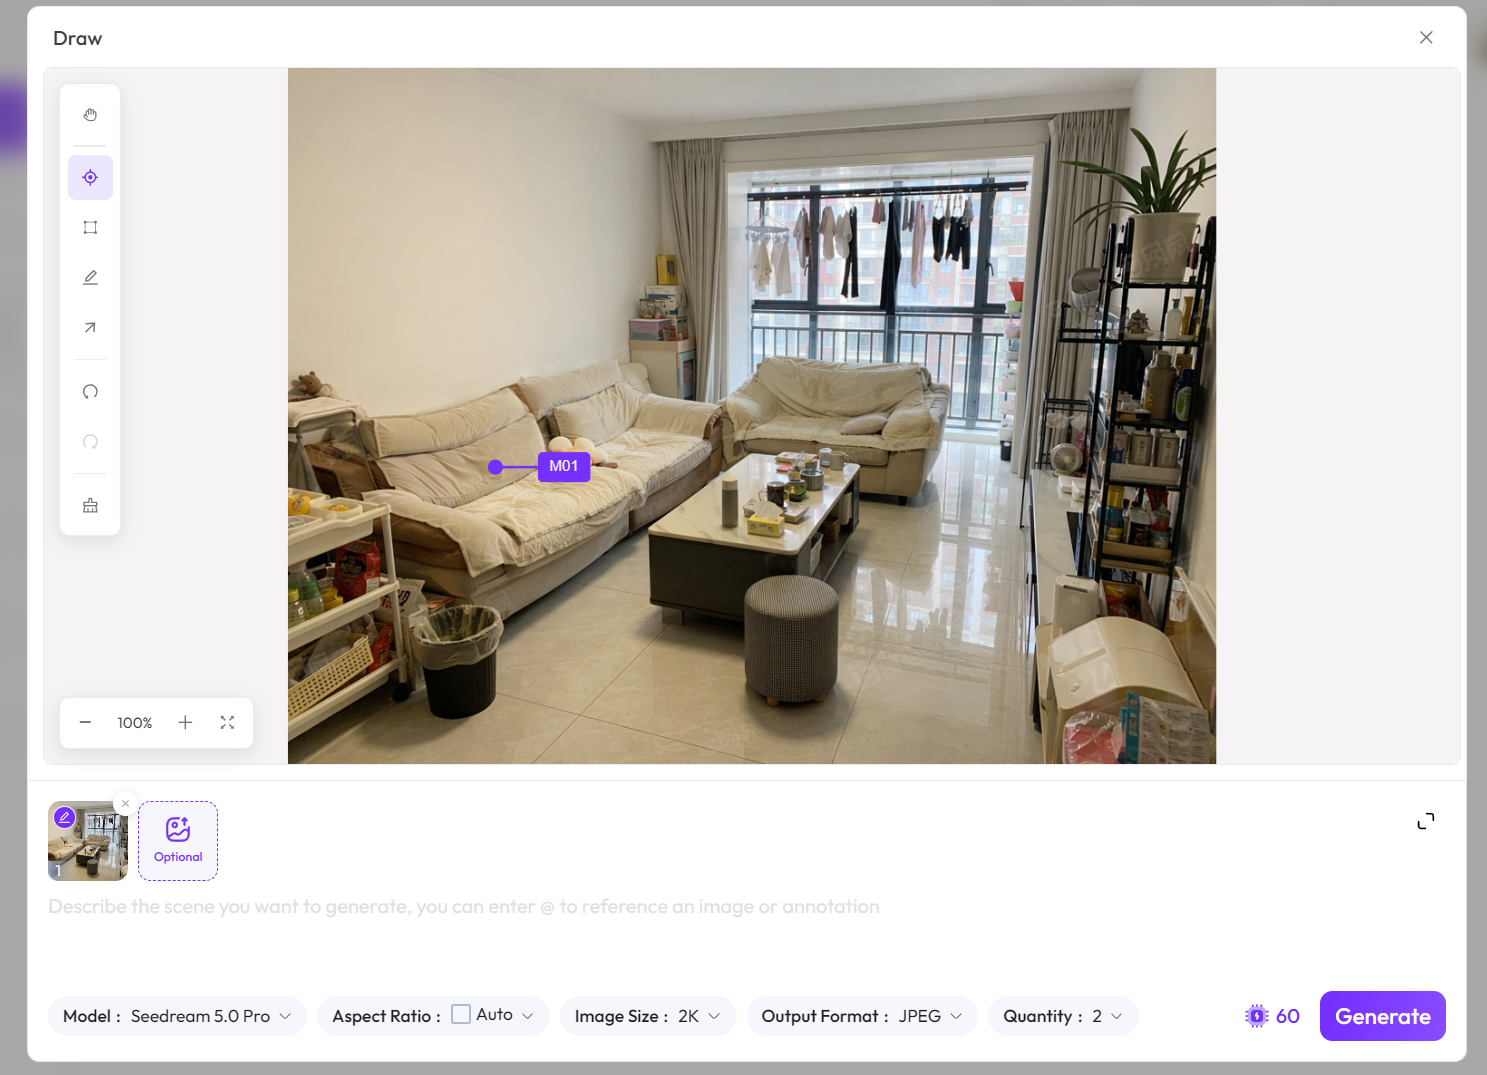
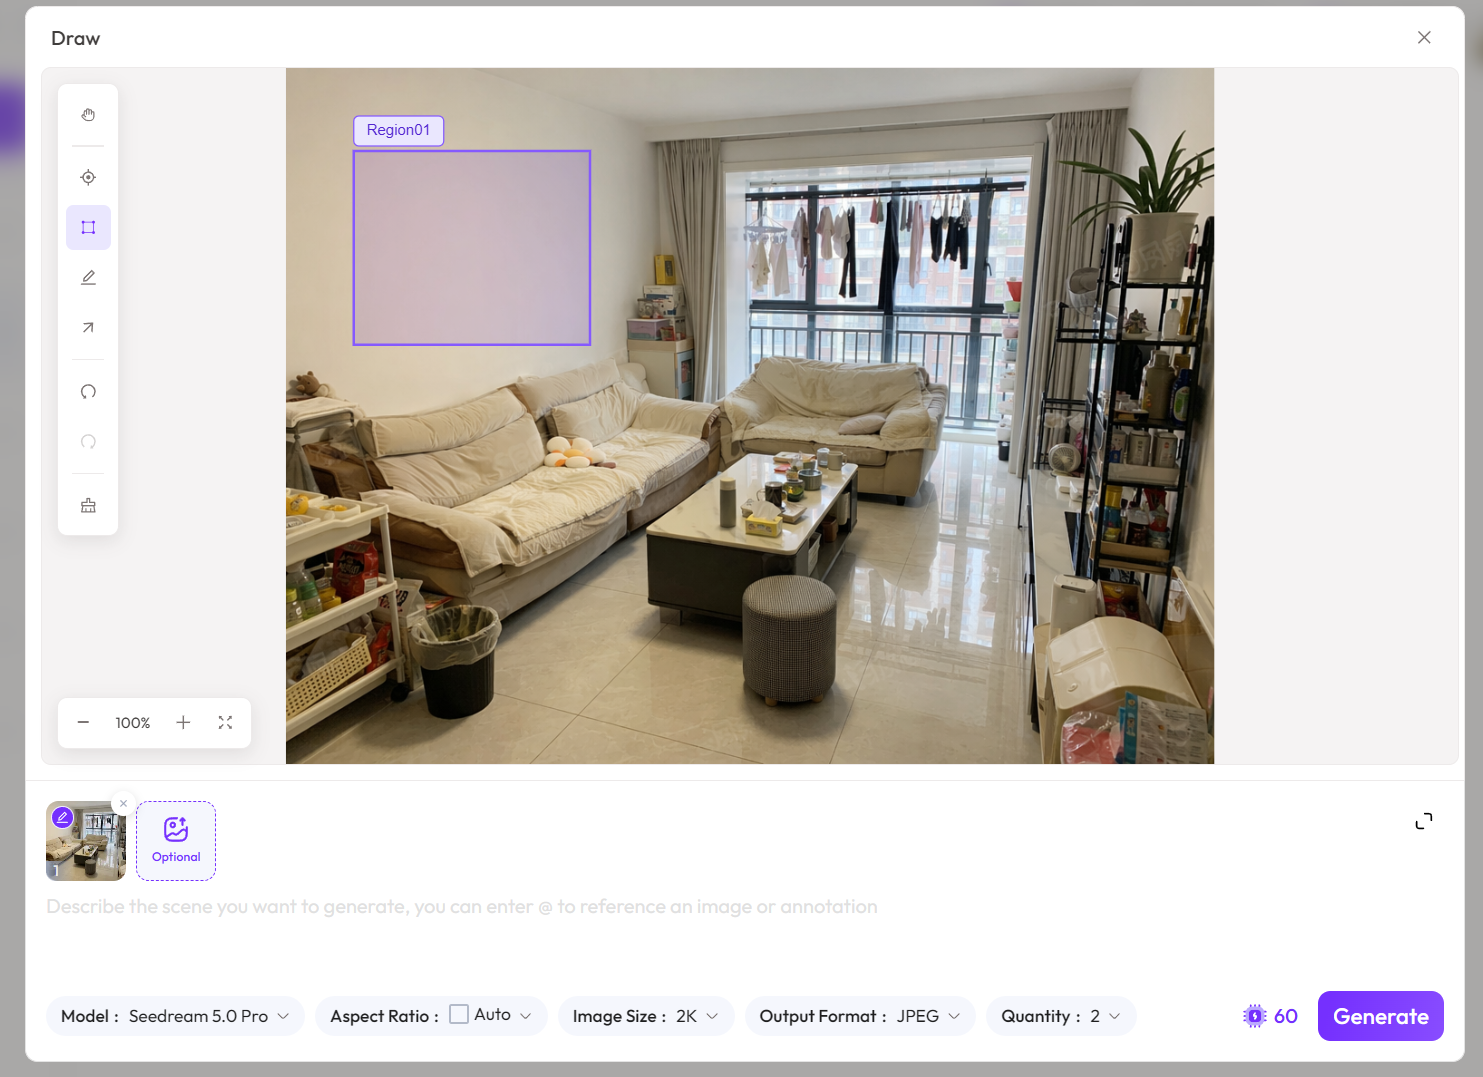
2. Region Selection: Region
Select a range using a rectangular box to tell the model to only process that area.
Suitable for:
- Replacing the background;
- Changing wall material;
- Adjusting local colors;
- Adding text at a specified location;
- Redrawing a portion of the image.
3. Scribbles, Arrows, and Color Marks
When the positional relationship is complex, you can also directly draw lines, arrows, or use color marks.
For example:
- Use an arrow to point out a product selling point;
- Use color to specify an area that needs redrawing;
- Use lines to mark multiple parts;
- Use different colors to distinguish different modification tasks.
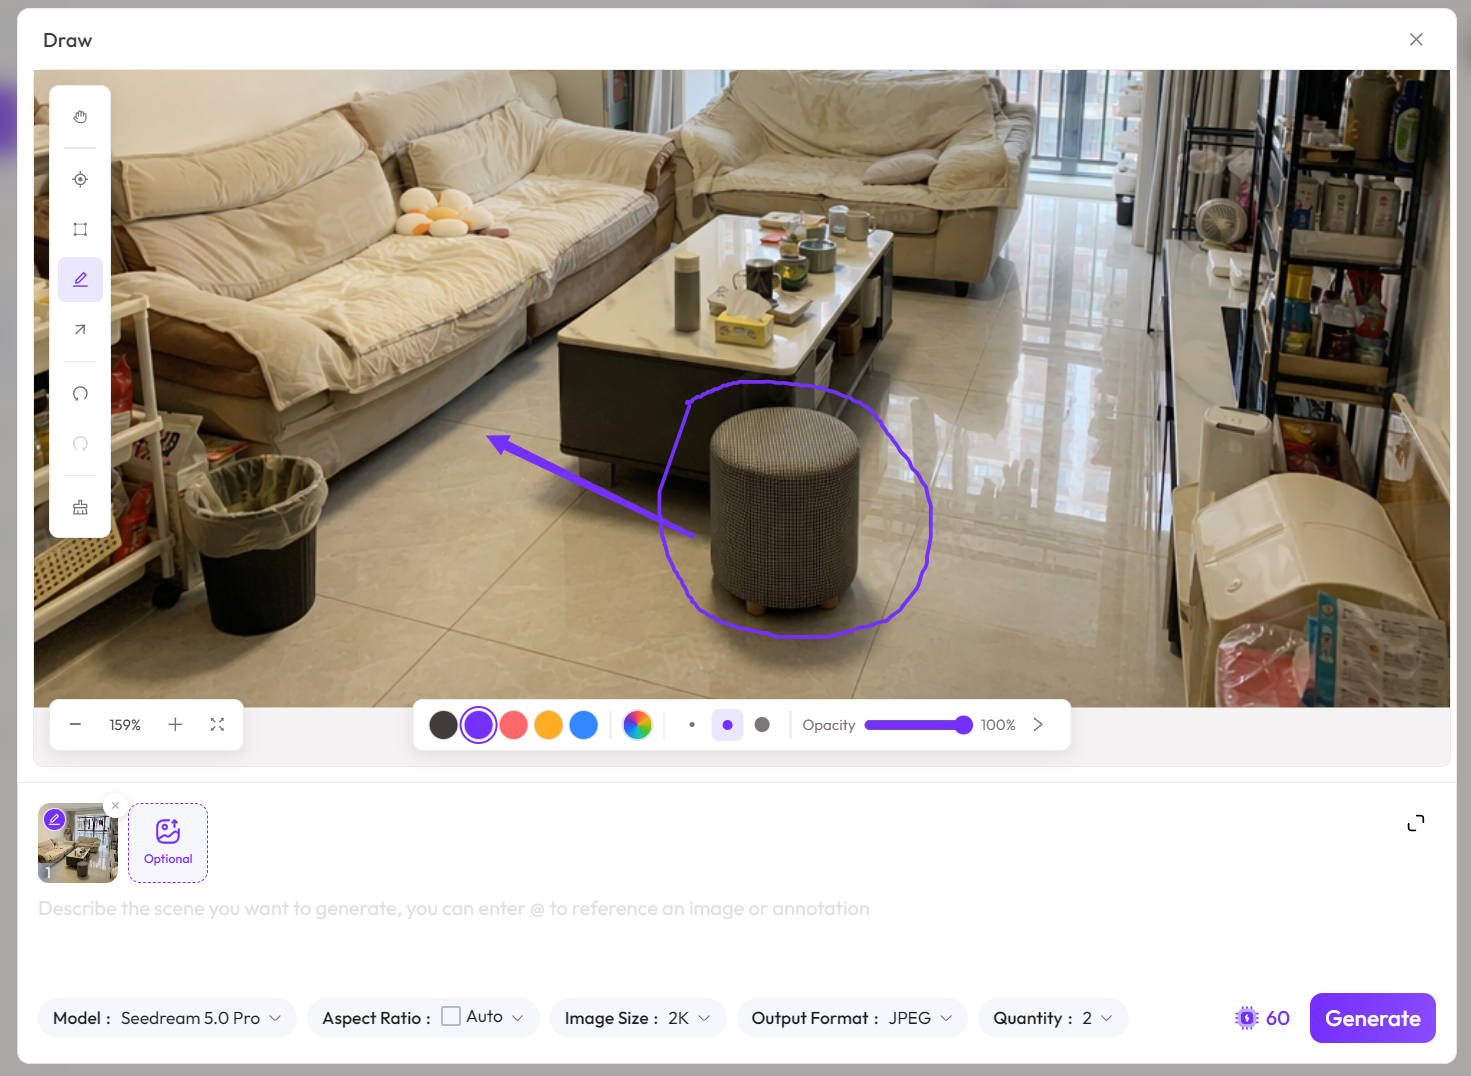
These operations may seem simple, but they are very important for the model's understanding.
Because users no longer need to spend a lot of text describing positions in the image; instead, they directly tell the model the location.
2. Interactive editing turns prompts into "operation instructions"
Traditional image generation prompts mainly describe what the image should look like.
But interactive editing prompts are more like clear operation instructions.
A good editing prompt usually only needs three parts:
Modified object + Modification target + Content to keep unchanged
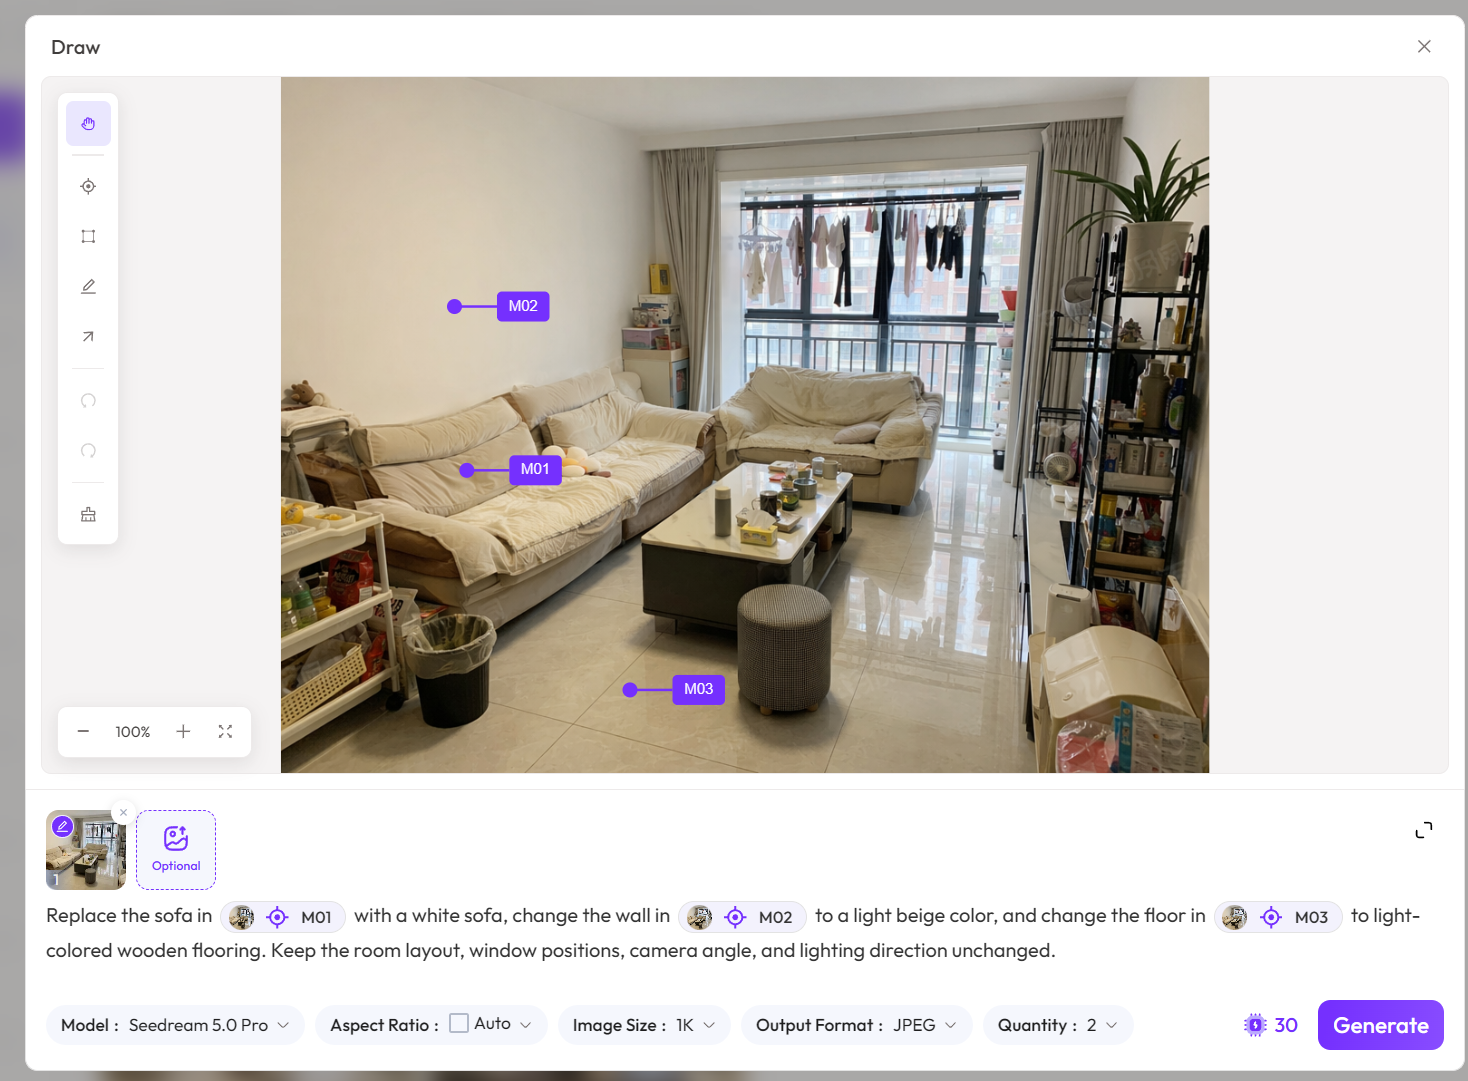
Points, boxes, reference images, color codes, and language requirements can all be placed in the same instruction.
This interaction method solves two long-standing problems.
Problem 1: Prompts struggle to accurately express spatial positions
"The sofa on the left," "the cabinet in the middle," "the chair by the window" — these descriptions seem clear, but the model may not understand them accurately.
After marking, the user no longer needs to explain positions; they only need to reference the corresponding Mark or Region.
Problem 2: The model easily changes unrelated areas
The most common failure in image editing is not that the target object isn't modified well, but that other content also changes.
Therefore, it's best to explicitly include in the prompt:
Keep other areas unchanged.
Or more specifically:
Maintain composition, camera angle, subject proportions, lighting direction, and background structure unchanged.
Interactive marking tells the model "where to change," while the prompt tells the model "how to change."
When combined, the controllability of modifications significantly improves.
3. Real-world Test 1: From a Cluttered Room to a Complete Home Design
To test Seedream 5.0 Pro's multi-object editing capabilities, I started with an ordinary room photo.
The original image included a sofa, coffee table, shelves, windows, a clothes rack, and lots of clutter — overall very messy.
This type of image is perfect for testing whether the model can simultaneously:
- Clean up clutter;
- Replace furniture;
- Maintain spatial structure;
- Unify materials and colors;
- Preserve a realistic shooting perspective.
Step 1: Clean the room and modify basic materials
First, I marked several main areas in the original image:
- Sofa;
- Wall;
- Floor;
- Shelves.
Then I entered a command like this:
Remove clutter and extra items from the room,
Replace the sofa corresponding to @Mark01 with a white fabric sofa,
Change the wall corresponding to @Mark02 to light beige,
Change the floor corresponding to @Mark03 to light wood flooring,
Keep the window position, room proportions, camera angle, and overall structure unchanged.
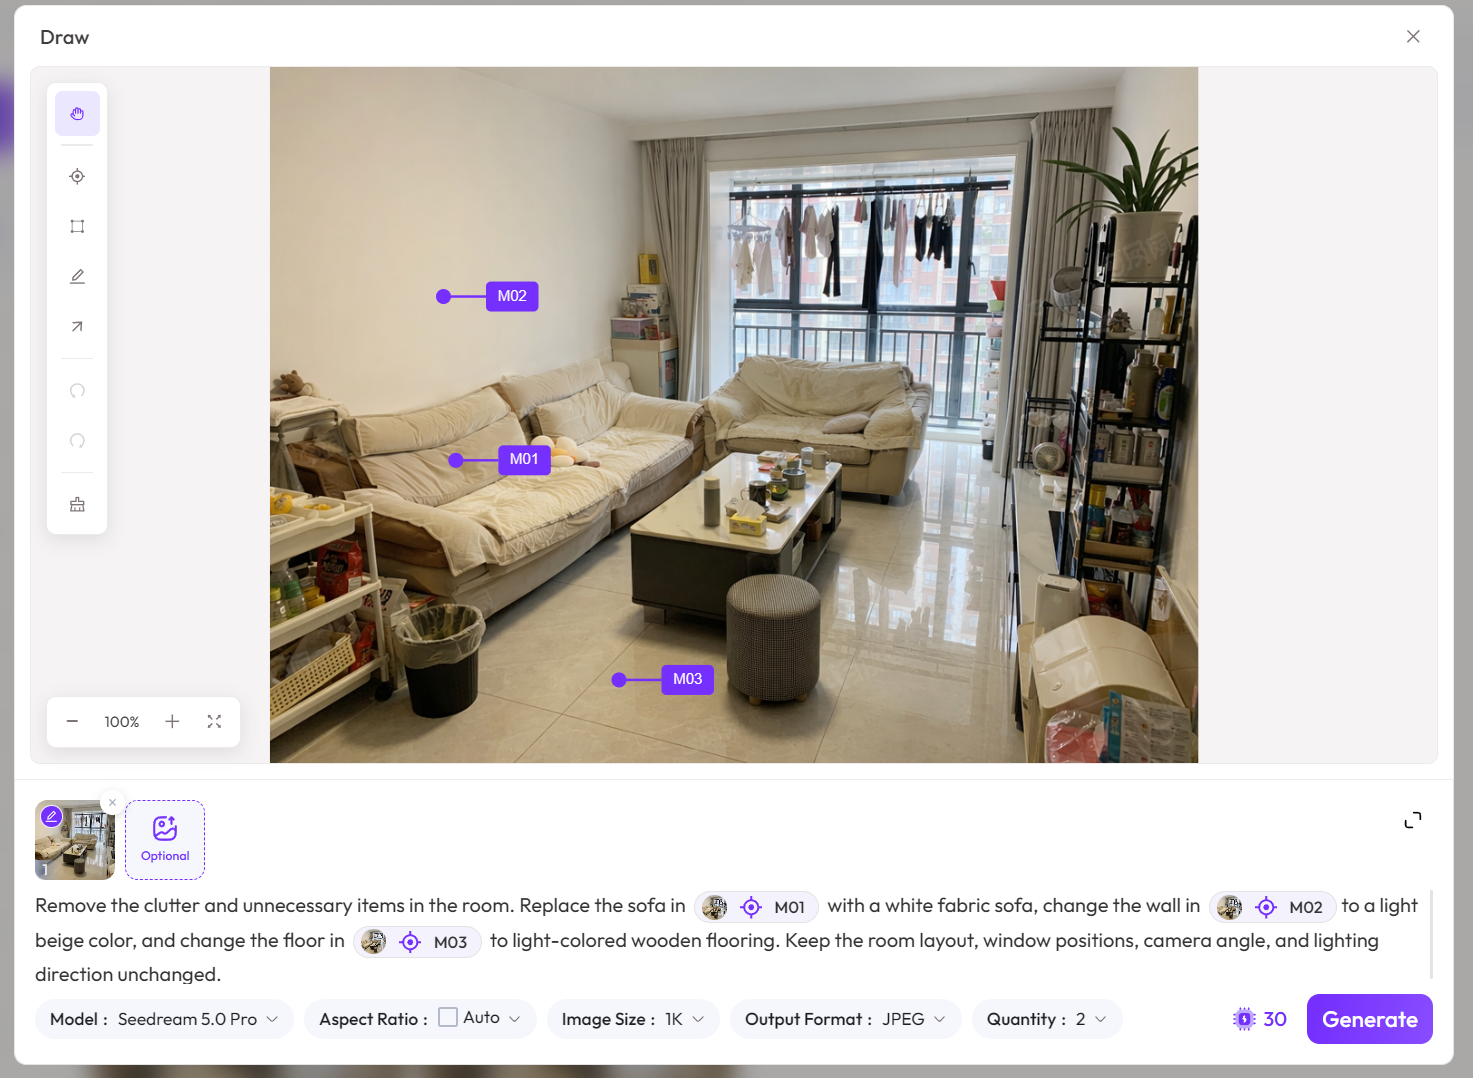
The most noteworthy aspect of the generated result is not that the room looks prettier, but that the original spatial relationships are largely preserved.
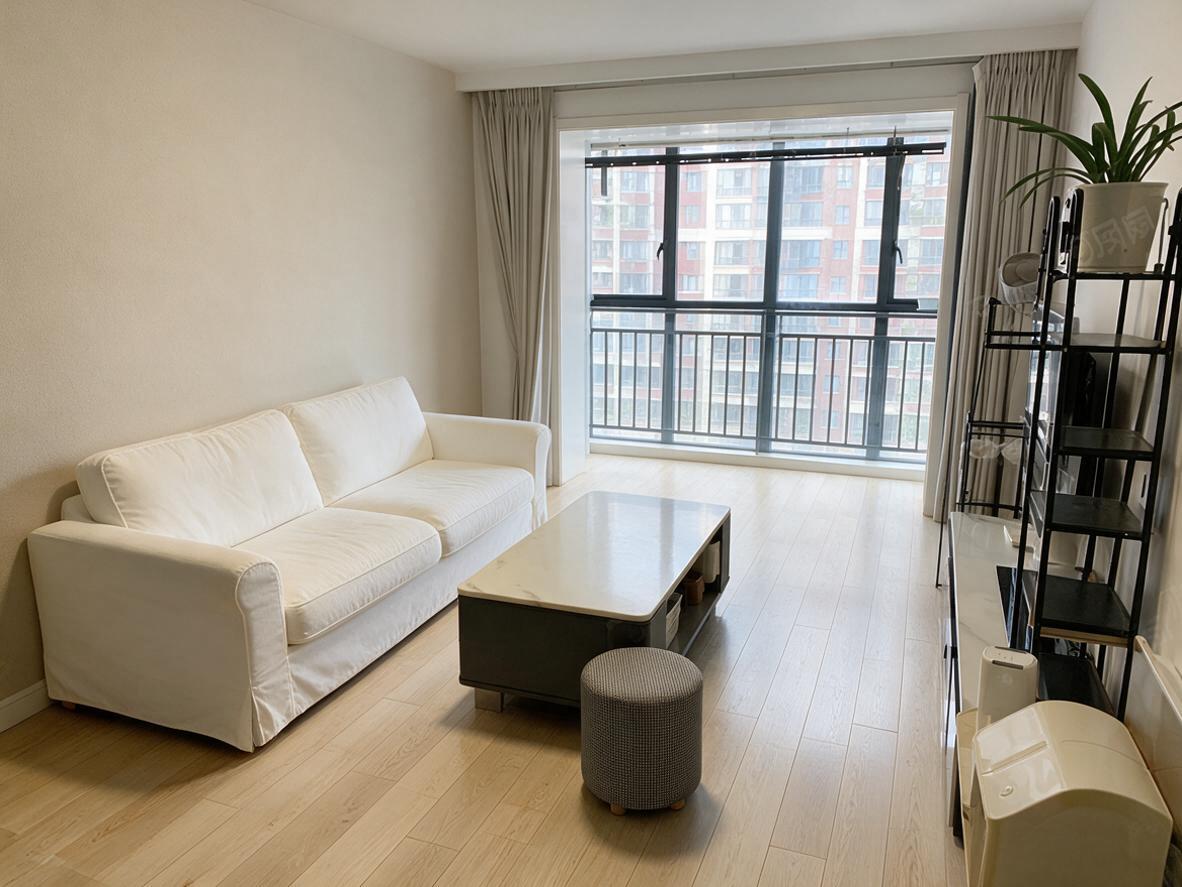
For example:
- The window is still in its original position;
- The depth of the room hasn't changed significantly;
- The camera height and shooting angle remain similar;
- The junction between wall and floor is generally reasonable.
This indicates that the model isn't simply regenerating a "similar room" but is modifying based on the original image structure.
Step 2: Place reference furniture in the room
Next, I uploaded several reference images of furniture, including:
Sofa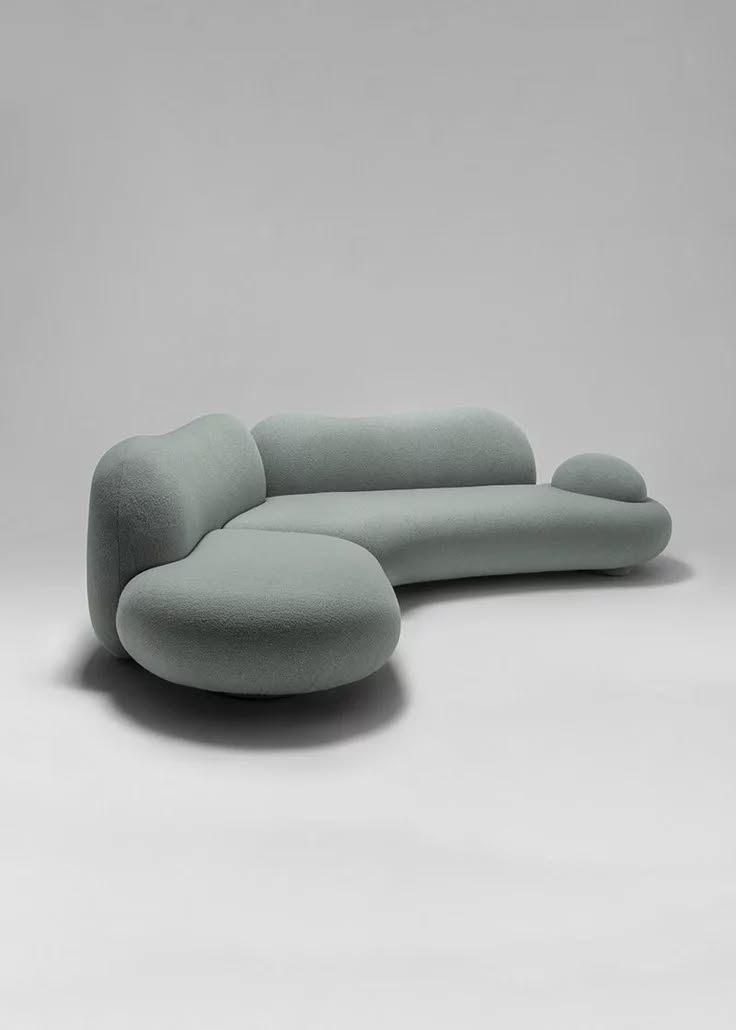
|
Coffee table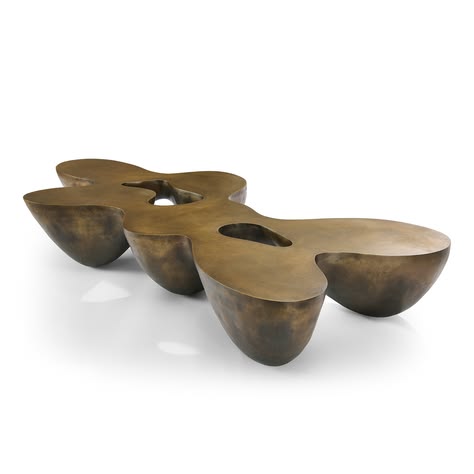
|
Armchair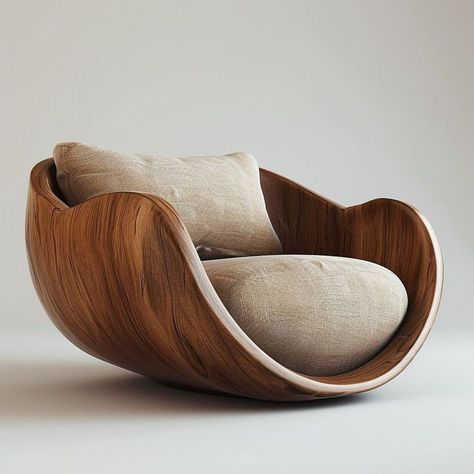
|
Bookshelf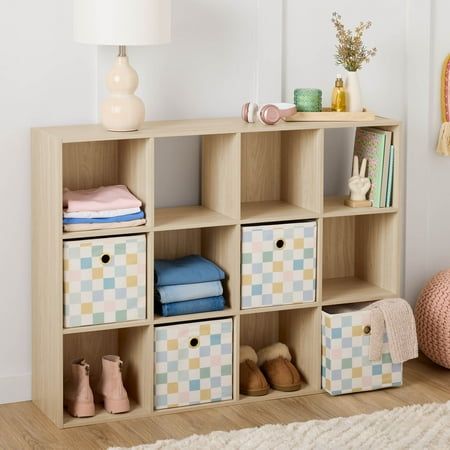
|
Curtains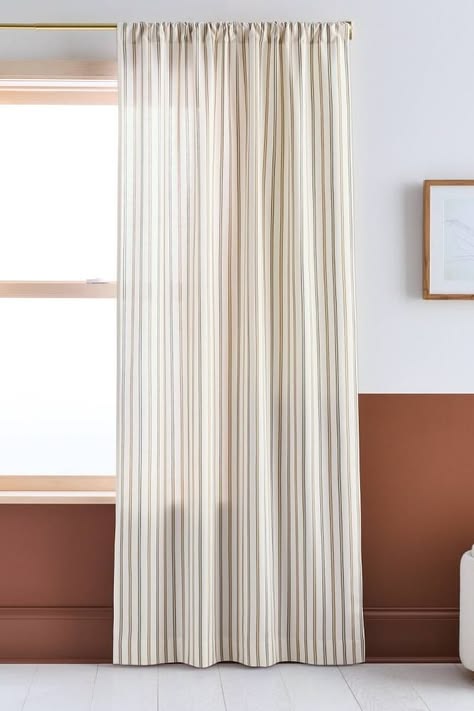
|
Then I bound the furniture positions in the original image with the reference images.
The prompt can be written as:
Replace the sofa corresponding to @Mark01 with the sofa in @Image02, Replace the coffee table corresponding to @Mark02 with the coffee table in @Image04, Replace the armchair corresponding to @Mark03 with the armchair in @Image03, Replace the bookshelf corresponding to @Mark04 with the bookshelf in @Image05, Replace the curtains corresponding to @Mark05 with the curtains in @Image06.
All furniture should match the original room's perspective, lighting direction, and spatial proportions,
Keep windows, walls, floor, and camera angle unchanged.
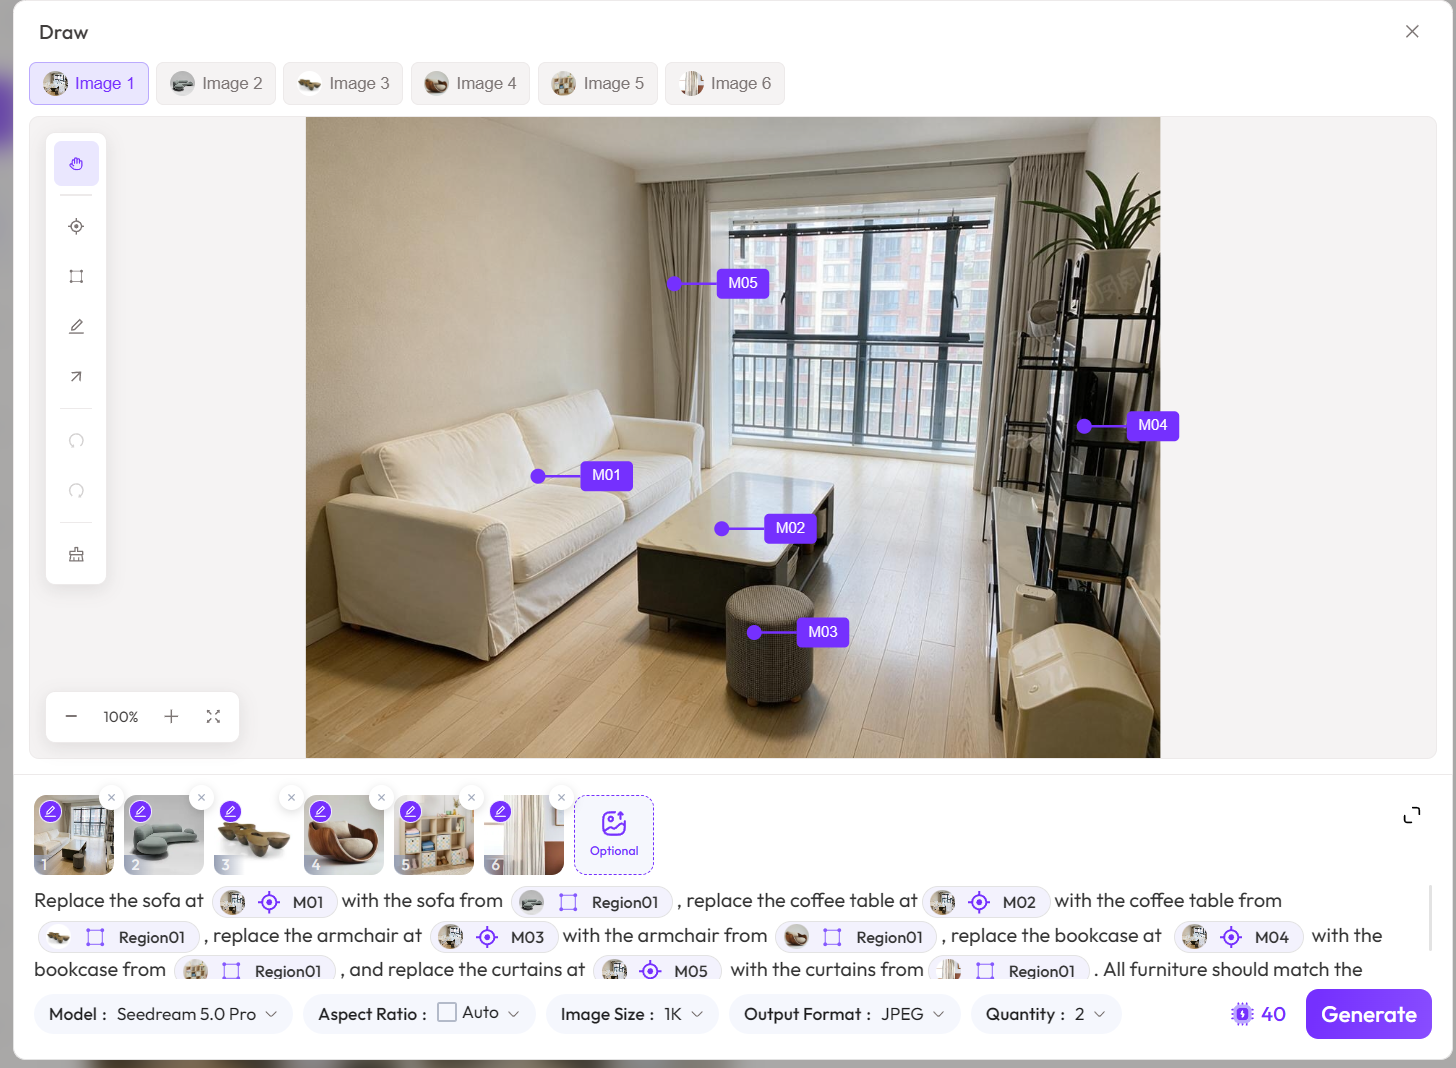
The difficulty in this step is not just "placing" the furniture, but making furniture from different sources look reasonable in the same space.
The model needs to simultaneously handle:
- Size relationships;
- Perspective directions;
- Lighting consistency;
- Material blending;
- Furniture occlusion;
- Spatial arrangement.
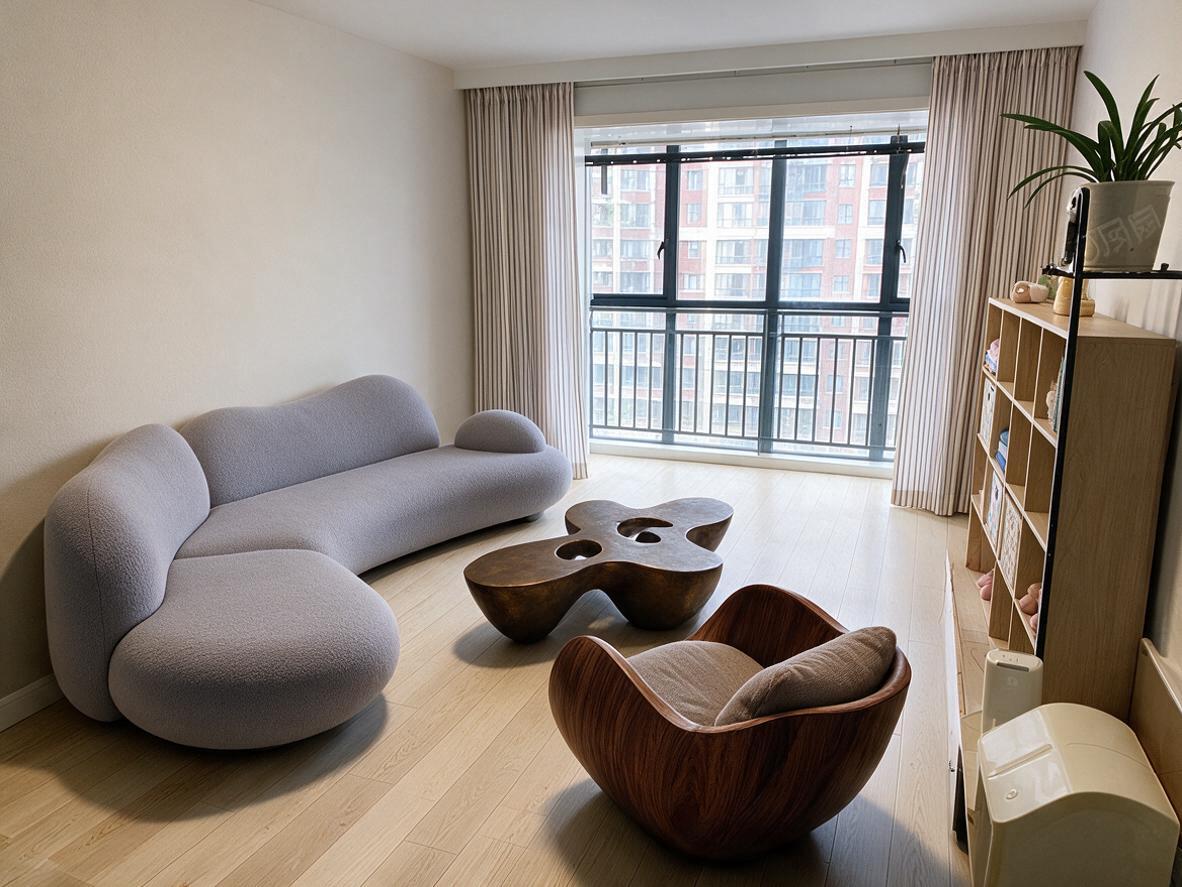
From the results, although local details might still have some deviations, the overall design already has strong preview value.
Step 3: Use a color palette to unify the space style
After furniture replacement, I added a color palette reference.
The palette includes:
- Espresso;
- Sand;
- Beige;
- Ivory;
- Almond.
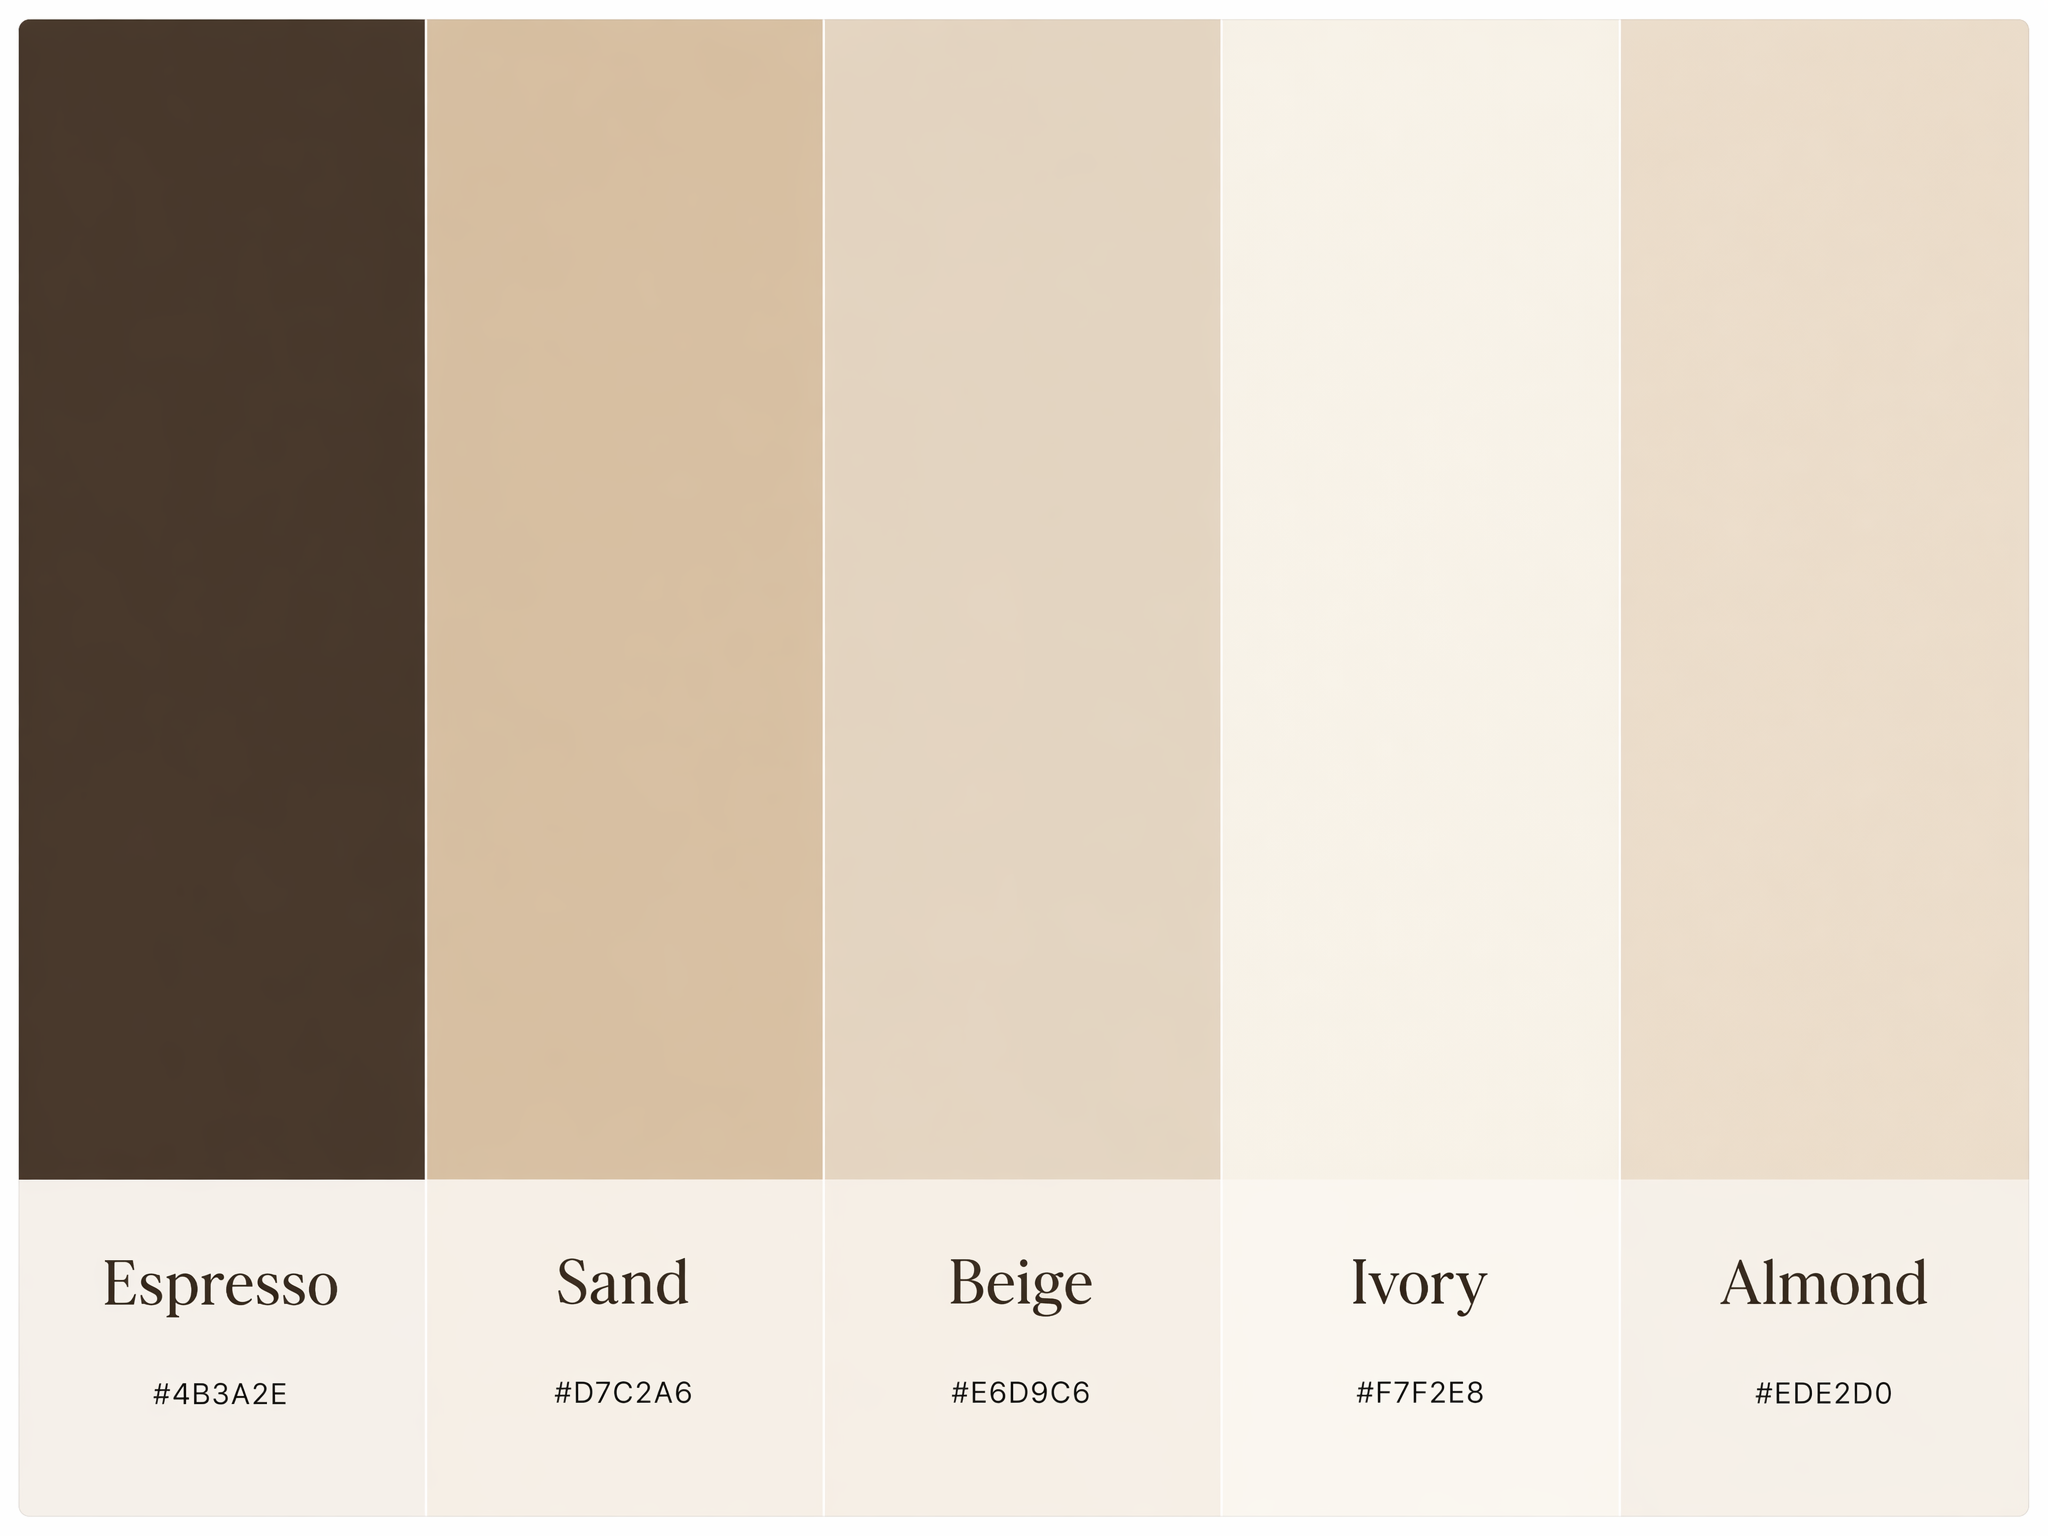
Then I asked the model to re-unify the entire space's color scheme.
For example:
Refer to the color palette in @Image02, Adjust the overall space color scheme to a combination of Espresso, Sand, Beige, Ivory, and Almond.
Use light Beige for walls, Use Ivory for the sofa, Use Espresso for wooden furniture, Use Sand and Almond for soft furnishings and accents.
Keep furniture positions, room structure, camera angle, and natural light direction unchanged.
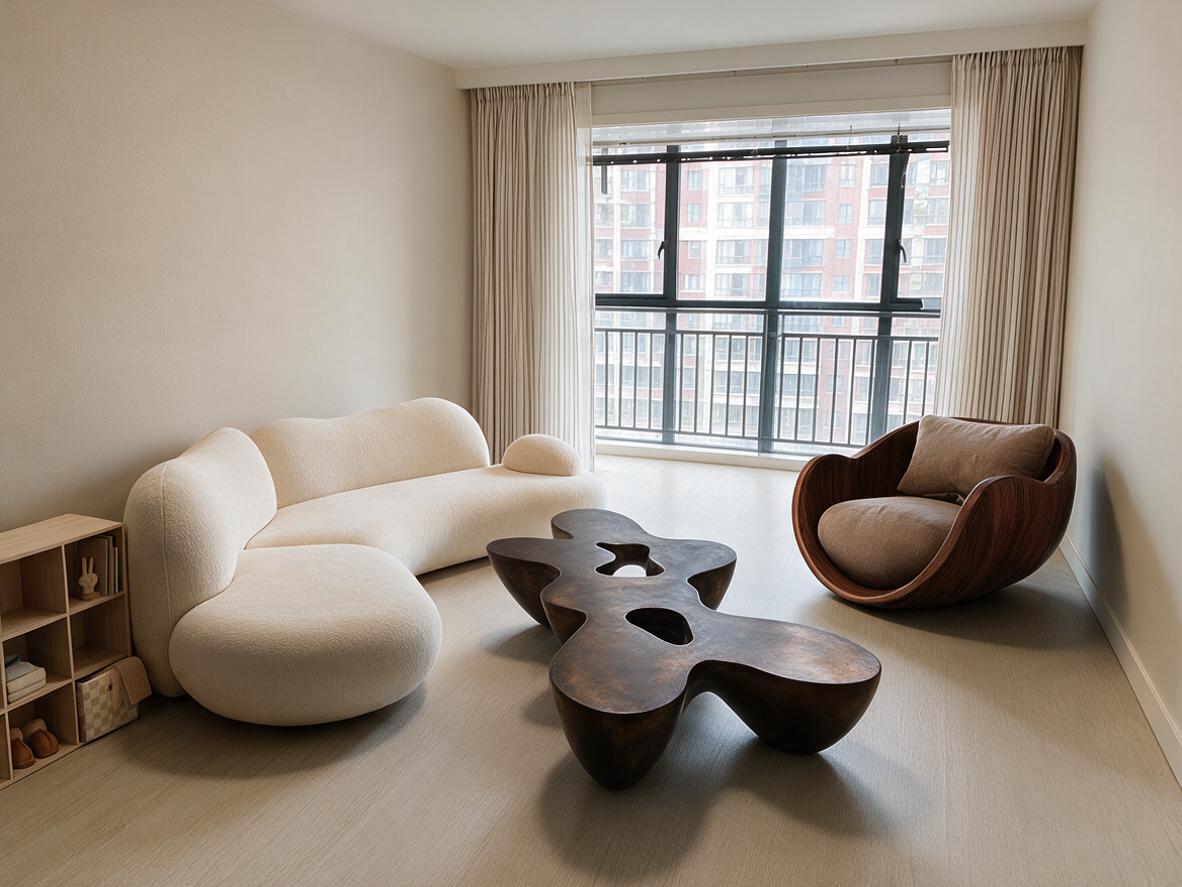
This method is more stable than saying "make it a high-end cream-toned style."
Because words like "high-end," "warm," and "textured" are subjective adjectives, while color palettes and color values are clear constraints.
The model doesn't need to guess what "high-end" means in your mind; it just follows the specified colors.
But what truly impressed me about this update is not how beautiful any single generated image is, but rather the new image editing paradigm it demonstrates: Use points, boxes, arrows, and reference images to tell the model "where to change," and then use a single sentence to tell the model "how to change."
When an image model starts to understand objects, regions, positions, and sequential modifications, it is no longer just a generation tool.
It is becoming a visual editing system that can genuinely participate in design, marketing, e-commerce, and content production.