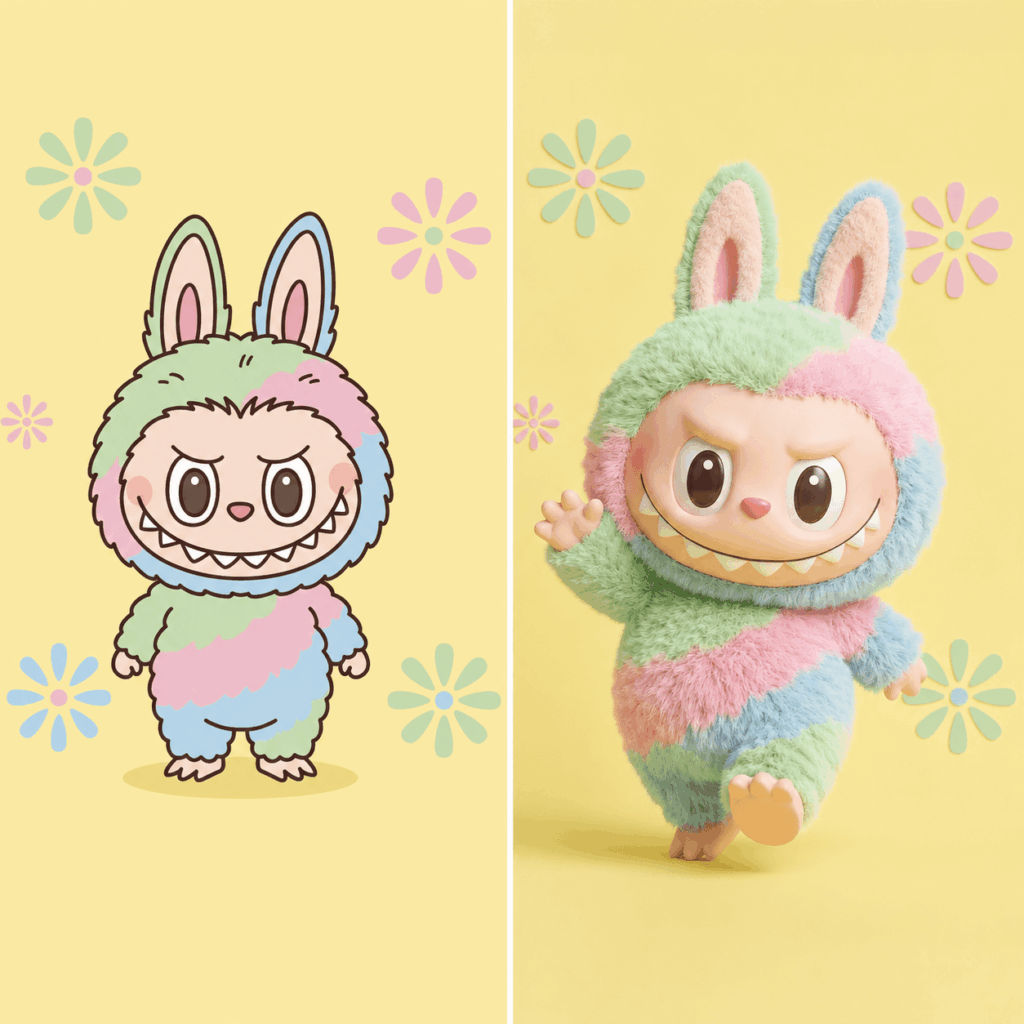
A 3D Cartoon Generator can turn a still character image into a short animated scene with movement, emotion, and personality. A sleepy cat can become an office worker. A brand mascot can introduce a new product. Even a simple character sketch can become the star of a social media video.
However, many first attempts do not look as charming as expected. The character may suddenly change shape. The background may move for no reason. Meanwhile, the camera may spin so quickly that the main action becomes difficult to follow.
Fortunately, the problem is often easy to fix. You do not need to learn 3D modeling, character rigging, or keyframe animation. Instead, you need one clear character image, one simple action, and a focused prompt.
This guide explains how to use a 3D Cartoon Generator to create a polished animated clip. You will also get a reusable prompt, practical motion tips, and simple ways to keep your character consistent.
🛠 Essential Tools for a 3D Cartoon Generator
Before you start, prepare two simple things.
A Clear Character or Reference Image
Choose an image with one clear subject, visible facial features, and a simple background. A mascot, pet, avatar, toy, product character, or illustrated figure can all work well.
A clear image gives the AI more useful visual information. Therefore, it is easier for the tool to preserve the original character.
The WeShop AI 3D Cartoon Generator
For this tutorial, we are using the WeShop AI 3D Cartoon Generator. It supports both text-to-video creation and image-to-video animation.
As a result, you can start with an existing character image or describe a completely new scene from scratch.
🧭 How to Use a 3D Cartoon Generator Step by Step
Step 1: Choose an Image for the 3D Cartoon Generator
First, select the character you want to animate. A strong expression can also make the final animation feel more lively.
For example, use:
- A smiling mascot for a cheerful product video
- A confused pet for a reaction meme
- A confident avatar for an introduction
- A surprised character for a comedy clip
- A cute toy for a short storytelling video
Next, choose only one main action. The character could wave, walk forward, open a box, react to an object, take a bite, or point toward the camera.
Do not try to fit an entire movie into one short clip. Instead, start with one moment that viewers can understand immediately.
Step 2: Open the 3D Cartoon Generator
Next, open the WeShop AI creation page.
Choose the image-to-video workflow when you already have a character image. Alternatively, use text-to-video when you want AI to create both the character and the scene.
You should also decide where the final video will be posted. This helps you choose the correct ratio before generation.
Step 3: Add Your Image and 3D Cartoon Prompt
This is the most important step in the process.
- Upload your selected character image.
- Copy the prompt below into the prompt box.
- Replace the words inside the brackets.
- Select the correct video ratio.
- Check that the prompt contains only one main action.
👇 Copy this prompt:
Prompt:
A screenshot of a 3D modeling software interface, displaying the Blender viewport. At the center of the scene is a highly realistic 3D model of the main subject, fully rendered with no visible topology or wireframe. The model is positioned on a gray 3D grid ground with an infinite horizon. The software’s UI toolbars are visible along the sides, a coordinate axis widget is present in the corner, the viewport is set to solid shading mode, and the overall scene depicts a 3D asset design workspace. 4K resolution and aspect ratio.
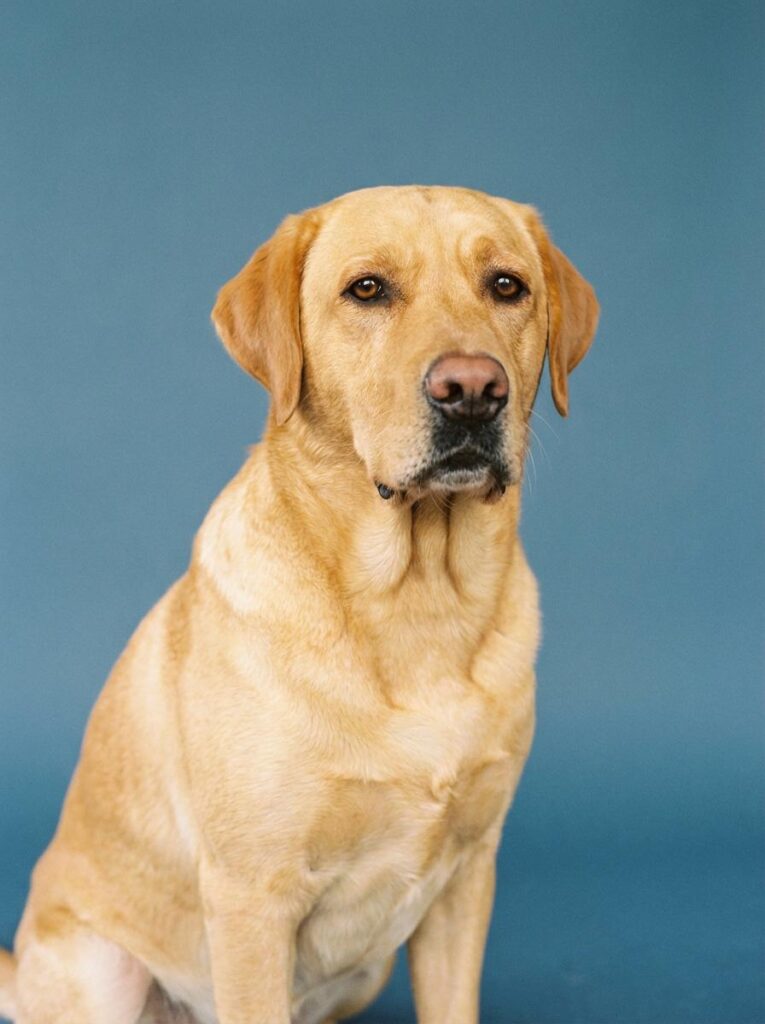
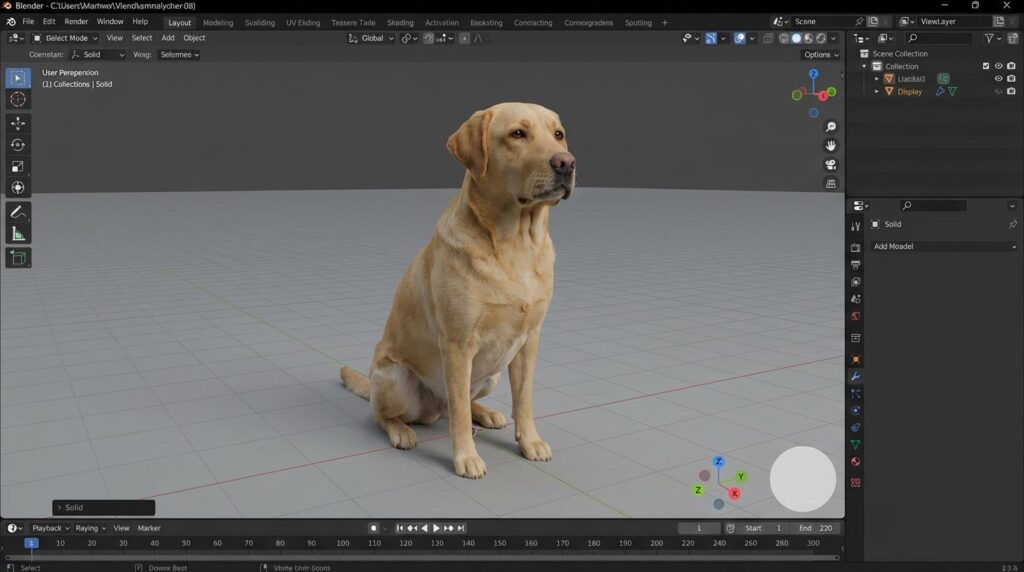
Step 4: Generate and Review Your First 3D Cartoon
Now, click the Generate button and wait for your first 3D result.
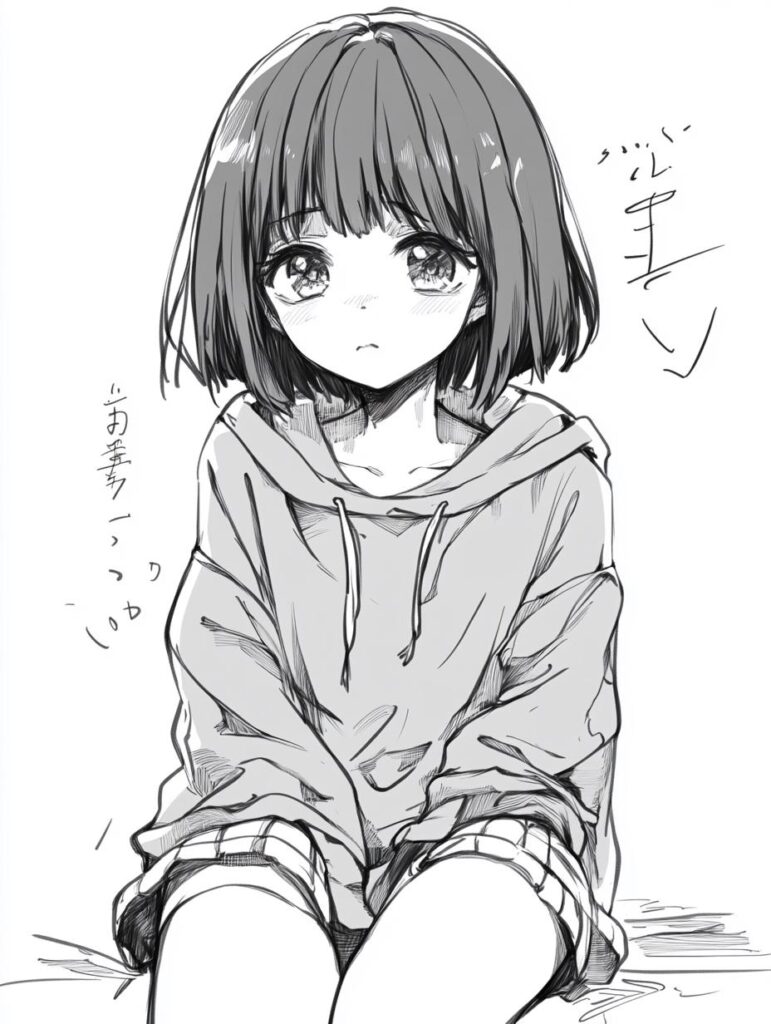
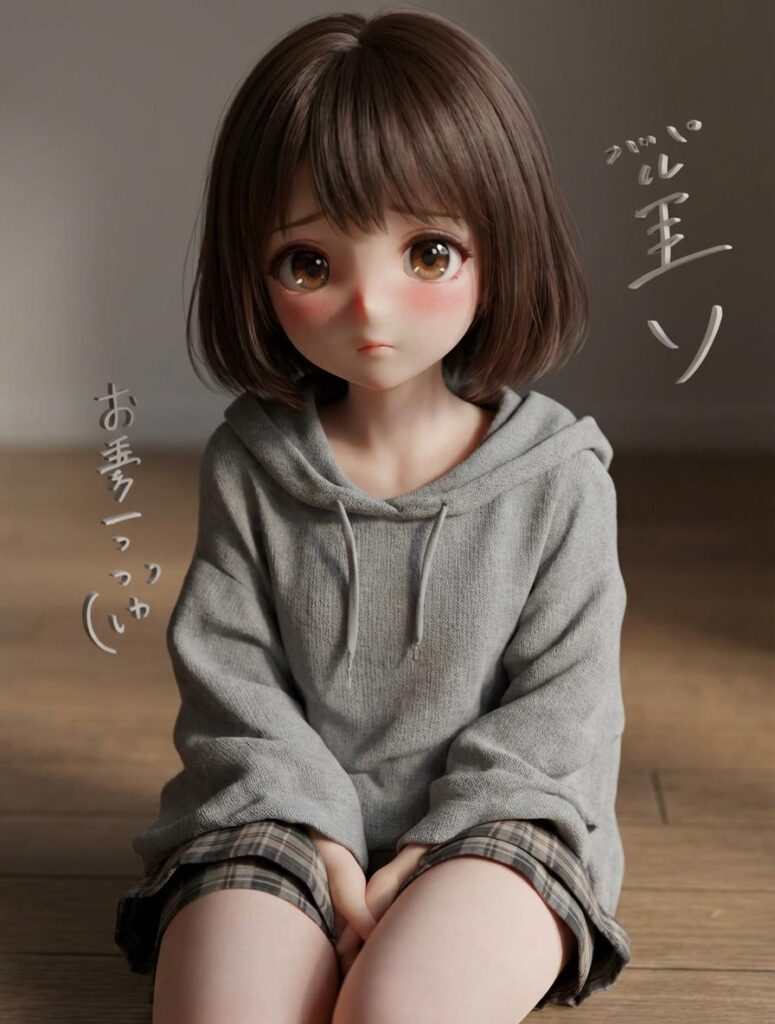
Once the image appears, compare it with the original reference. The goal is not only to make the character look three-dimensional. The new version should also preserve the character’s identity, colors, expression, and key design details.
Check the following points:
- Does the 3D character still resemble the original image?
- Are the face, hairstyle, outfit, and accessories consistent?
- Do the materials look soft, glossy, plastic, furry, or realistic as requested?
- Are the body proportions balanced?
- Does the lighting create clear depth?
- Is the background simple enough to keep attention on the character?
- Does the final result look like a complete 3D character rather than a flat illustration with added shadows?
If the result looks too flat, add:
Create stronger three-dimensional depth, realistic volume, soft directional lighting, natural shadows, and clearly defined 3D materials.
If the character changes too much, add:
Strictly preserve the original facial features, colors, outfit, hairstyle, accessories, and overall character identity.
If the surface looks too smooth or artificial, describe the material more clearly:
Use soft plush fur, detailed fibers, subtle texture variation, and natural studio lighting.
For a toy-like result, try:
Use polished vinyl materials, smooth rounded surfaces, soft reflections, and a collectible designer-toy appearance.
If the proportions look distorted, simplify the prompt and add:
Keep the character’s original body proportions, head size, facial placement, and silhouette unchanged.
Make one adjustment at a time. This makes it easier to understand which instruction improves the result.
Once the character looks consistent and has enough depth, save the final 3D cartoon image for your blog, social post, character concept, product visual, or creative project.
💡 Advanced Tips for Better 3D Cartoon Generator Results
Keep the Character Consistent
Repeat the character’s key features in every prompt, including colors, facial details, outfit, proportions, and accessories.
Preserve the original face, colors, clothing, proportions, and character identity.
Add Clear 3D Depth
If the result still looks flat, describe volume, shadows, and lighting more clearly.
Use rounded forms, realistic depth, soft directional lighting, and natural shadows.
Use This Prompt Formula
Character Details + 3D Material + Pose + Lighting + Background
For example:
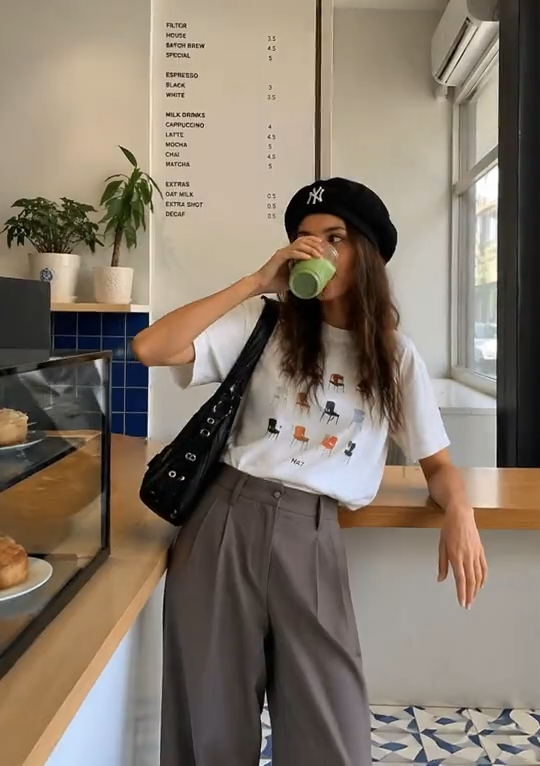
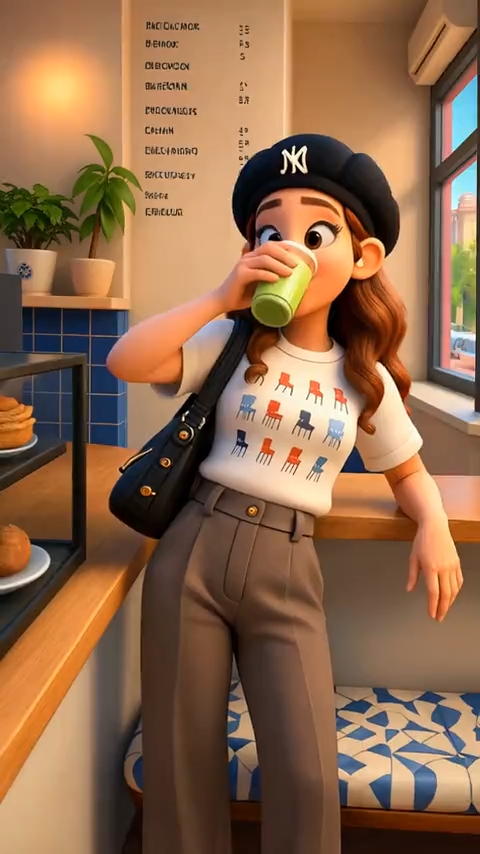
Transform the uploaded 2D anime character into a polished 3D cartoon. Preserve its face, colors, outfit, and proportions. Use soft plush fur, a front-facing pose, gentle studio lighting, and a simple yellow background.
❓ 3D Cartoon Generator Quick Tips & FAQ
What Images Work Best with a 3D Cartoon Generator?
Use a clear image with one main subject, visible facial features, and a simple background. Avoid blurry photos, covered faces, and crowded scenes.
How Can I Make the 3D Cartoon Look More Realistic?
Describe the material, lighting, and depth clearly.
Use rounded 3D forms, soft studio lighting, natural shadows, and detailed plush or vinyl textures.
How Do I Keep the Original Character Consistent?
Use the same reference image and repeat the key details in every prompt.
Preserve the original face, colors, outfit, proportions, accessories, and character identity.
🌟 Conclusion: Start Creating with a 3D Cartoon Generator
Creating a polished 3D cartoon video does not require a large production team or a complicated animation workflow. The most important part is a clear idea.
With the right reference image and prompt, a 3D Cartoon Generator can turn a mascot, pet, avatar, product character, or original illustration into a short animated scene.
Your first clip does not need to be a complete animated movie. It only needs one moment worth watching.
Go to WeShop AI For Exploration: