

AI Design Repair helps you correct one problem area without rebuilding an entire image. You can select a damaged detail, guide the repair with a prompt or reference image, and keep the rest of the visual unchanged. Therefore, a nearly finished product photo no longer needs to return to the beginning of the creative process.
This matters because many generated images are not complete failures.
The lighting may look right. The product may sit in the perfect position. The model, background, and campaign mood may already match the brief. However, one strap may be twisted. A package edge may be distorted. A small accessory may be missing.
In these cases, full regeneration often creates more problems than it solves.
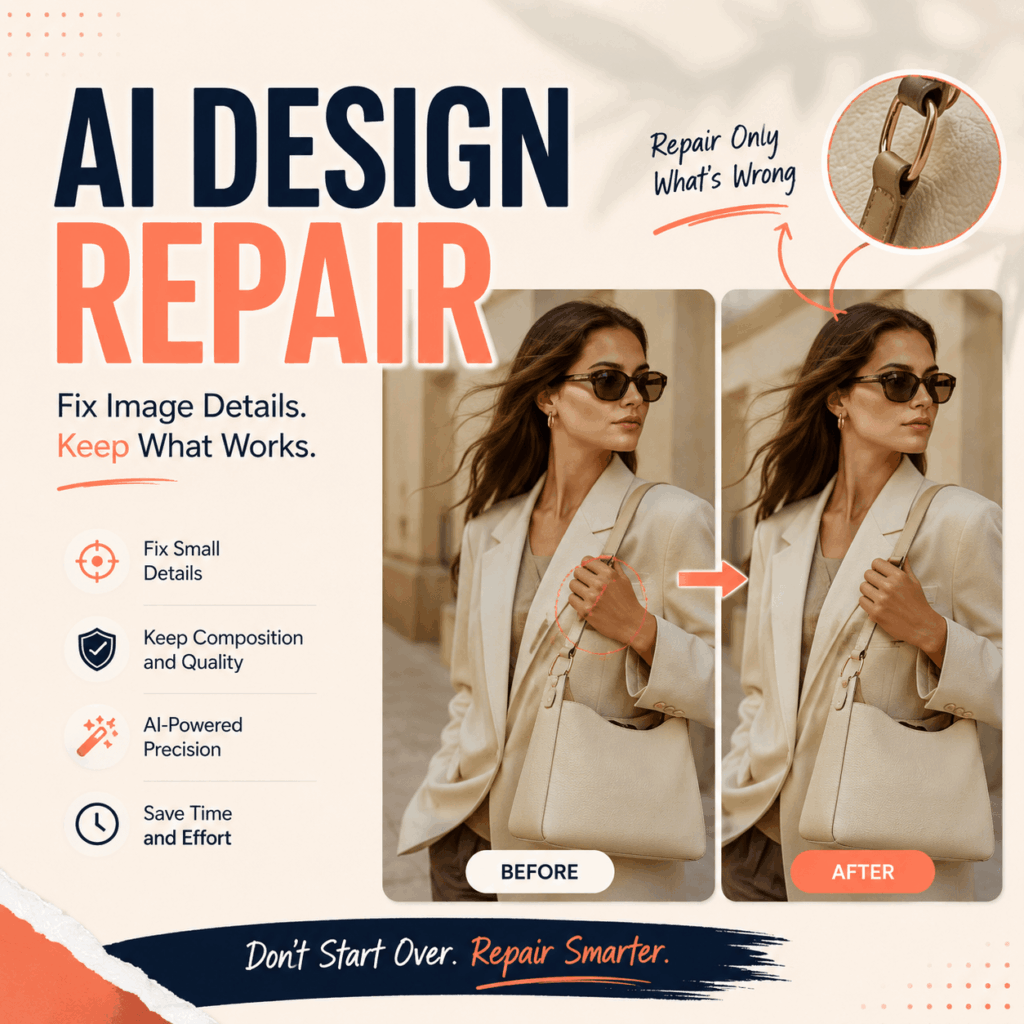
Why AI Design Repair Solves the Almost-Perfect Image Problem
Creative teams often treat an image as either successful or unsuccessful.
Yet many images fall somewhere in the middle.
They may contain one small error while everything else works well. For example:
- A handbag handle is uneven.
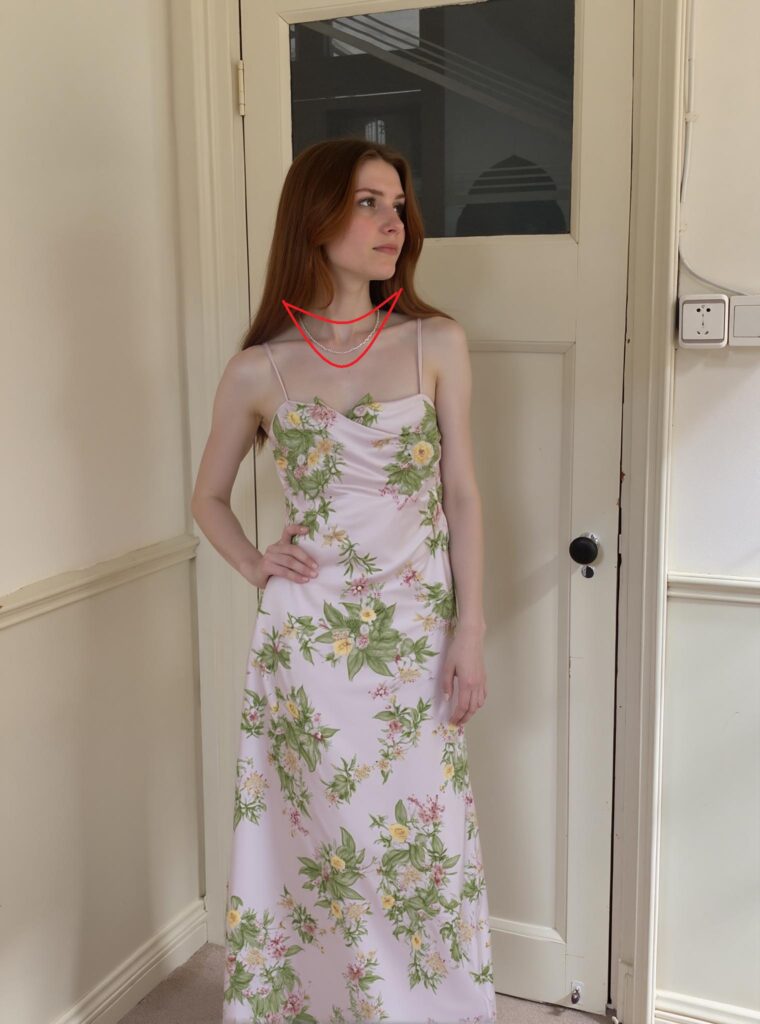
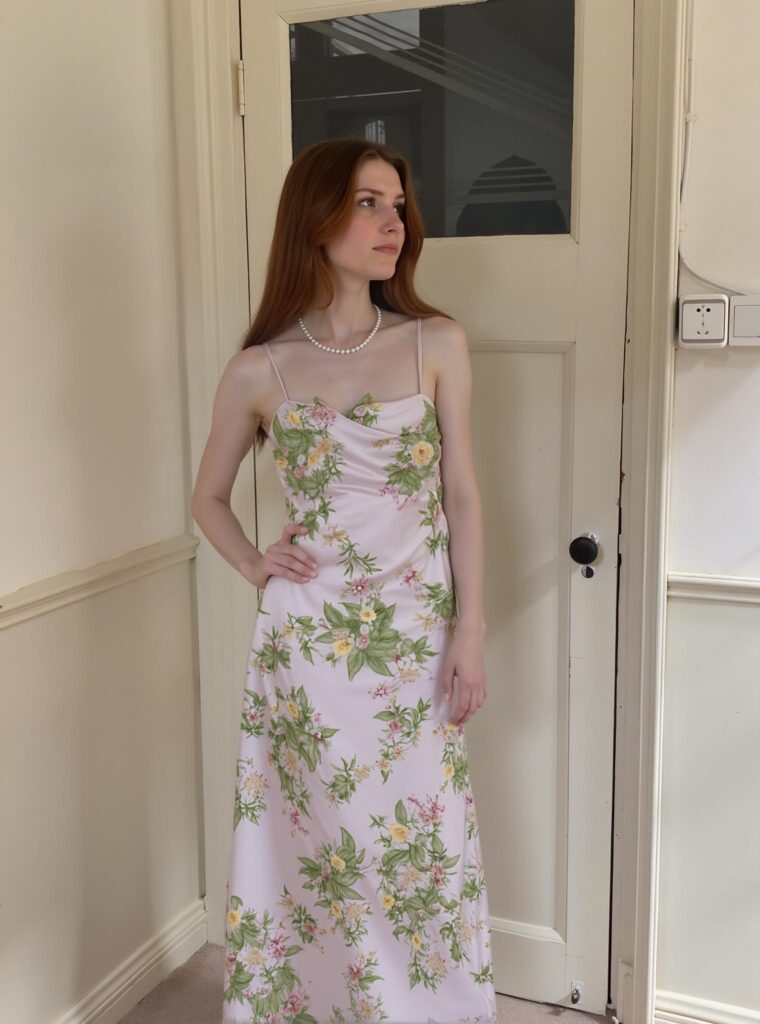
- A necklace disappears behind the model.
- A shoe loses part of its heel.
- A skincare bottle cap changes shape.
- A printed label becomes unclear.
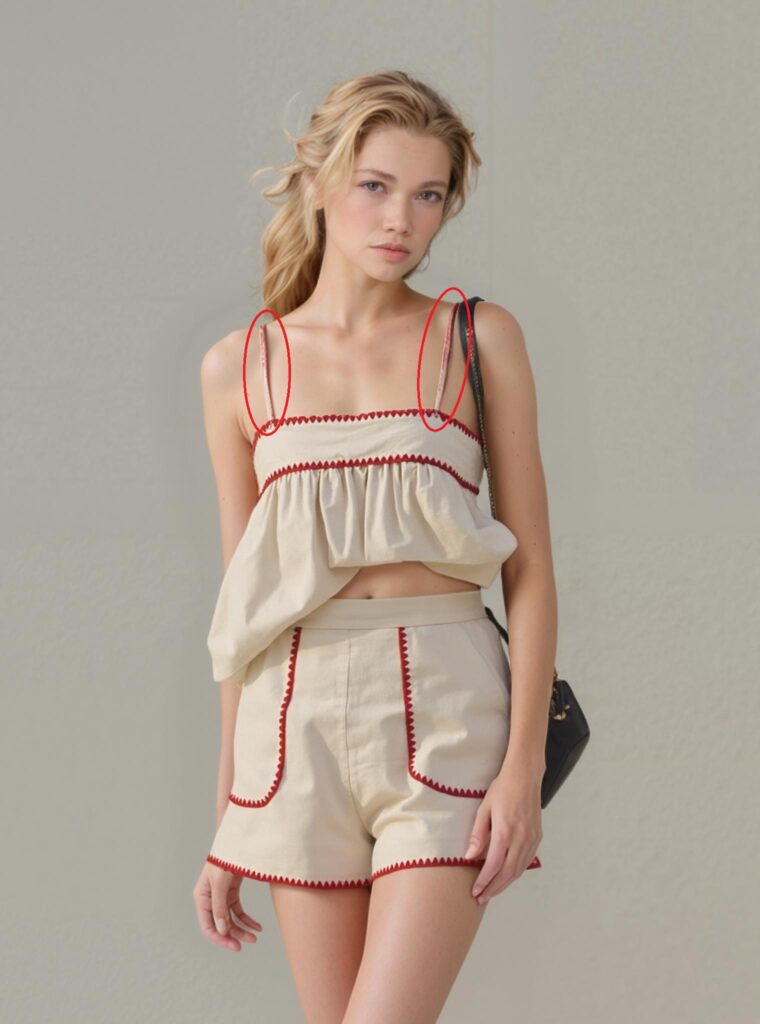
- A dress strap connects to the wrong place.
- A product reflection does not match the object.
- A decorative element appears twice.
These errors may seem minor. Nevertheless, they can make an ecommerce image look unreliable.
A shopper may not understand why the image feels wrong. Still, distorted product structure can reduce trust. Therefore, the image needs correction before it appears on a product page, ad, marketplace listing, or social post.
Why Full Regeneration Can Waste a Good Result
Full regeneration does not simply correct the original mistake.
It may also change details that were already correct.
For instance, a second generation may alter:
- The model’s face
- The product angle
- The garment shape
- The packaging proportions
- The background layout
- The direction of light
- The campaign color palette
- The spacing around the subject
As a result, the team may solve one problem but introduce three new ones.
In addition, a useful image may have been selected because of a subtle expression, an unusual shadow, or a well-balanced composition. Those qualities can be difficult to reproduce.
Therefore, the first question should not be, “Should we generate another image?”
Instead, ask:
“Can we protect what already works and repair only what failed?”
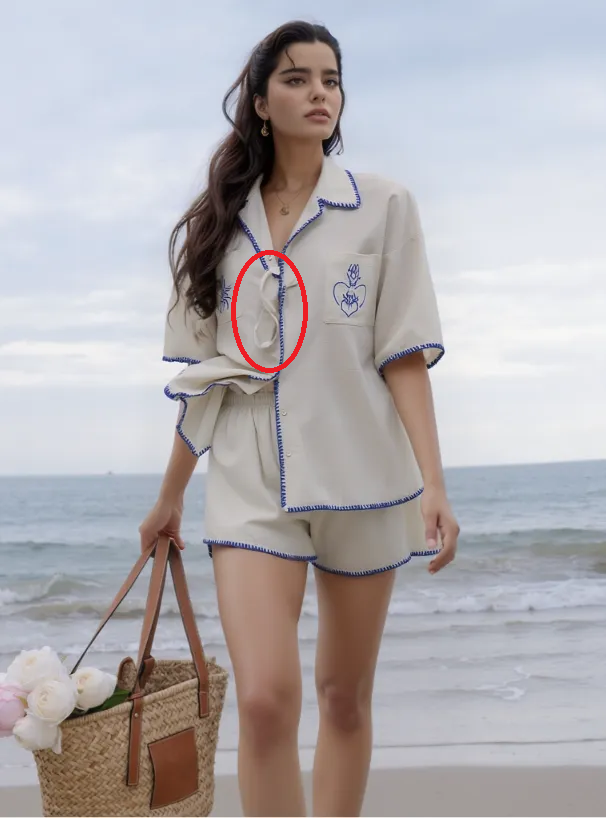

What Can AI Design Repair Fix?
AI Design Repair is most useful when the problem is local rather than global.
A local problem affects one limited area. Meanwhile, the wider image remains suitable for use.
AI Design Repair for Clothing Details
Fashion images often contain small structural errors.
Thin straps may merge with skin. Buttons may move. Lace patterns may become uneven. A collar may lose its original shape. In addition, layered clothing can confuse the connection between sleeves, hands, and accessories.
Useful repair targets include:
- Broken straps
- Uneven hems
- Missing buttons
- Distorted collars
- Unclear lace
- Incorrect seams
- Folded or merged fabric
- Missing garment decorations
When repairing these areas, the reference image should show the real garment clearly. This gives the tool a stronger visual guide.
AI Design Repair for Product Packaging
Product packaging requires consistency.
Even a beautiful campaign image may become unusable when the bottle, box, lid, pump, or label no longer matches the real item.
Common packaging problems include:
- Uneven box corners
- Incorrect cap shapes
- Distorted pumps
- Missing product parts
- Broken bottle edges
- Misaligned packaging details
- Repeated decorative elements
- Inconsistent transparent materials
However, text deserves special attention. Small typography may not always be restored perfectly in one generation. Therefore, first repair the physical label area and its perspective. Then add final verified text through a design editor when necessary.
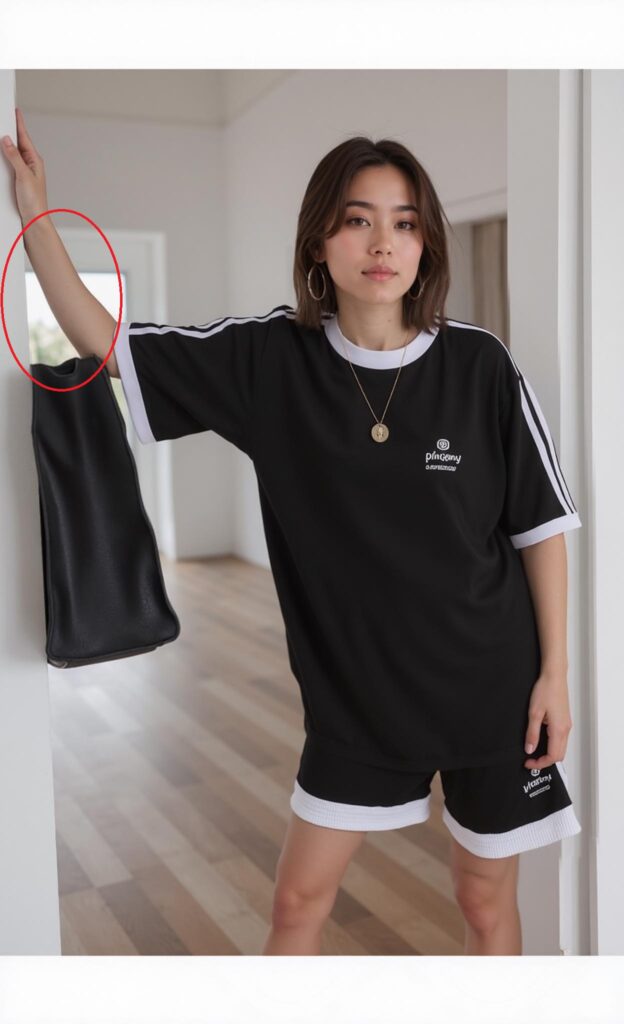
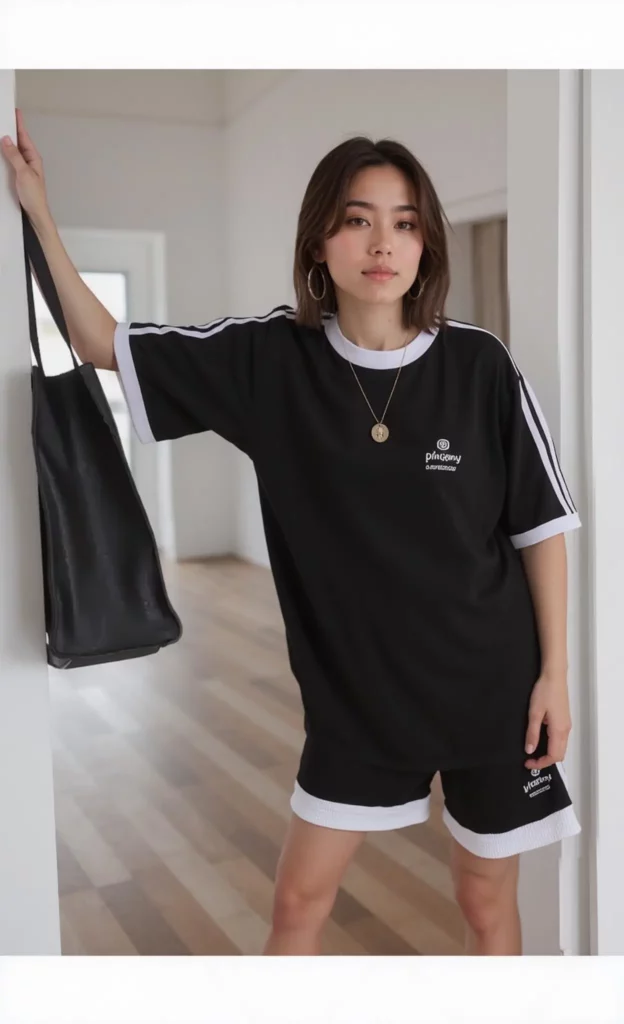
AI Design Repair for Accessories
Accessories are visually small but commercially important.
A missing earring can affect a styled fashion image. Similarly, a bent watch strap or broken handbag chain can make the entire visual feel artificial.
AI Design Repair can help correct:
- Earrings
- Necklaces
- Bracelets
- Watch bands
- Bag chains
- Shoe straps
- Sunglasses
- Hair accessories
Because these objects are often thin, the selection area must include enough surrounding context. Otherwise, the repaired detail may not connect naturally to the subject.
AI Design Repair or Magic Eraser?
These tools may appear similar. However, they solve different problems.
A Magic Eraser is useful when an unwanted object should disappear. It removes the selected item and rebuilds the background behind it.
In contrast, AI Design Repair is useful when something should remain but needs to look correct.
For example:
- Remove a stray cable: use Magic Eraser.
- Repair a broken bag handle: use AI Design Repair.
- Remove a background person: use Magic Eraser.
- Restore a missing earring: use AI Design Repair.
- Remove an unwanted prop: use Magic Eraser.
- Correct a damaged bottle cap: use AI Design Repair.
Therefore, the decision depends on the final intention.
Do you want the selected element to disappear, or do you want it to become accurate?
How to Use AI Design Repair
The tool workflow is simple. Still, preparation has a strong effect on the result.
Step 1: Choose the Best Base Image
Start with the strongest overall image.
Do not choose an image only because the error looks easy to fix. Instead, review the complete visual.
Check:
- Product shape
- Subject position
- Lighting
- Camera angle
- Background
- Model identity
- Brand mood
- Composition
- Image resolution
If most of these elements are correct, the image is a good repair candidate.
However, when the entire product structure is wrong, local editing may not be enough. In that situation, regeneration may be more efficient.
Step 2: Identify One Clear Repair Goal
Next, describe the exact problem.
Avoid broad instructions such as:
“Make the image better.”
A stronger repair goal would be:
“Restore the missing left shoulder strap and match the width, fabric, and attachment point of the right strap.”
Another example:
“Repair the bottle cap so it matches the original cylindrical shape and aligns with the bottle neck.”
One goal is easier to evaluate. Therefore, fix one category of error at a time.
Step 3: Mask the Problem Area Carefully
Highlight the damaged area in the Design Repair interface.
The official workflow is based on selecting the section that needs correction and regenerating that local region rather than recreating the complete image.
The mask should cover the full error. In addition, it should include a small amount of nearby context.
For example, when repairing a dress strap, include:
- The full broken strap
- Its connection to the dress
- A small area of the shoulder
- Nearby fabric texture
However, do not select the entire upper body when only one strap is damaged. A larger repair area gives the model more freedom to change unrelated details.
Step 4: Add a Clear Reference Image
A reference image can show what the selected detail should look like.
For product work, use a verified photograph of the real item. Ideally, the reference should have:
- A similar camera angle
- Clear product structure
- Good lighting
- Visible materials
- High resolution
- Minimal obstruction
The reference does not need to match the campaign background. Its main purpose is to communicate the correct shape and detail.
For instance, a clean catalog image can guide the repair of a luxury campaign visual.
Step 5: Write a Protective Repair Prompt
A useful prompt explains both what should change and what must remain protected.
Use this formula:
REPAIR + MATCH + PROTECT
For example:
Repair the selected handbag handle. Match the original black leather texture, gold hardware, handle width, and attachment points shown in the reference image. Keep the bag body, model, pose, lighting, background, shadows, and all unselected areas unchanged.
Another example:
Restore the selected dress strap with the correct thin satin structure. Match the color, fabric sheen, width, and natural connection to the neckline. Preserve the model’s face, body, pose, garment shape, lighting, and background.
This structure reduces ambiguity.
Step 6: Review the Connection Points
After generation, do not inspect only the center of the repaired area.
Instead, examine the edges where the new content joins the original image.
Check whether:
- A strap connects naturally.
- A shadow follows the same light source.
- A texture continues across the boundary.
- A product edge remains straight.
- A reflection matches the material.
- Skin and fabric do not merge.
- A chain or accessory follows realistic gravity.
These connection points often reveal whether the repair feels natural.
The AI Design Repair Quality Checklist
A repaired area should pass three levels of review.
1. Product Truth
First, compare the result with the real product.
Check its shape, construction, material, color, and proportions.
The result may look attractive but still be commercially inaccurate. Therefore, visual beauty is not enough.
2. Image Truth
Next, review whether the repair belongs in the original image.
Check lighting, focus, shadows, grain, perspective, and depth.
A repaired detail should not look pasted onto the scene.
3. Brand Truth
Finally, make sure the complete image still supports the campaign.
Ask:
- Does it match the intended mood?
- Is the product still the visual focus?
- Does the image feel premium, playful, minimal, or technical as planned?
- Can it sit beside the other campaign images?
- Is it suitable for the final sales channel?
A technically correct repair may still need another variation when it changes the original creative direction.

Common AI Design Repair Mistakes
Selecting Too Large an Area
A large mask increases the chance of unwanted changes.
Therefore, cover the complete error but protect as much of the original image as possible.
Using a Weak Reference
A blurry or distant reference may not communicate important structure.
Instead, choose a clean image that clearly shows the correct product detail.
Asking for Several Changes at Once
A prompt that requests a new strap, different lighting, clearer skin, a new necklace, and another background creates too many goals.
Repair one issue. Review it. Then continue.
Ignoring Material Behavior
Leather, glass, metal, satin, knit fabric, and transparent plastic react differently to light.
Therefore, include material information in the prompt.
Do not only request “a correct bottle.” Request “a transparent amber glass bottle with realistic highlights and the same cylindrical proportions.”
Treating Generated Text as Final Packaging
AI may improve a damaged label area. However, small commercial text should still be checked carefully.
Use verified typography and exact product information before publication.
When AI Design Repair Is Not the Right Tool
Local repair is powerful, but it cannot solve every image problem.
Consider full regeneration when:
- The complete product shape is incorrect.
- The camera angle is unusable.
- The model identity has changed.
- The background conflicts with the campaign.
- Lighting is inconsistent across the whole image.
- Several large areas need replacement.
- The image resolution is too low.
- The composition no longer supports the brief.
In these cases, repeated small repairs may take longer than creating a stronger base image.
Therefore, use AI Design Repair when the image is already valuable and the problem is limited.
Who Should Use AI Design Repair?
AI Design Repair is useful for:
- Ecommerce sellers
- Fashion brands
- Product photographers
- Marketplace teams
- Social media creators
- Creative agencies
- Catalog managers
- Designers using AI-generated visuals
- Small brands without large retouching teams
It is especially valuable during final quality control.
At that stage, the main campaign direction is already approved. The team does not want a new concept. It only wants the approved concept to become usable.
Frequently Asked Questions
What Is AI Design Repair?
Can AI Design Repair Fix Product Photos?
Yes. It can be used for local product problems such as broken edges, missing parts, incorrect packaging structures, damaged accessories, and inconsistent materials. However, all commercial details should be compared with a verified product reference.
Can It Repair Clothing Details?
Does AI Design Repair Change the Whole Image?
The workflow focuses on the selected masked area. Still, users should keep the mask controlled and review the boundary around the repaired section.
Should I Use a Reference Image?
A reference is strongly recommended when shape accuracy matters. It gives the repair process a clearer target for product structure, material, color, and proportions.
Save the Image That Is Already Working
A small mistake should not erase the value of an otherwise successful visual.
AI Design Repair gives ecommerce and creative teams a more controlled way to finish images. Instead of starting over, they can identify the weak area, protect the approved composition, and repair only what needs attention.
The strongest workflow is simple:
Choose the best base image. Define one repair goal. Use a precise mask. Add a reliable reference. Then review the result against the product, the image, and the brand.
The goal is not to generate more images.
The goal is to make the right image ready to use.
Go to WeShop AI For Exploration:


