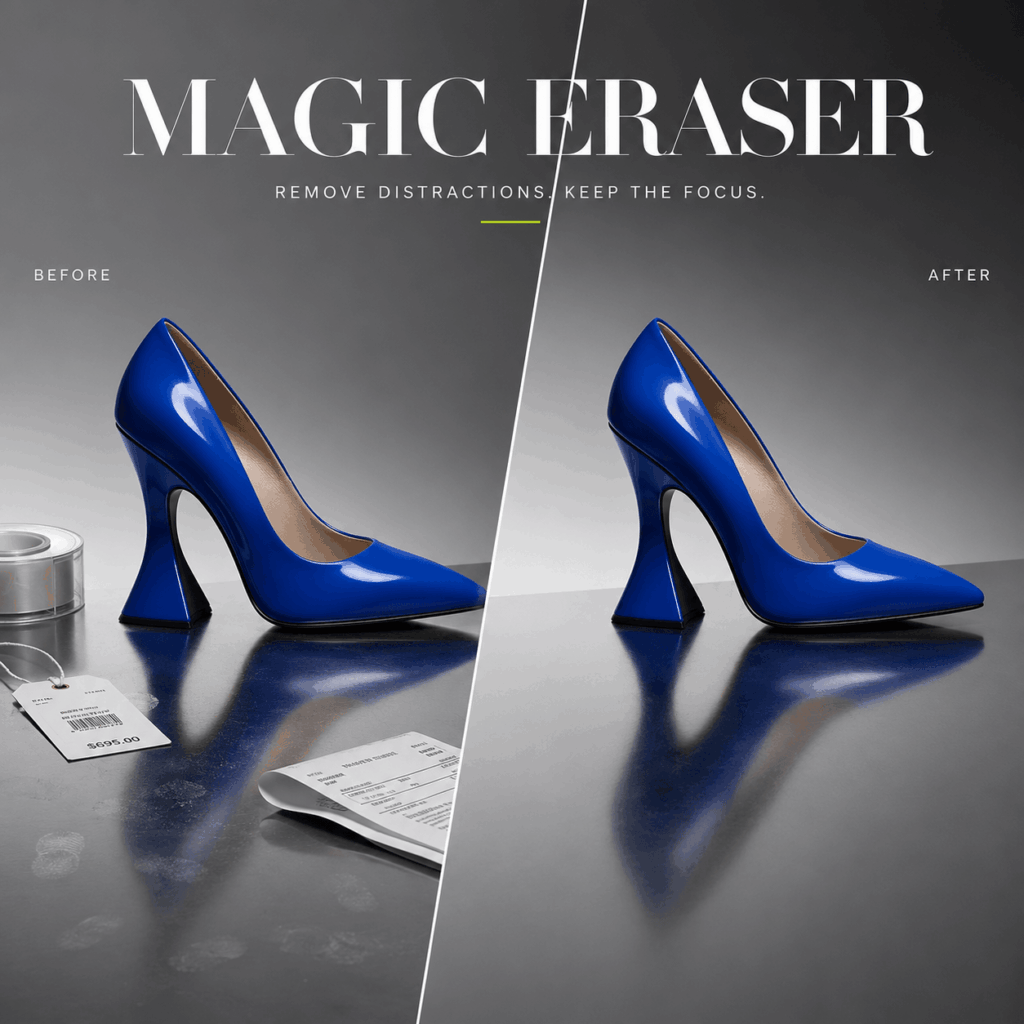
Magic Eraser helps you remove small distractions from a product photo before they steal attention from the item you want to sell. A cable near the table edge, a crushed receipt, or a person in the background may seem harmless. However, shoppers often notice these details before they study the product.
Most photo cleanup guides begin with the editing tool. This guide begins one step earlier: deciding what should disappear and what should stay.
That choice matters. After all, a clean product image should look intentional, not empty or artificial. Magic Eraser lets you paint over unwanted people, text, objects, or background clutter. It then rebuilds the cleared area to match the surrounding scene.
The goal is not to erase half the image. Instead, the goal is to remove the few details that weaken the photo.
Why Product Photos Feel “Off” Before They Look Bad
A product photo does not need to be terrible to lose attention. Sometimes, it only needs one object in the wrong place.
For example, imagine a skincare bottle on a bathroom shelf. The lighting is soft, the label is clear, and the colors work well. Still, a bright toothbrush in the corner may become the first thing viewers notice.
The same problem can happen in fashion photos. A clothing tag may stick out near the collar. A shopping bag may sit behind the model. Meanwhile, a crease in the paper backdrop may cut through the product.
None of these issues destroys the image. However, together they make it feel less controlled.
The Eye Goes to Contrast
People tend to notice areas that are brighter, darker, sharper, or more colorful than the rest of an image.
Therefore, a small red label can pull attention away from a neutral handbag. A bright cable can compete with a dark speaker. In addition, a pale object can stand out against a deep background.
This is why size is not the only factor. A tiny distraction with strong contrast can be more noticeable than a large object that blends into the scene.
Clutter Creates False Priorities
Every visible element tells the viewer where to look.
If the product is surrounded by too many props, the image may lose its clear visual order. As a result, shoppers have to search for the main item instead of seeing it at once.
Props are not always a problem. In fact, they can explain size, use, or mood. However, they should support the product rather than compete with it.
Before editing, ask one simple question:
Does this object help the customer understand or want the product?
If the answer is no, it may be a good candidate for removal.


What Magic Eraser Is Best At
Magic Eraser works best when the photo is already strong but contains one or two unwanted details.
For instance, it can help remove:
- A person walking through the background
- A stray cable beside an electronic product
- Dust, crumbs, or small marks on a surface
- Temporary notes or stickers that belong to your own photo
- A prop that makes the layout feel crowded
- A reflection containing an unwanted object
- Packaging left behind after setting up the scene
- Small items near the edge of the frame
The official workflow is simple. You upload the photo, brush over the distraction, and let the tool fill the selected space with matching visual detail.
However, object removal is easier when the background has a clear pattern. A plain wall, tabletop, studio backdrop, or soft outdoor scene usually gives the tool useful visual information.
Complex areas need more care. For example, removing an object that covers a hand, product label, or detailed fabric may also affect the item you want to keep.
Therefore, the best edits are often small and controlled.


Start With the Five-Second Distraction Test
Before opening any editing tool, look at the photo for five seconds.
Do not zoom in. Do not study the product description. Instead, notice where your eyes go first.
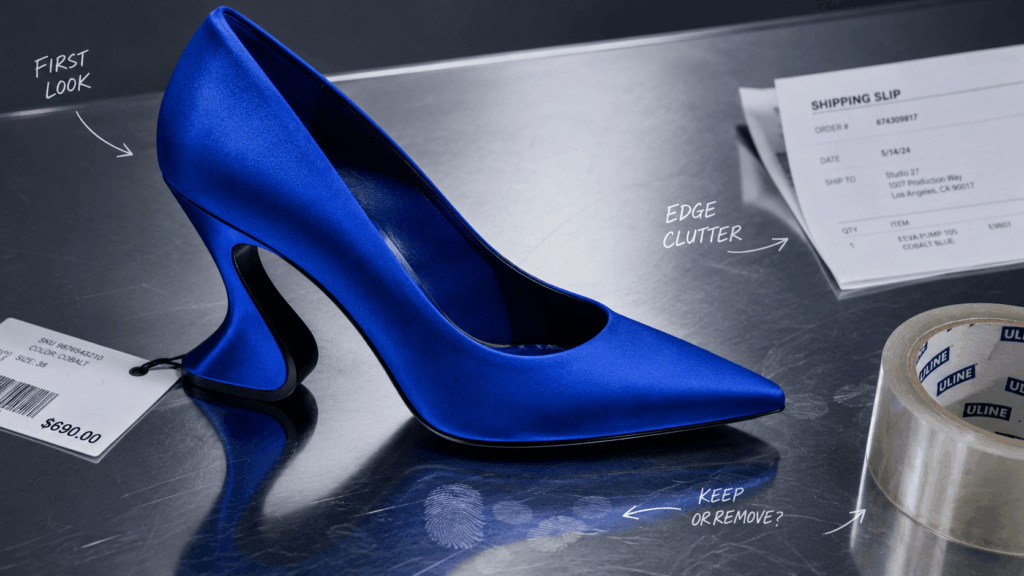
If you look at the product, the image already has a strong visual order. However, if your attention moves to a bag, sign, cable, shadow, or person, that element may need to go.
Next, check the four edges of the image. Objects near the frame edge often feel accidental because they appear partly cut off.
Finally, look at the space around the product. Ask whether the background supports the product category and mood.
For example:
- A coffee cup may help a home-office scene.
- A random plastic bottle may weaken it.
- A folded towel may support a skincare setup.
- A bright cleaning cloth may distract from it.
- A book may add scale beside a lamp.
- A crowded pile of books may hide the lamp’s shape.
This test prevents overediting because it gives you a reason for each removal.
How to Use Magic Eraser Without Overediting
Removing an object is easy. Making the result look natural requires a more careful process.
The most common mistake is selecting too little. Users often brush only over the center of an object while leaving part of its shadow, reflection, or outline behind.
Another mistake is removing too much at once. A large selection can force the tool to rebuild a wide area with limited context.
Instead, use several small passes.
Magic Eraser Tip: Brush Beyond the Object
Select the full object, including a narrow area around its edges.
For example, when removing a cable, cover the cable itself and the shadow directly beneath it. Otherwise, the final photo may contain a strange dark line with no visible source.
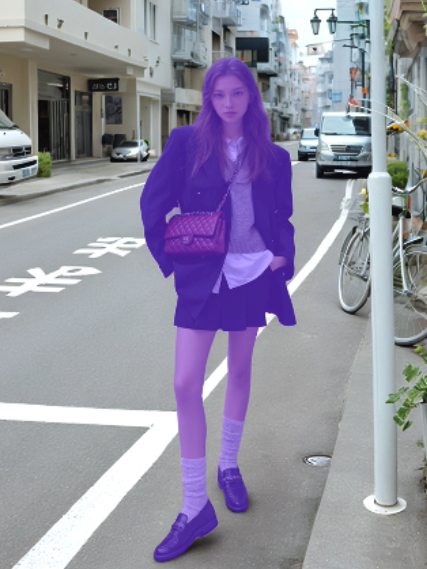
The same rule applies to people. Cover loose hair, clothing edges, feet, and shadows when they belong to the unwanted subject.
However, do not brush deeply into the main product. A slightly wider selection helps with background reconstruction, but a careless selection may change the product edge.
Work From Large to Small
Begin with the largest clear distraction.
Then review the new result before moving to smaller objects. This approach makes it easier to see whether the image still feels balanced.
A useful order is:
- Remove unwanted people or large props.
- Clean objects near the image edges.
- Remove cables, labels, or small clutter.
- Correct leftover shadows or marks.
- Review the product outline.
As a result, each edit has a clear purpose.
Keep a Copy of the Original
Always save the unedited photo.
Sometimes, an object seems distracting at first but provides useful context. For instance, a small plant pot may help show the scale of a table lamp. Without it, the product can feel isolated or unusually large.
Therefore, compare the original and edited versions side by side. Do not judge the new image alone.
Clean the Edges That Shoppers Notice First
Product photo cleanup should never damage the item being sold.
Therefore, pay special attention to the product outline. This is where object removal errors are often easiest to see.
Look closely at:
- Bag handles
- Shoe laces
- Clothing hems
- Bottle pumps
- Chair legs
- Jewelry chains
- Product shadows
- Transparent packaging
- Reflective surfaces
For example, imagine a cable crossing behind a chair leg. Removing the cable may also soften the edge of the chair. The image may look clean at first glance, but the leg can appear bent when viewed at full size.
Likewise, a removed prop may leave an uneven shadow beside a product. In that case, the object is gone, but the evidence remains.
After each edit, zoom in and check three areas:
the product edge, the rebuilt background, and the shadow transition.
These areas reveal whether the change looks natural.


Magic Eraser for Different Content Formats
The same photo may need different cleanup choices depending on where it will appear.
A product-page image needs clarity. A social post may benefit from more atmosphere. Meanwhile, a campaign banner needs enough empty space for headlines or buttons.
Therefore, do not create one “perfect” cleaned image and force it into every channel. Instead, make a version for each main use.
Magic Eraser for Product Pages
Product pages should make the item easy to understand.
Remove objects that hide the silhouette, label, color, or key features. In addition, reduce props that could confuse shoppers about what is included in the purchase.
For example, if a handbag is shown beside a scarf and wallet, customers may wonder whether all three items are included. A clean product photo should make the offer clear.
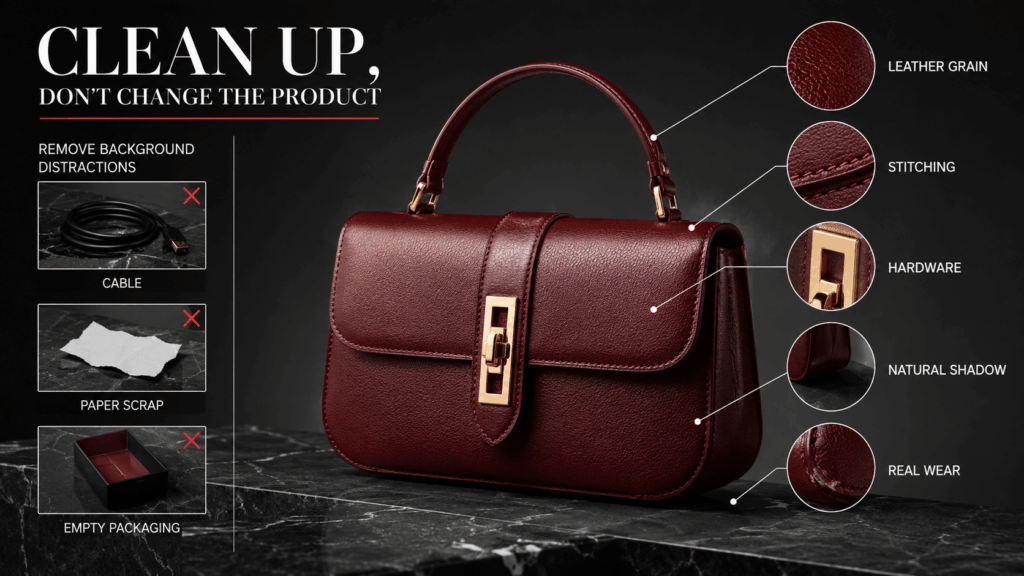
However, do not remove real product details. Scratches, seams, texture, hardware, and natural material variation may affect a buying decision.
A cleaner image should still be an honest image.
Magic Eraser for Social Posts
Social images can keep more visual personality.
A coffee cup, magazine, flower, or desk item may support the story. Still, too many objects can make the post feel staged or hard to read on a small phone screen.
Therefore, review the image at mobile size. If a prop becomes a strange shape or bright spot, remove it.
You can also clean space around the product before adding a caption or graphic element. This helps the text feel part of the composition rather than placed over a busy background.
Campaign Crops
Banner images often need clear negative space.
For example, a product may sit on the right while the left side holds the campaign message. However, a background object in that empty area can make text harder to place.
Magic Eraser can remove those isolated elements before the image is cropped into a wider format.
Still, object removal cannot create unlimited space. When the required banner is much wider than the original, an image-expansion tool may be more suitable after cleanup.
What Not to Remove
A cleaner image is not always a better image.
Some details carry useful information. Therefore, remove them only when you are sure they do not affect product accuracy or customer trust.
Do not erase:
- Parts of the product that are difficult to style
- Real texture, grain, wrinkles, or construction details
- Safety labels or required product information
- Size references that help customers understand scale
- Shadows that make the product feel grounded
- Features that may affect the purchase decision
- Natural fit details on clothing
- Damage or flaws in a second-hand item
For example, removing a wrinkle from a linen shirt may make the fabric look smoother than it really is. Likewise, deleting a seam could change the apparent design.
Magic Eraser should improve the presentation, not rewrite the product.
Also, only edit content you own or have permission to modify. Do not remove ownership marks or branding from images taken from another creator.
A Simple Magic Eraser Workflow for Teams
When several people prepare images, cleanup can become inconsistent.
One editor may remove every prop. Another may keep the same items. As a result, the final product catalog can feel uneven.
A short review system keeps the visual style consistent.
Create a Keep-and-Remove Map
Before editing a set of images, define what normally stays and what usually goes.
For example:
KEEP
- Main product
- Useful size references
- Brand-approved props
- Natural product shadows
- Real material texture
REMOVE
- Setup equipment
- Loose packaging
- Random personal items
- Distracting people
- Cut-off edge clutter
- Temporary labels
This map does not need to cover every possible photo. However, it gives the team a common starting point.
Review at Full Size and Thumbnail Size
A good edit should work at both sizes.
At full size, inspect edges, patterns, shadows, and texture. Meanwhile, at thumbnail size, check whether the product remains the clearest element.
An edit may look technically perfect when zoomed in but still fail as a small product card. Conversely, a photo may look clean as a thumbnail but contain obvious reconstruction errors at full size.
Therefore, both checks are necessary.
Approve the Image in Context
Do not review the photo only on a blank screen.
Instead, place it in the product grid, social layout, banner, or article where it will appear. This reveals whether the composition works with nearby text and images.
For example, a removed prop may create useful space on its own. However, the final crop may place the product too far from the center.
Context changes the decision.
When to Reshoot Instead
Magic Eraser is useful, but it cannot save every photo.
A new photo may be faster when:
- The unwanted object covers a large part of the product
- The main item is blurry
- The lighting hides the product color
- Several people overlap the product
- The product is cut off by the frame
- Reflections cover important details
- The background is too complex to rebuild
- The composition has no clear focal point
For example, removing one cable from a desk scene is a simple correction. Removing an entire chair from behind a transparent table is much harder.
Therefore, consider the amount of repair needed. If cleanup starts changing the main product or rebuilding half the frame, the original setup probably needs improvement.
Object removal works best as a finishing tool, not as a replacement for every photography decision.
Final Thoughts: Small Edits, Stronger Photos
Strong product photos are not always the ones with the fewest objects. Instead, they are the ones where every visible element has a clear job.
Magic Eraser helps remove the details that interrupt that job. It can clean stray props, background people, cables, marks, and other small distractions without forcing you to rebuild the full image.
However, the most important step happens before you brush anything away.
Look at the photo for five seconds. Find the first distraction. Then ask whether it supports the product, explains the scene, or strengthens the story.
If it does not, remove it carefully.
A small change may be enough to make the product feel clearer, the composition feel calmer, and the final image feel ready to publish.
Go to WeShop AI For Exploration: