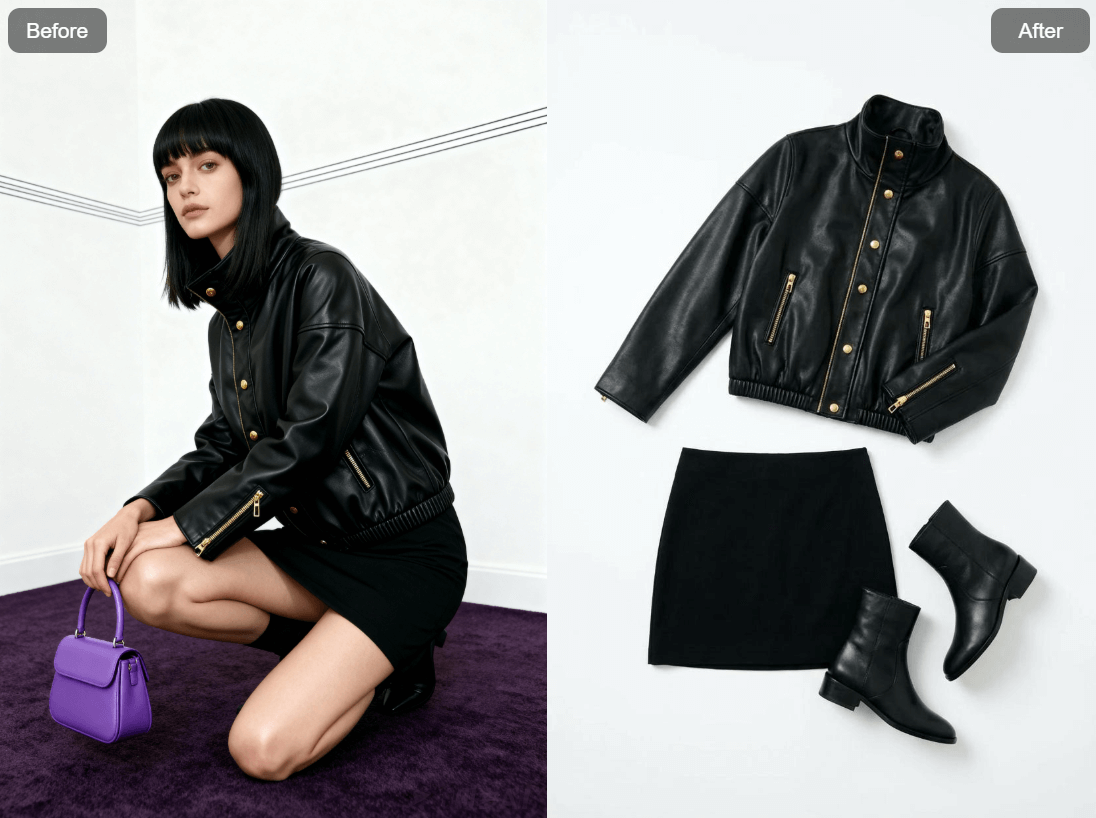
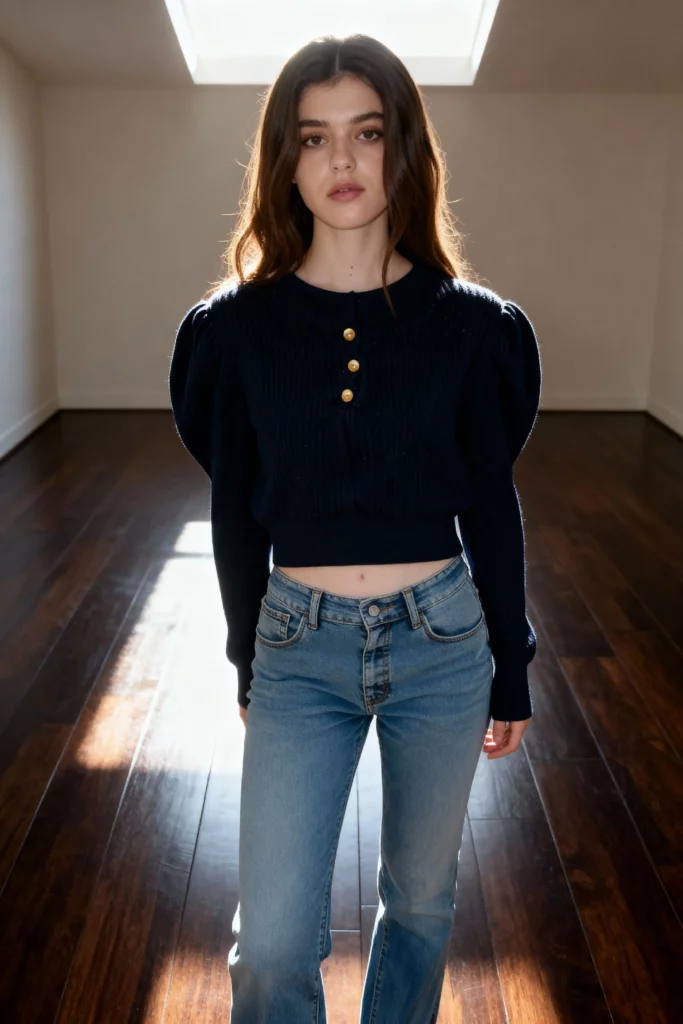
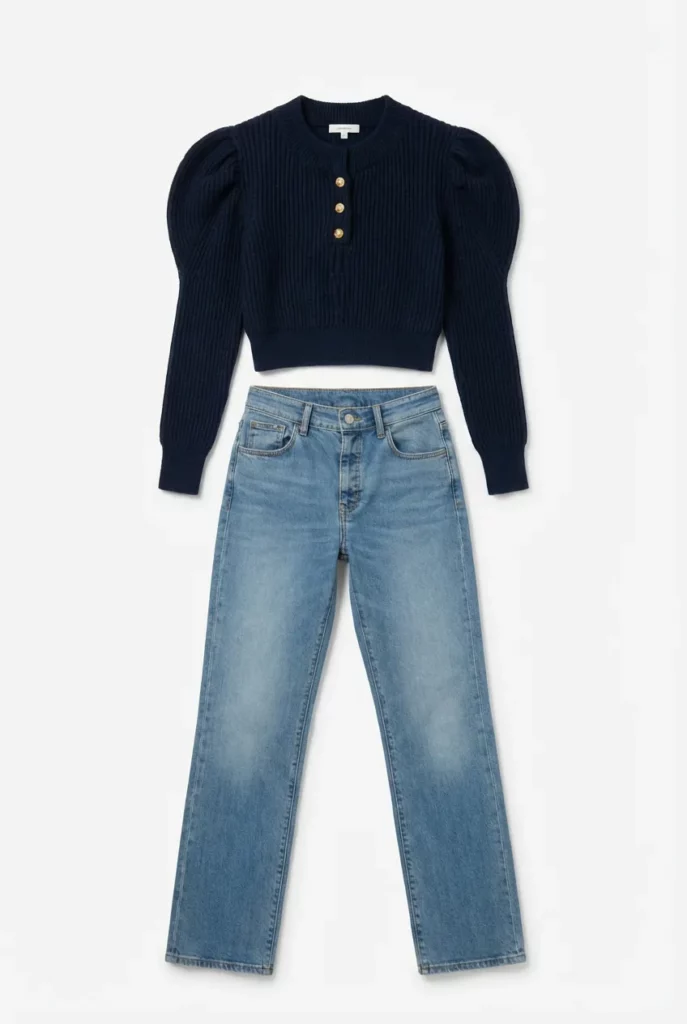
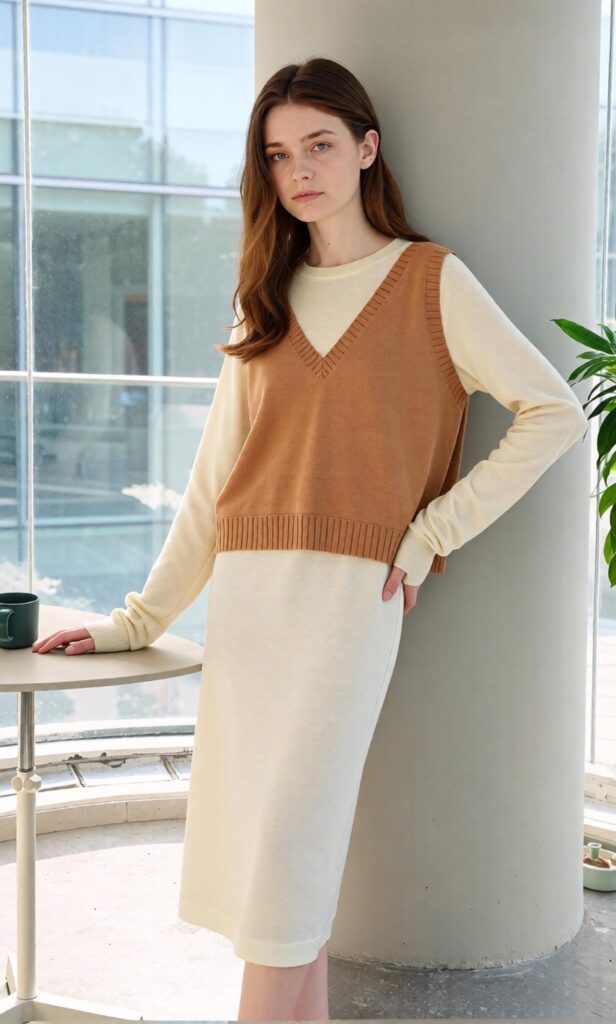
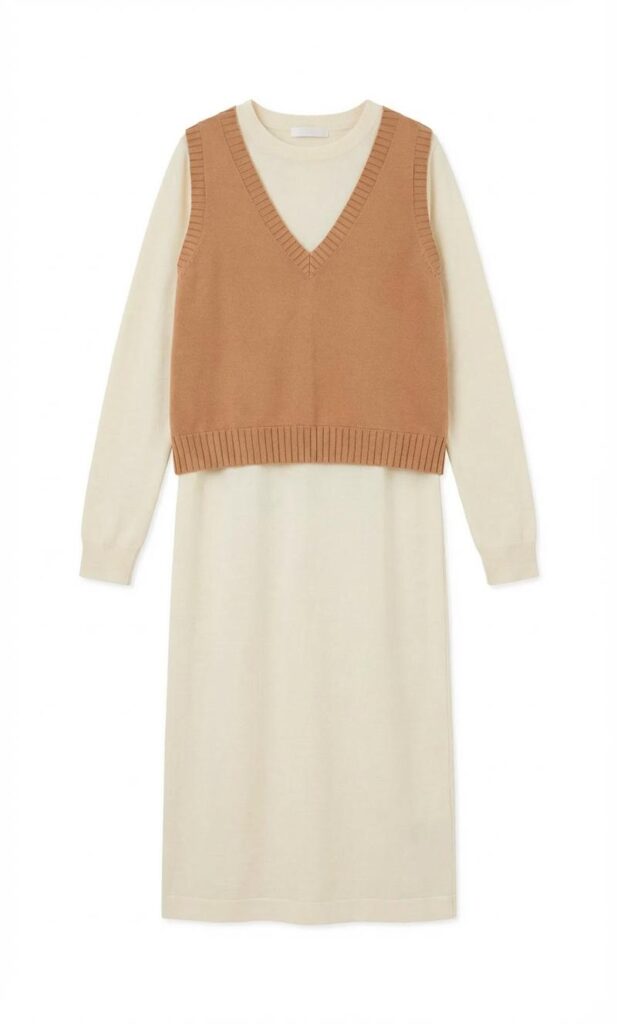
An AI Clothing Piece Generator can turn a model photo, casual clothing image, design reference, or simple fashion idea into a clean flatlay. Therefore, fashion teams do not always need to arrange another shoot when they need a standalone product image. Instead, they can turn an existing visual into a reusable clothing asset.
This reverses the usual fashion content workflow.
Normally, a brand starts with a product-only image. Then, it creates model photos, lifestyle scenes, advertisements, and social content.
However, many small brands begin in the opposite direction.
They may already have an attractive model image from a campaign. A designer may have photographed a sample on a friend. A resale seller may only have a mirror photo. Meanwhile, the team still needs a clear garment image for a product page or catalog.
That is where the workflow becomes useful.
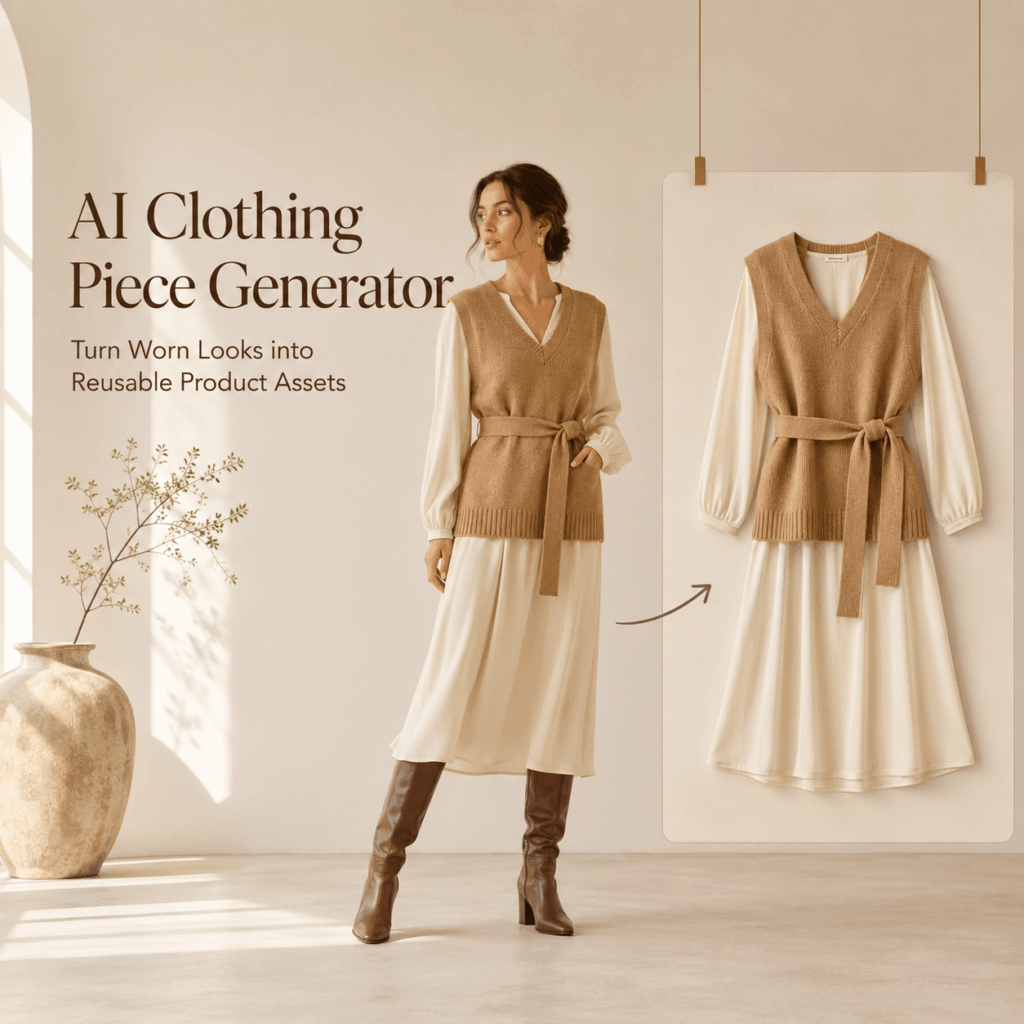
Why an AI Clothing Piece Generator Changes the Asset Order
A model image can sell a mood. Still, it may not show the complete product clearly.
The model’s arms may cover the waist. A handbag may hide part of a skirt. Hair may fall across the neckline. In addition, the pose can change the apparent length or shape of the garment.
These details are acceptable in campaign photography. Yet they are less useful when shoppers want to inspect the item itself.
An AI Clothing Piece Generator creates another visual layer. It separates the garment from the wider scene and presents it as a flatlay.
As a result, one image can support both inspiration and product understanding.
A Model Shot Is Not the End of the Workflow
Fashion teams often treat a model image as the final asset.
However, it can also become a new starting point.
For example, a campaign photograph may produce:
- A garment-only flatlay
- A clean marketplace image
- A catalog thumbnail
- A color reference
- A collection planning asset
- A social styling graphic
- A resale listing image
Therefore, the value of the original photo extends beyond one campaign.
Instead of asking, “Where else can we post this model image?” teams can ask a better question:
“What new product assets can we recover from it?”
One Garment Can Support Several Channels
Different channels need different visual information.
A social post can be emotional and styled. Meanwhile, a marketplace listing often needs a clean product view. A product page may use both.
For example:
- The campaign image introduces the mood.
- The flatlay explains the product.
- The detail image shows the material.
- The on-model image shows fit.
- The video shows movement.
Therefore, the flatlay does not replace fashion photography. It fills an important gap between storytelling and product information.

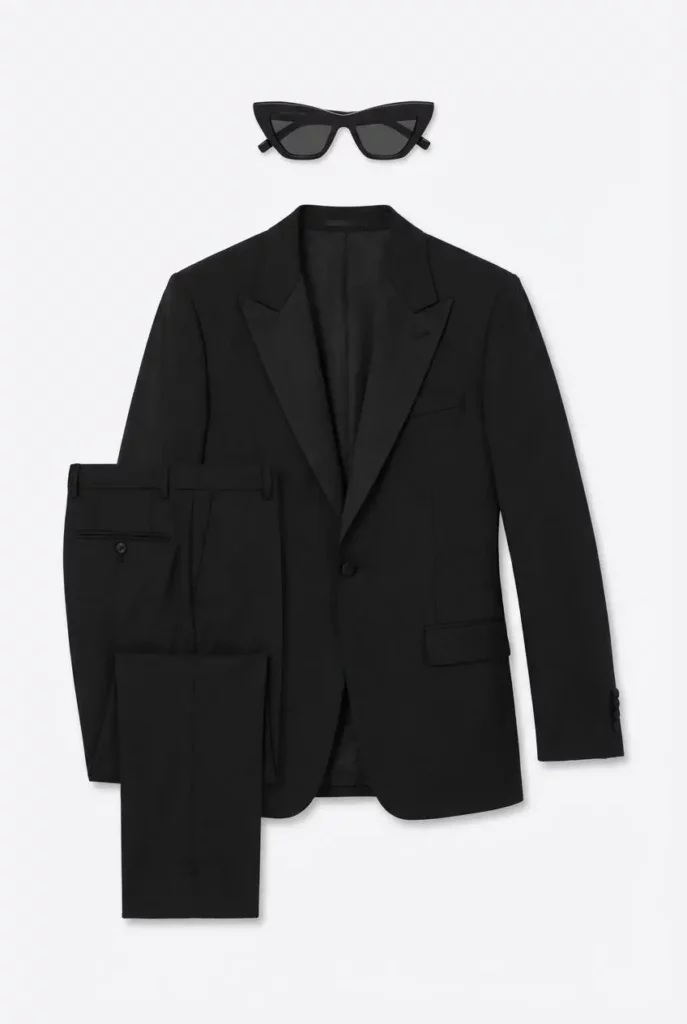
What Does an AI Clothing Piece Generator Create?
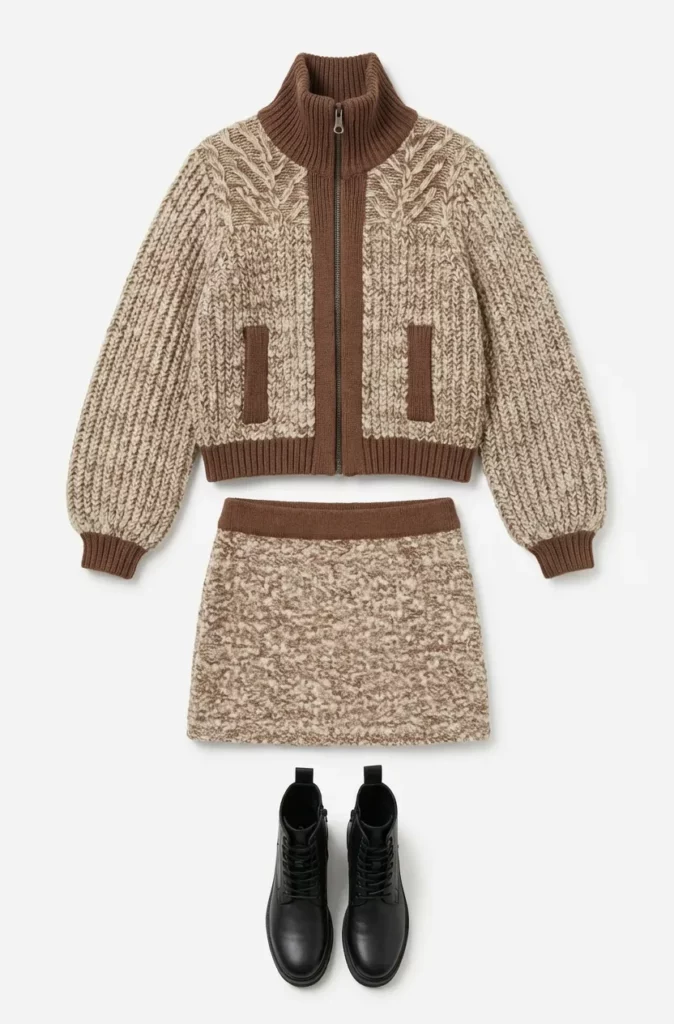
The WeShop AI tool is designed to convert apparel photos or fashion ideas into polished flatlays. It supports clothing categories such as shirts, pants, dresses, skirts, outerwear, accessories, kidswear, and other fabric items. Users can also guide the lighting, background, and layout mood.
However, a useful result is more than a removed background.
It should communicate the garment clearly.
A Clean Garment-Only View
A good flatlay helps viewers understand:
- The overall silhouette
- The neckline
- The sleeve shape
- The garment length
- The waist structure
- The hem
- The main color
- The visible fabric texture
- Important buttons or hardware
Therefore, the output should feel like an intentional product image, not a random clothing cutout.
The garment needs enough space around it. In addition, its shape should feel natural. Sleeves should not collapse into the body, while straps should remain visible.
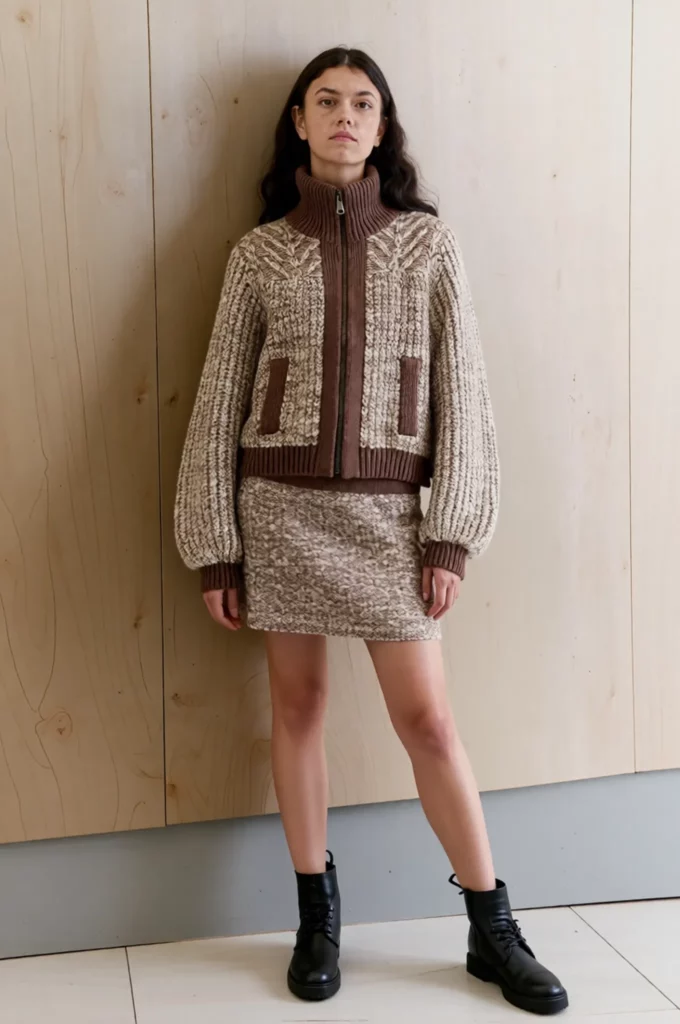
A Repeatable Catalog Language
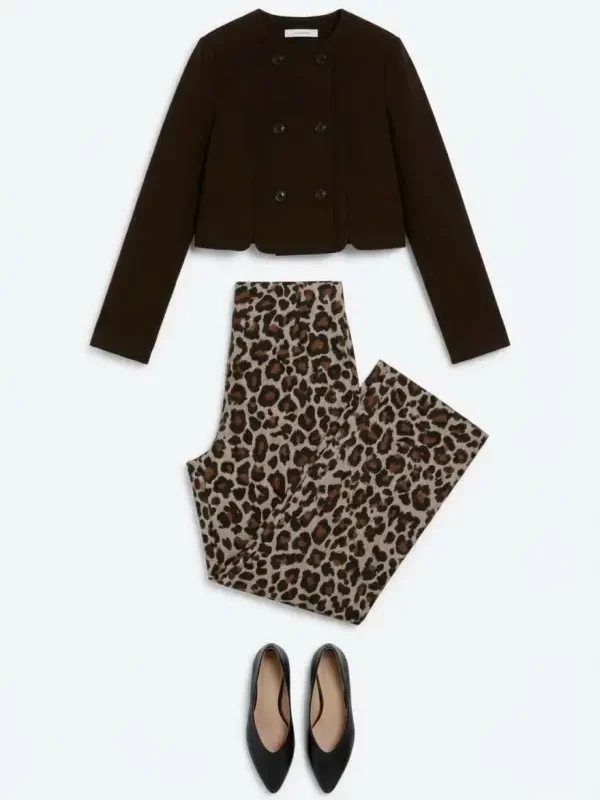
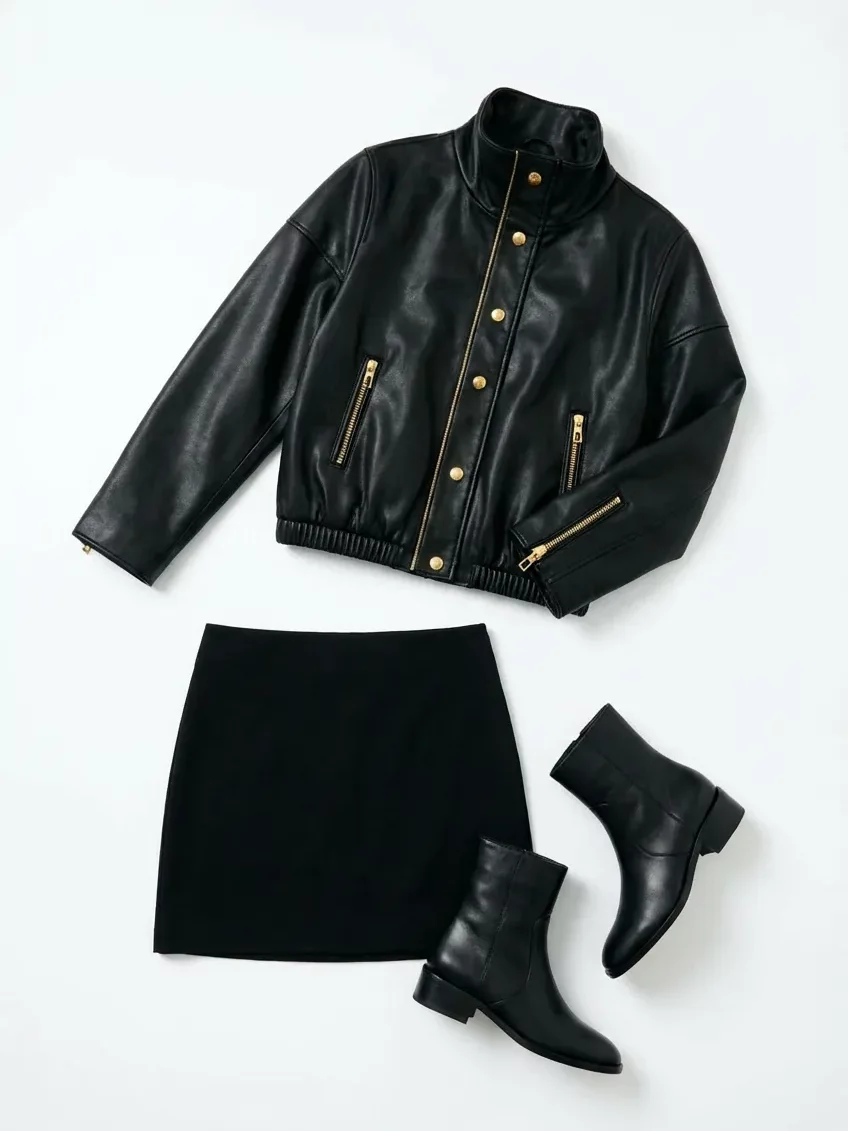
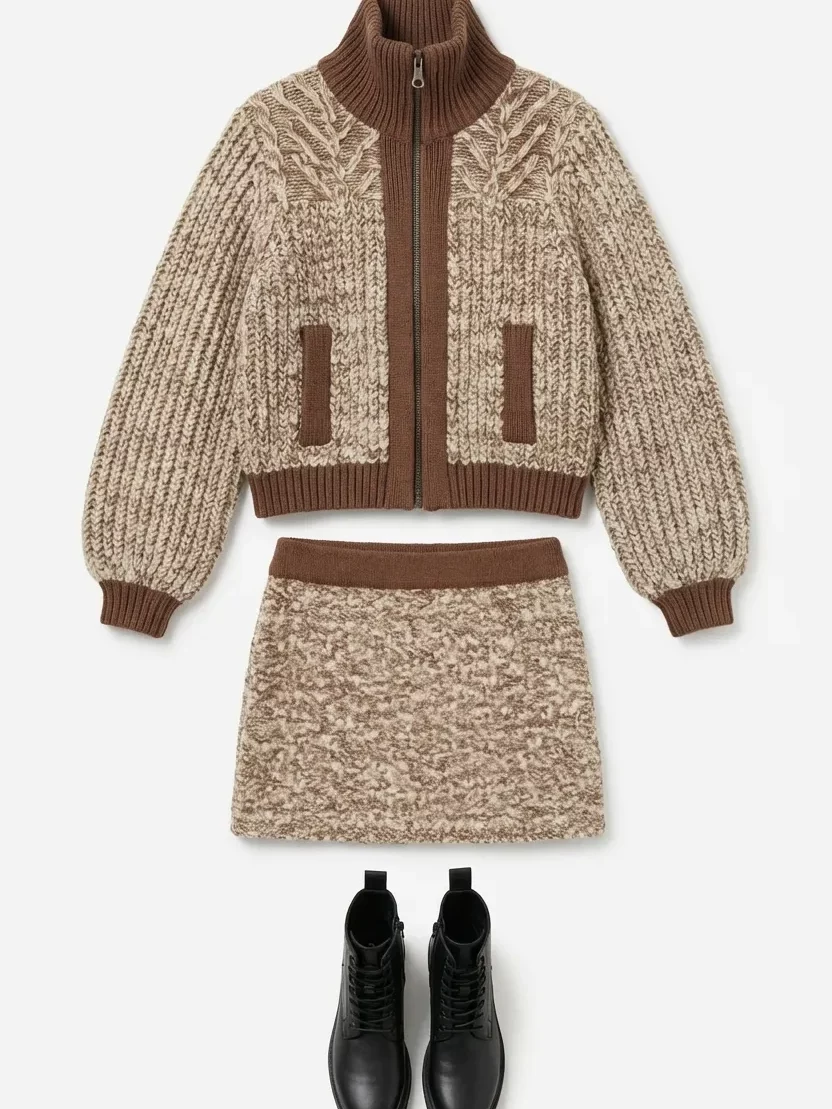
One attractive flatlay is useful. However, a consistent series is more valuable.
Imagine a collection with twelve garments.
If every item uses a different crop, angle, background, and shadow, the catalog may feel disorganized. Therefore, the first approved flatlay should become a visual standard for the next items.
Define:
- Background color
- Garment scale
- Camera angle
- Shadow strength
- Sleeve position
- Image ratio
- Empty space
- Styling level
Then apply the same direction across the collection.
As a result, customers can compare products more easily.
A Starting Point for Future Fashion Content
A clean flatlay is also a flexible source asset.
Once the clothing is presented clearly, a team can use it in other workflows. For example, it may become the source for a color variation, a model image, an outfit combination, or a campaign concept.
WeShop’s existing workflow also connects clothing-piece images with tools for recoloring and on-model presentation. Therefore, one generated flatlay can become the center of a wider content system.
When Should You Use an AI Clothing Piece Generator?
The tool is useful whenever the clothing exists in an image but a clear standalone product asset is missing.
However, some scenarios benefit more than others.
After a Campaign Shoot
A small brand may complete a campaign and later realize that it did not capture enough product-only images.
Rescheduling the model, stylist, studio, and photographer may not be practical. Instead, the approved campaign photos can become source material.
The team can extract a flatlay and use it for:
- Collection pages
- Product thumbnails
- Email announcements
- Line sheets
- Product comparison graphics
Still, the final image must be checked against the real garment.
When Supplier Images Are Inconsistent
Online sellers often receive product images from several suppliers.
One supplier may provide a white-background image. Another may send a mannequin photo. A third may only provide a model image.
Consequently, the catalog begins to look like several different stores.
An AI Clothing Piece Generator can help move those mixed inputs toward one common flatlay style. Therefore, the storefront can feel more consistent even when the original sources are different.
For Vintage and Resale Listings
A vintage seller may not have access to official product photography.
Instead, the item may be photographed on a person, hanger, chair, or bedroom floor. Although these images prove that the product exists, they may not present it clearly.
A cleaner flatlay can improve the listing structure.
However, resale sellers should not hide stains, wear, repairs, or missing details. The flatlay should clarify the product, not make it appear newer than it is.
During Fashion Design Development
The tool can also support early visual planning.
A designer may start with:
- A sketch
- A sample photo
- A fabric idea
- A reference silhouette
- A rough prototype
The official tool page includes fashion design visualization among its main use cases. It can turn sketches or sample images into flatlays for concepts, internal discussions, and design updates.
Still, the result should be treated as a visual proposal. It is not a technical pattern or production specification.
How to Use AI Clothing Piece Generator Effectively
The interface may be simple. However, strong results still depend on the source image and creative direction.
Use the following workflow.
Step 1: Choose the Clearest Source Image
First, select the image that reveals the most product information.
A strong source image usually has:
- Good lighting
- Clear garment edges
- Limited motion blur
- Minimal obstruction
- Visible sleeves and hem
- Accurate color
- Enough image resolution
A dramatic pose may look impressive. However, it is not always the best source.
For example, crossed arms may cover the front of a shirt. Sitting may change the shape of a skirt. In addition, an open jacket may hide its true closure.
Therefore, choose clarity before mood.
Step 2: Identify the Exact Clothing Piece
Next, state which garment should become the flatlay.
Do not assume the system will always choose the correct item from a layered outfit.
For example, write:
Create a clean flatlay of the cream cropped cardigan worn by the model. Do not include the white camisole, necklace, jeans, or handbag.
For another image:
Extract only the dark green pleated midi skirt. Preserve the waistband, pleat direction, length, and original color.
Specific instructions reduce confusion.
Step 3: Define the Flatlay Style
A flatlay can be minimal, soft, editorial, technical, playful, or marketplace-ready.
Therefore, describe the intended use.
For a product page:
Create a centered ecommerce flatlay on a warm white background. Use soft, balanced studio lighting, a light contact shadow, and generous empty space.
For a social post:
Create a relaxed editorial flatlay on pale textured paper. Keep the garment fully visible and add subtle natural shadows without extra props.
For a resale listing:
Create a clean front-facing flatlay on a neutral light gray background. Show the full garment clearly without decorative styling.
Step 4: Protect Important Product Details
The prompt should also explain what must remain unchanged.
Mention:
- Color
- Pattern
- Neckline
- Sleeve length
- Fastening
- Pockets
- Stitching
- Hardware
- Hem shape
- Visible logo placement
For example:
Preserve the original blue-and-white stripe width, button count, collar shape, sleeve length, curved hem, and chest pocket position.
This is more useful than simply writing “keep the clothing accurate.”
Step 5: Generate More Than One Layout
The first result may look attractive. However, another arrangement may communicate the product more clearly.
Generate a few controlled variations.
You can compare:
- Fully symmetrical layout
- Natural relaxed layout
- Sleeves extended
- Sleeves softly folded
- White background
- Pale brand-color background
Still, change only one variable at a time.
Otherwise, it becomes difficult to understand which direction actually works better.
Step 6: Review Before Publishing
Finally, compare the result with the source garment.
Do not review it only as a beautiful image.
Instead, inspect it as product information.
The AI Clothing Piece Generator Product Truth Checklist
A flatlay may look polished while containing small product errors.
Therefore, review these areas closely.
Check the Silhouette
Compare the width, length, and general proportions.
Ask:
- Is the body too narrow?
- Did the sleeves become longer?
- Is the waist more fitted than the real garment?
- Has the hem changed?
- Does the item still belong to the same size category?
Even a subtle silhouette change can misrepresent the product.
Check Construction Details
Next, inspect the design structure.
Look for:
- Button count
- Pocket position
- Seams
- Darts
- Pleats
- Zippers
- Straps
- Cuffs
- Collars
- Waistbands
For example, a generated shirt should not gain an extra button. Likewise, a skirt should not lose a side zip that is visible in the original.
Check Patterns and Materials
Patterns often reveal inconsistencies quickly.
Check whether stripes continue naturally. In addition, make sure printed flowers do not repeat strangely near seams.
Material also matters.
Cotton should not suddenly look like satin. Knitwear should keep its visible knit structure. Meanwhile, denim should retain its weight and texture.
Check Color Accuracy
Lighting can change how a product color appears.
Therefore, compare the generated flatlay with the most reliable source available. Ideally, use both the original photo and the physical sample.
Color accuracy is especially important when customers must choose between similar variants.
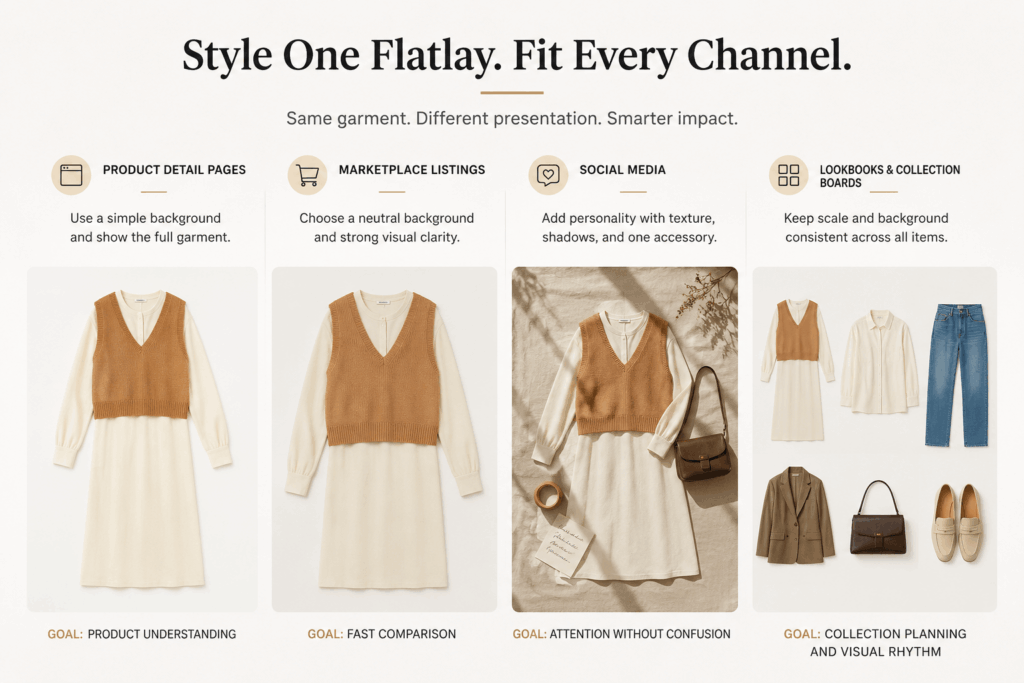
How to Style Flatlays for Different Channels
One flatlay style does not fit every channel.
The garment may remain the same. However, the presentation can change.
Product Detail Pages
Use a simple background and show the full garment.
Avoid excessive props. In addition, leave enough space for responsive page crops.
The goal is product understanding.
Marketplace Listings
Choose a neutral background and strong visual clarity.
The garment should fill enough of the frame to remain visible as a small thumbnail. However, it should not touch the image edges.
The goal is fast comparison.
Social Media
A social flatlay can include more personality.
For example, use textured paper, bold shadows, tape, handwritten notes, or one complementary accessory.
Still, the clothing must remain the visual focus.
The goal is attention without confusion.
Lookbooks and Collection Boards
Use the same scale and background across every item.
Then arrange the flatlays by color story, outfit group, or product category.
The goal is collection planning and visual rhythm.
Common AI Clothing Piece Generator Mistakes
Using a Heavily Obstructed Photo
The tool cannot recover every detail from a garment that is mostly hidden.
Therefore, avoid source images where large bags, crossed arms, long hair, coats, or furniture cover the product.
Adding Too Many Styling Instructions
A flatlay prompt may request flowers, shoes, jewelry, coffee, magazines, fabric, and decorative text.
As a result, the clothing becomes secondary.
Start with the garment. Then add one supporting idea only when the channel needs it.
Changing the Product While “Improving” It
Words such as “more elegant,” “more fitted,” or “more fashionable” may encourage design changes.
Instead, describe the presentation rather than redesigning the item.
For example:
Present the original garment in a clean premium flatlay.
This is safer than:
Make the garment look more luxurious.
Assuming Both Sides Are Identical
An asymmetric garment may have a side pocket, one-shoulder strap, uneven hem, or decorative panel.
Therefore, do not ask the tool to “make everything symmetrical” unless the real product is symmetrical.
Publishing Without Product Review
AI-generated flatlays should not bypass quality control.
A team member who knows the actual product should approve the result before publication.
Who Should Use an AI Clothing Piece Generator?
This workflow is useful for:
- Independent fashion brands
- Shopify clothing stores
- Marketplace sellers
- Vintage and resale shops
- Fashion designers
- Catalog managers
- Social media teams
- Creative agencies
- Small teams with limited photography resources
It is especially useful when a brand has many worn or styled images but not enough clean product-only assets.
Frequently Asked Questions
What Is an AI Clothing Piece Generator?
An AI Clothing Piece Generator converts clothing photos, model images, sketches, samples, or fashion ideas into clean flatlay visuals. WeShop positions the tool for ecommerce, marketing, design visualization, advertising, social content, and resale listings.
Do I Need a Studio Photo?
No. The official tool page states that users can begin with ordinary clothing photos, including casual images. However, clearer source photos usually provide more reliable product information.
Can It Remove the Original Background?
Yes. WeShop describes background cleanup and normalization as part of the workflow. Therefore, the result can move toward a cleaner and more consistent catalog presentation.
Can It Create Flatlays from Model Photos?
Yes. A model image can be used to extract and present a specific garment as a standalone flatlay. However, the clothing should be clearly visible in the source image.
Can It Be Used for Resale Clothing?
Yes. It can create cleaner visuals for vintage and second-hand listings. Still, sellers should preserve accurate product condition and disclose flaws separately.
Does It Replace Product Photography?
Not completely.
It can reduce the need for additional flatlay setup in some workflows. However, real product photography remains valuable for exact material, construction, fit, condition, and color documentation.
Turn the Look Back into the Product
Fashion content usually moves from the garment to the model.
However, the process does not need to end there.
An AI Clothing Piece Generator can take an existing model photo, casual image, sample, or concept and turn it back into a usable product asset. As a result, one garment can support product pages, catalogs, marketplaces, social posts, lookbooks, and design planning.
The strongest workflow is simple.
Choose a clear source. Identify one clothing piece. Define the layout. Protect the product details. Then compare the result with the real garment.
Do not generate a flatlay only because it looks clean.
Generate one because it makes the product easier to understand and easier to reuse.
Go to WeShop AI For Exploration: