Your photos are blurry, your pixels are low, and every time you zoom in the image falls apart. Here’s the neural network science behind AI photo enhancement — and a real-world test of free vs. paid image upscalers.
See It First: AI Photo Enhancement Before and After

Before: Original

After: AI Enhanced
Portrait: 680×1024 → 2720×4096 — skin texture and hair detail fully reconstructed
We ran identical source images through WeShop AI’s Image Enhancer. The AI reconstructs missing detail — not fake edges — preserving fabric texture, skin luminosity, and shadow gradients that cheaper tools destroy.
The Science Behind AI Photo Enhancement: How Super-Resolution Networks Reconstruct What Cameras Missed
From SRCNN to Real-ESRGAN: A Decade of Neural Architecture Evolution
The lineage of modern AI photo enhancers starts with SRCNN (Super-Resolution Convolutional Neural Network), published in 2014. That original three-layer network could barely handle 2x upscaling without introducing visible ringing artifacts. Fast forward to 2026, and we’re working with architectures like Real-ESRGAN and SwinIR that use residual-in-residual dense blocks (RRDB) and shifted window attention mechanisms to reconstruct plausible high-frequency detail from low-resolution inputs.
The key innovation isn’t just “making things bigger.” These networks learn to predict what should be in the high-resolution version based on millions of training image pairs. When you upload a blurry photo to an AI image enhancer, the model isn’t sharpening pixels — it’s hallucinating plausible detail based on learned texture priors. The nose in your portrait doesn’t get “enhanced”; the network generates a statistically plausible high-resolution nose based on what it learned from millions of other noses.
This is why results vary so dramatically between AI photo enhancer tools. The training data, the loss function (perceptual loss vs. pixel-wise MSE), and the network depth all determine whether you get a crisp, natural-looking result or a waxy, over-smoothed disaster.
Perceptual Loss vs. Pixel Loss: The Quality Divide That Separates Pro Tools from Toys
Here’s where the technical nuance gets practically relevant. Most free image upscalers optimize for PSNR (Peak Signal-to-Noise Ratio) — a metric that rewards pixel-level accuracy. The problem? High PSNR doesn’t mean high visual quality. An image can score perfectly on PSNR while looking unnaturally smooth because the model played it safe, averaging out fine details rather than committing to specific texture reconstruction.
Professional-grade tools use perceptual loss functions that optimize for visual similarity as perceived by human observers. The model is penalized not just for wrong pixels, but for wrong textures, wrong edge profiles, and wrong frequency distributions. WeShop AI’s Image Enhancer uses this approach — based on residual learning networks and perceptual loss functions — which is why it can increase resolution up to 4x while keeping the output looking like a better camera shot, not a filtered mess.
The Technical Frontier: Why 80% Enhancement Strength Beats 100%
One counterintuitive finding from production testing: dialing enhancement strength to around 80% consistently produces more natural results than pushing it to maximum. At 100%, the network over-commits to hallucinated detail, producing output that looks technically sharp but perceptually “off” — the uncanny valley of image enhancement. At 80%, the model retains enough of the original’s character while adding just enough reconstructed detail to close the quality gap. This tip alone will save you hours of trial and error.
Actionable Scene Guide: Matching AI Enhancement to Your Actual Workflow
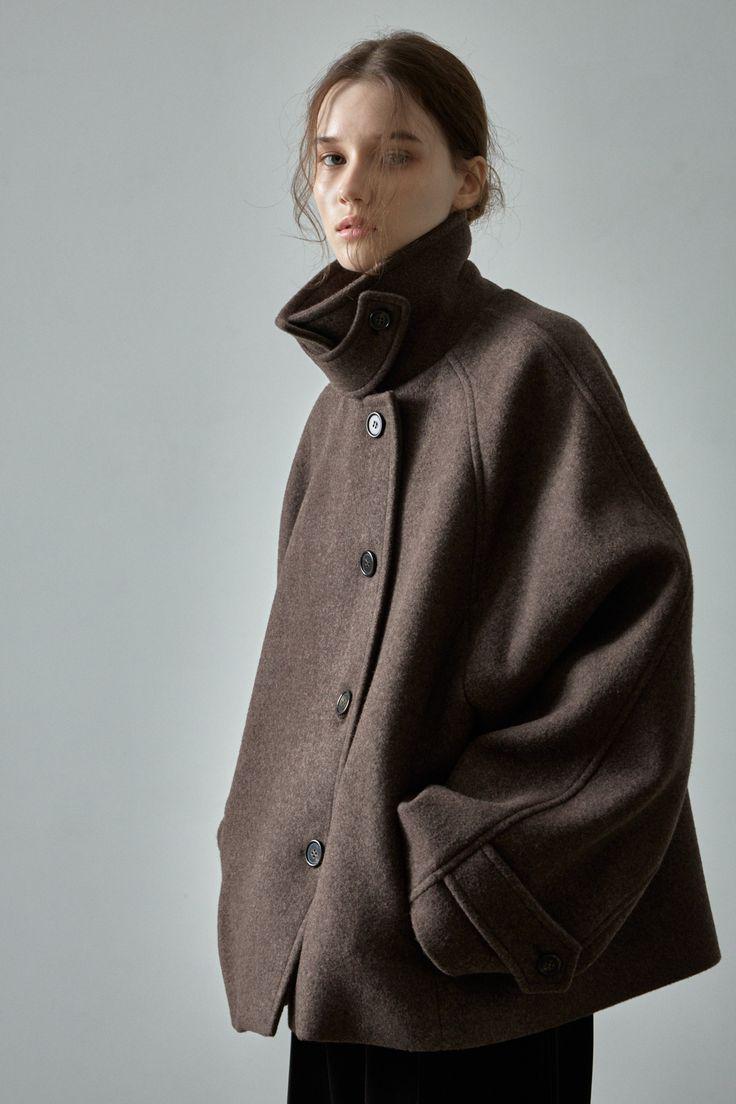
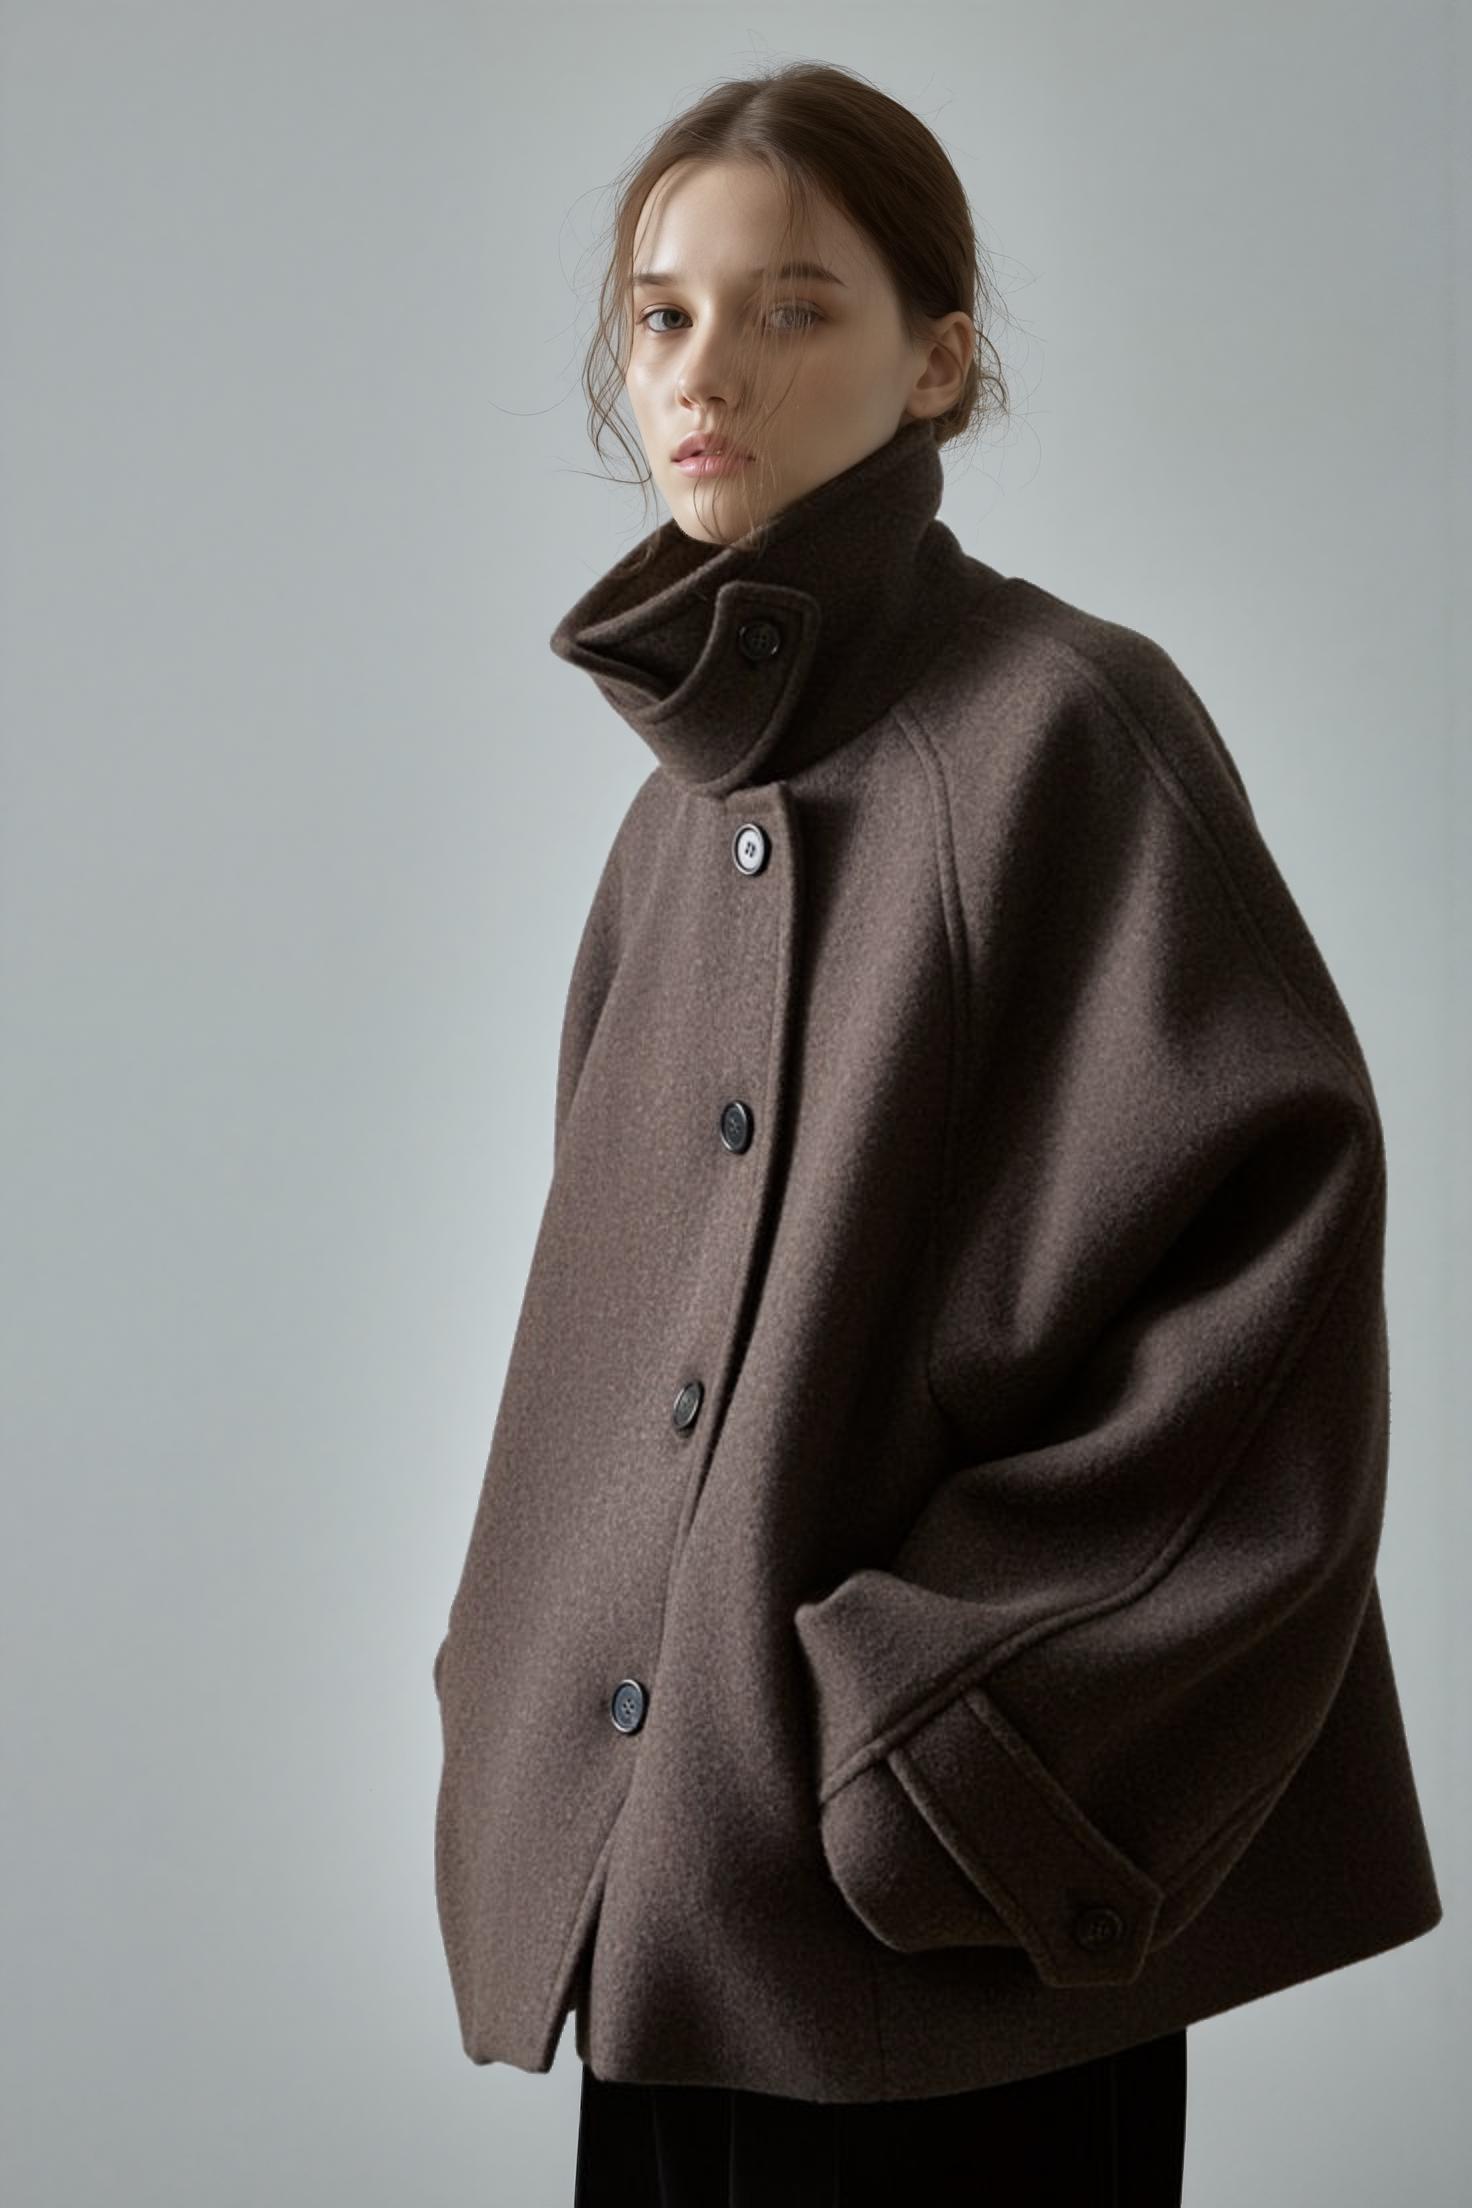
Before: Original
After: AI Enhanced
Product shot: material texture and color accuracy preserved at 2x increase resolution
Scene 1: E-commerce Product Photography — The Universal Pain Point
Your product photos are blurry. Your supplier sent low-res images. Your old catalog was shot on a phone three years ago. Sound familiar? This is the single most common use case for AI photo enhancement, and it’s where the technology delivers the most dramatic ROI.
The production workflow: Upload your highest-resolution source → AI enhances to 4x → pass the enhanced image to WeShop’s AI Background Changer for scene placement → final output ready for listing.
This workflow matters because WeShop AI’s Image Enhancer is the universal downstream tool in the ecosystem. Generate a model shot with Virtual Try-On, adjust the pose with AI Pose Generator, swap the background — then run the final composite through the Image Enhancer as the quality assurance step. It’s the closer in every pipeline.
Pro tip: Good lighting in the source photo dramatically improves AI enhancement results. Simple backgrounds also help — the model doesn’t waste capacity trying to reconstruct complex background noise.
Scene 2: Old Photo Restoration — From Blurry Memories to HD Clarity
Before: Original
After: AI Enhanced
Fashion: fabric drape and shadow gradients preserved — not smoothed away
Old family photos, vintage product images, archival content — all share the same problem: insufficient resolution for modern displays. AI photo enhancement handles faded colors and moderate blur surprisingly well. Where it struggles is heavy physical damage (scratches, tears, missing regions), which requires inpainting models as a pre-processing step.
For a deeper dive on restoration workflows, see our guide: Enhance and Upscale: Crystal-Clear Artistic Efforts.
Scene 3: Social Media Content — Stop the Scroll with Crystal-Clear Images
Before: Original
After: AI Enhanced
Square: 736×736 → 2944×2944 — reconstructed detail, not fake sharpening edges
That compressed screenshot you pulled from TikTok? The JPEG artifact nightmare from a news article? AI enhancement can recover surprising detail from heavily compressed sources. The key insight: upscaling before applying artistic styles (oil painting, watercolor, sketch) gives the AI a larger canvas to work with, so brushstrokes follow object contours organically instead of fighting pixel blocks.
Style recommendations from production testing:
- Oil Painting: Best for portraits and pet photos — softens skin while keeping eyes laser-sharp
- Watercolor: Perfect for landscape and travel content — natural bleed and white space rendering
- Sketch: Ideal for architecture and headshots — clean, minimal, modern
Scene 4: Print Production — The DPI Reality Check
Print requires 300 DPI minimum. A 1000×1000px image at 300 DPI prints at roughly 3.3 inches — barely a business card. AI 4x upscaling transforms that same image to 4000×4000px, printing comfortably at 13+ inches. That’s the difference between a thumbnail and a wall poster.
When NOT to use AI enhancement for print: fine text (AI hallucinates incorrect characters), geometric patterns (moiré artifacts), and medical/forensic imagery (hallucinated detail is a liability).
The Free vs. Paid Landscape: Testing 8 AI Tools So You Don’t Have To
The Xiaohongshu post that inspired this analysis recommended free alternatives for 8 paid AI tools. Here’s the image enhancement category tested against professional requirements.
Free Tier: Upscayl, Bigjpg, and Browser Tools
Upscayl (free, open-source, desktop) runs Real-ESRGAN locally. Genuinely good results, no privacy concerns, no upload limits. Limitations: slow batch processing, no domain-specific tuning, basic UI. Best free option if you’re willing to run desktop software.
Bigjpg (free tier limited to 3000×3000px) handles anime and illustration well but produces waxy skin textures on photographic content. The PSNR-optimized model plays it safe, averaging out the fine detail that makes photos look real.
Browser-based tools (clipdrop, upscale.media, etc.) trade convenience for compromise: watermarks, resolution caps, aggressive output compression. The free tiers are essentially demos for paid plans.
Paid Tier: MagnificAI ($39/mo), Topaz Photo AI ($199/yr)
MagnificAI’s “creativity slider” is actually a hallucination intensity control. High settings produce impressive but unfaithful results. Topaz is the batch processing workhorse — excellent for high-volume studios processing hundreds of images monthly.
The Middle Ground: WeShop AI’s Image Enhancer
The key differentiator isn’t just quality — it’s integration. WeShop AI’s enhancer plugs into an entire ecosystem: enhance → change background → generate model → create video. No export-import friction, no format conversion, no quality loss from repeated file handling. One click to transform any image into crystal-clear HD quality, then flow directly into the next production step.
For studios processing product images, this pipeline integration saves more time than the enhancement itself.
Step-by-Step: Maximum Quality from AI Photo Enhancement
Step 1: Source Preparation
- Start with the highest resolution version available (check cloud backups, original camera files, email attachments)
- Crop first: remove borders, watermarks, UI elements — the model wastes capacity on junk pixels
- Format: PNG or high-quality JPEG. Avoid images compressed multiple times
Step 2: Enhancement Settings
- 2x upscale: images already decent, need a resolution bump for presentations
- 4x upscale: the sweet spot — smartphone photos become print-ready without heavy hallucination
- Beyond 4x: diminishing returns. The model generates more than it reconstructs
- Strength at 80%: more natural than 100%. Trust the production testing data
Step 3: Quality Check
- Zoom to 100% — never judge from a thumbnail
- Check: skin texture (should have pores, not plastic), hair detail, text legibility, edge sharpness
- Toggle original vs. enhanced — good enhancement looks like a better camera, not a filter
Step 4: Post-Enhancement Workflow
- Need a new background? → AI Change Background
- Need a model wearing your product? → Virtual Try-On
- Need a different pose? → AI Pose Generator
- Image Enhancer is always the final step in any pipeline
Expert FAQ
Does AI photo enhancement create new detail or just sharpen existing pixels?
It creates new detail — technically. The neural network generates plausible high-frequency information (texture, edges, fine detail) that didn’t exist in the original. This is fundamentally different from traditional sharpening, which only amplifies existing contrast edges. The generated detail is statistically plausible based on training data, but it’s not the “real” detail a higher-resolution camera would have captured. For e-commerce, social media, and marketing — the distinction is invisible to consumers.
Why do some AI-enhanced photos look “plasticky” or over-processed?
Two culprits: aggressive denoising and PSNR-optimized loss functions. Models that prioritize pixel accuracy produce smooth, averaged textures because smoothness is statistically “safe.” The fix: use tools with perceptual loss optimization (like WeShop AI’s enhancer), and keep strength at 80% rather than maximum.
Can AI enhancement recover detail from a heavily compressed JPEG?
Partially. The model substitutes plausible detail for what JPEG compression discarded, convincing at normal viewing distances but not under close inspection. Always start from the least-compressed source you can find. Pro tip: WebP at quality 85+ or AVIF at quality 70+ preserves enhancement detail better than JPEG for web delivery.
What’s the best workflow for product images that need both enhancement and background changes?
Enhance first, then change background. The Image Enhancer works best on the original subject with its native lighting. After enhancement, use AI Change Background — the system automatically matches lighting and perspective. This sequence produces more natural composites than the reverse.
How does WeShop AI’s Image Enhancer fit into a complete content production pipeline?
It’s the universal closer. Whatever you create in the WeShop AI ecosystem — AI model photos, virtual try-ons, pose adjustments, background swaps — the Image Enhancer is the final quality assurance step. The integration means zero export friction: enhance and immediately proceed to the next tool without downloading, converting, or re-uploading. For teams managing hundreds of SKUs, this pipeline saves hours per week.
© 2026 WeShop AI — Powered by intelligence, designed for creators.


