You run your photo through an AI enhancer expecting crystal clarity. Instead, the output has that unmistakable AI feel — skin that looks like wax, edges sharpened into halos, textures that scream algorithmic processing. Over 9,500 people flagged this exact problem in online discussions this year. The image is technically “enhanced,” but it no longer looks like a photograph. It looks like a render.
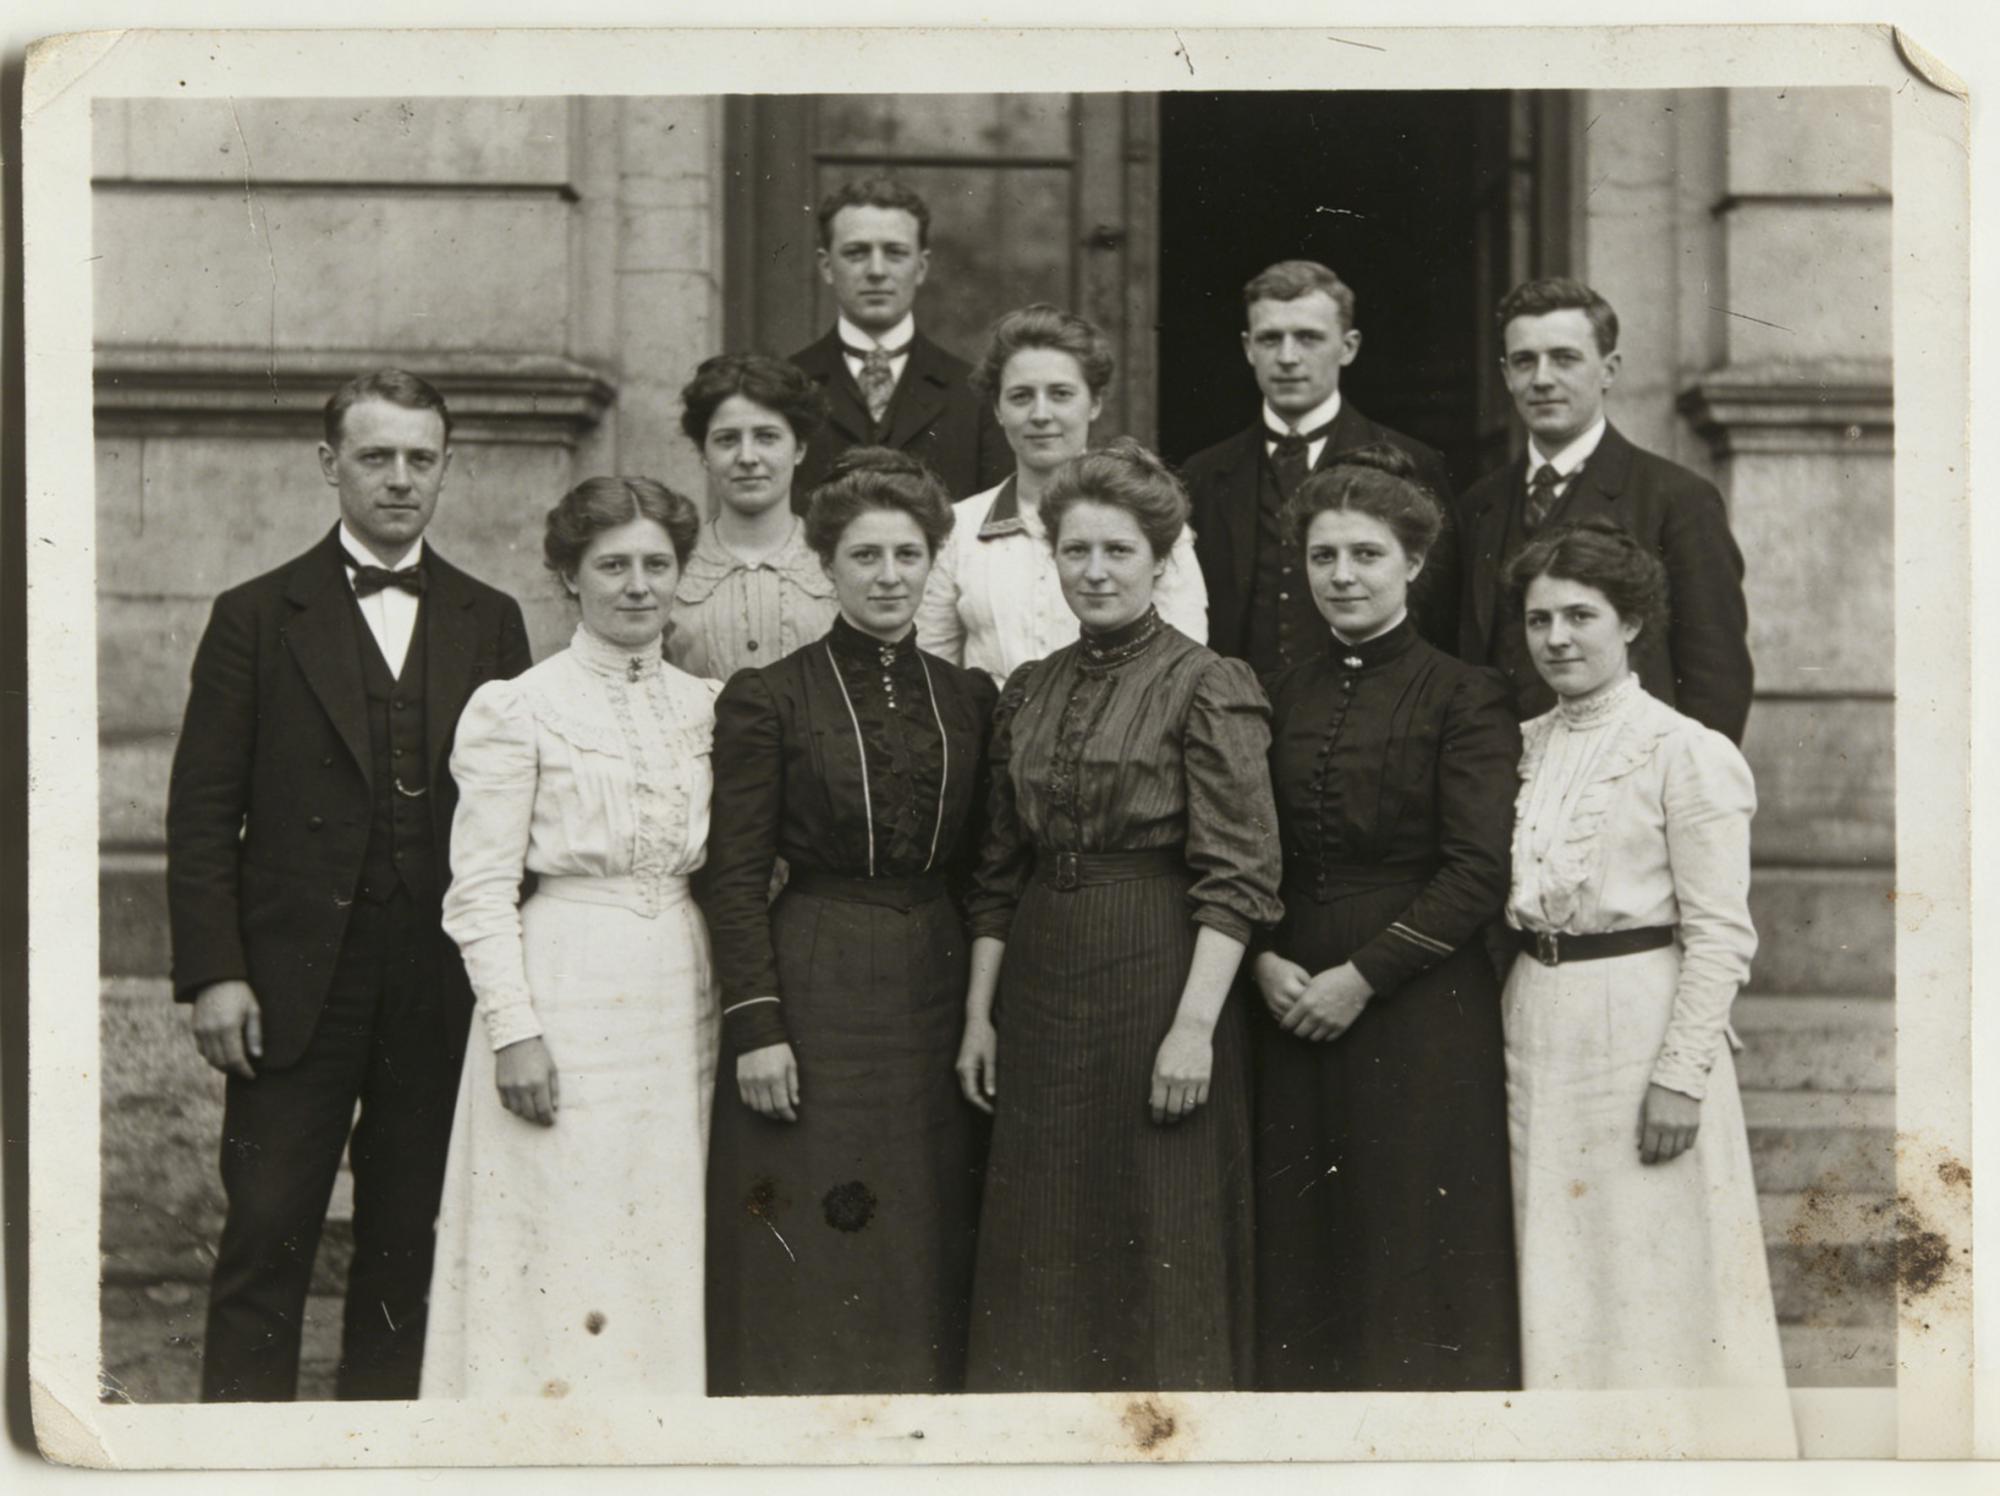
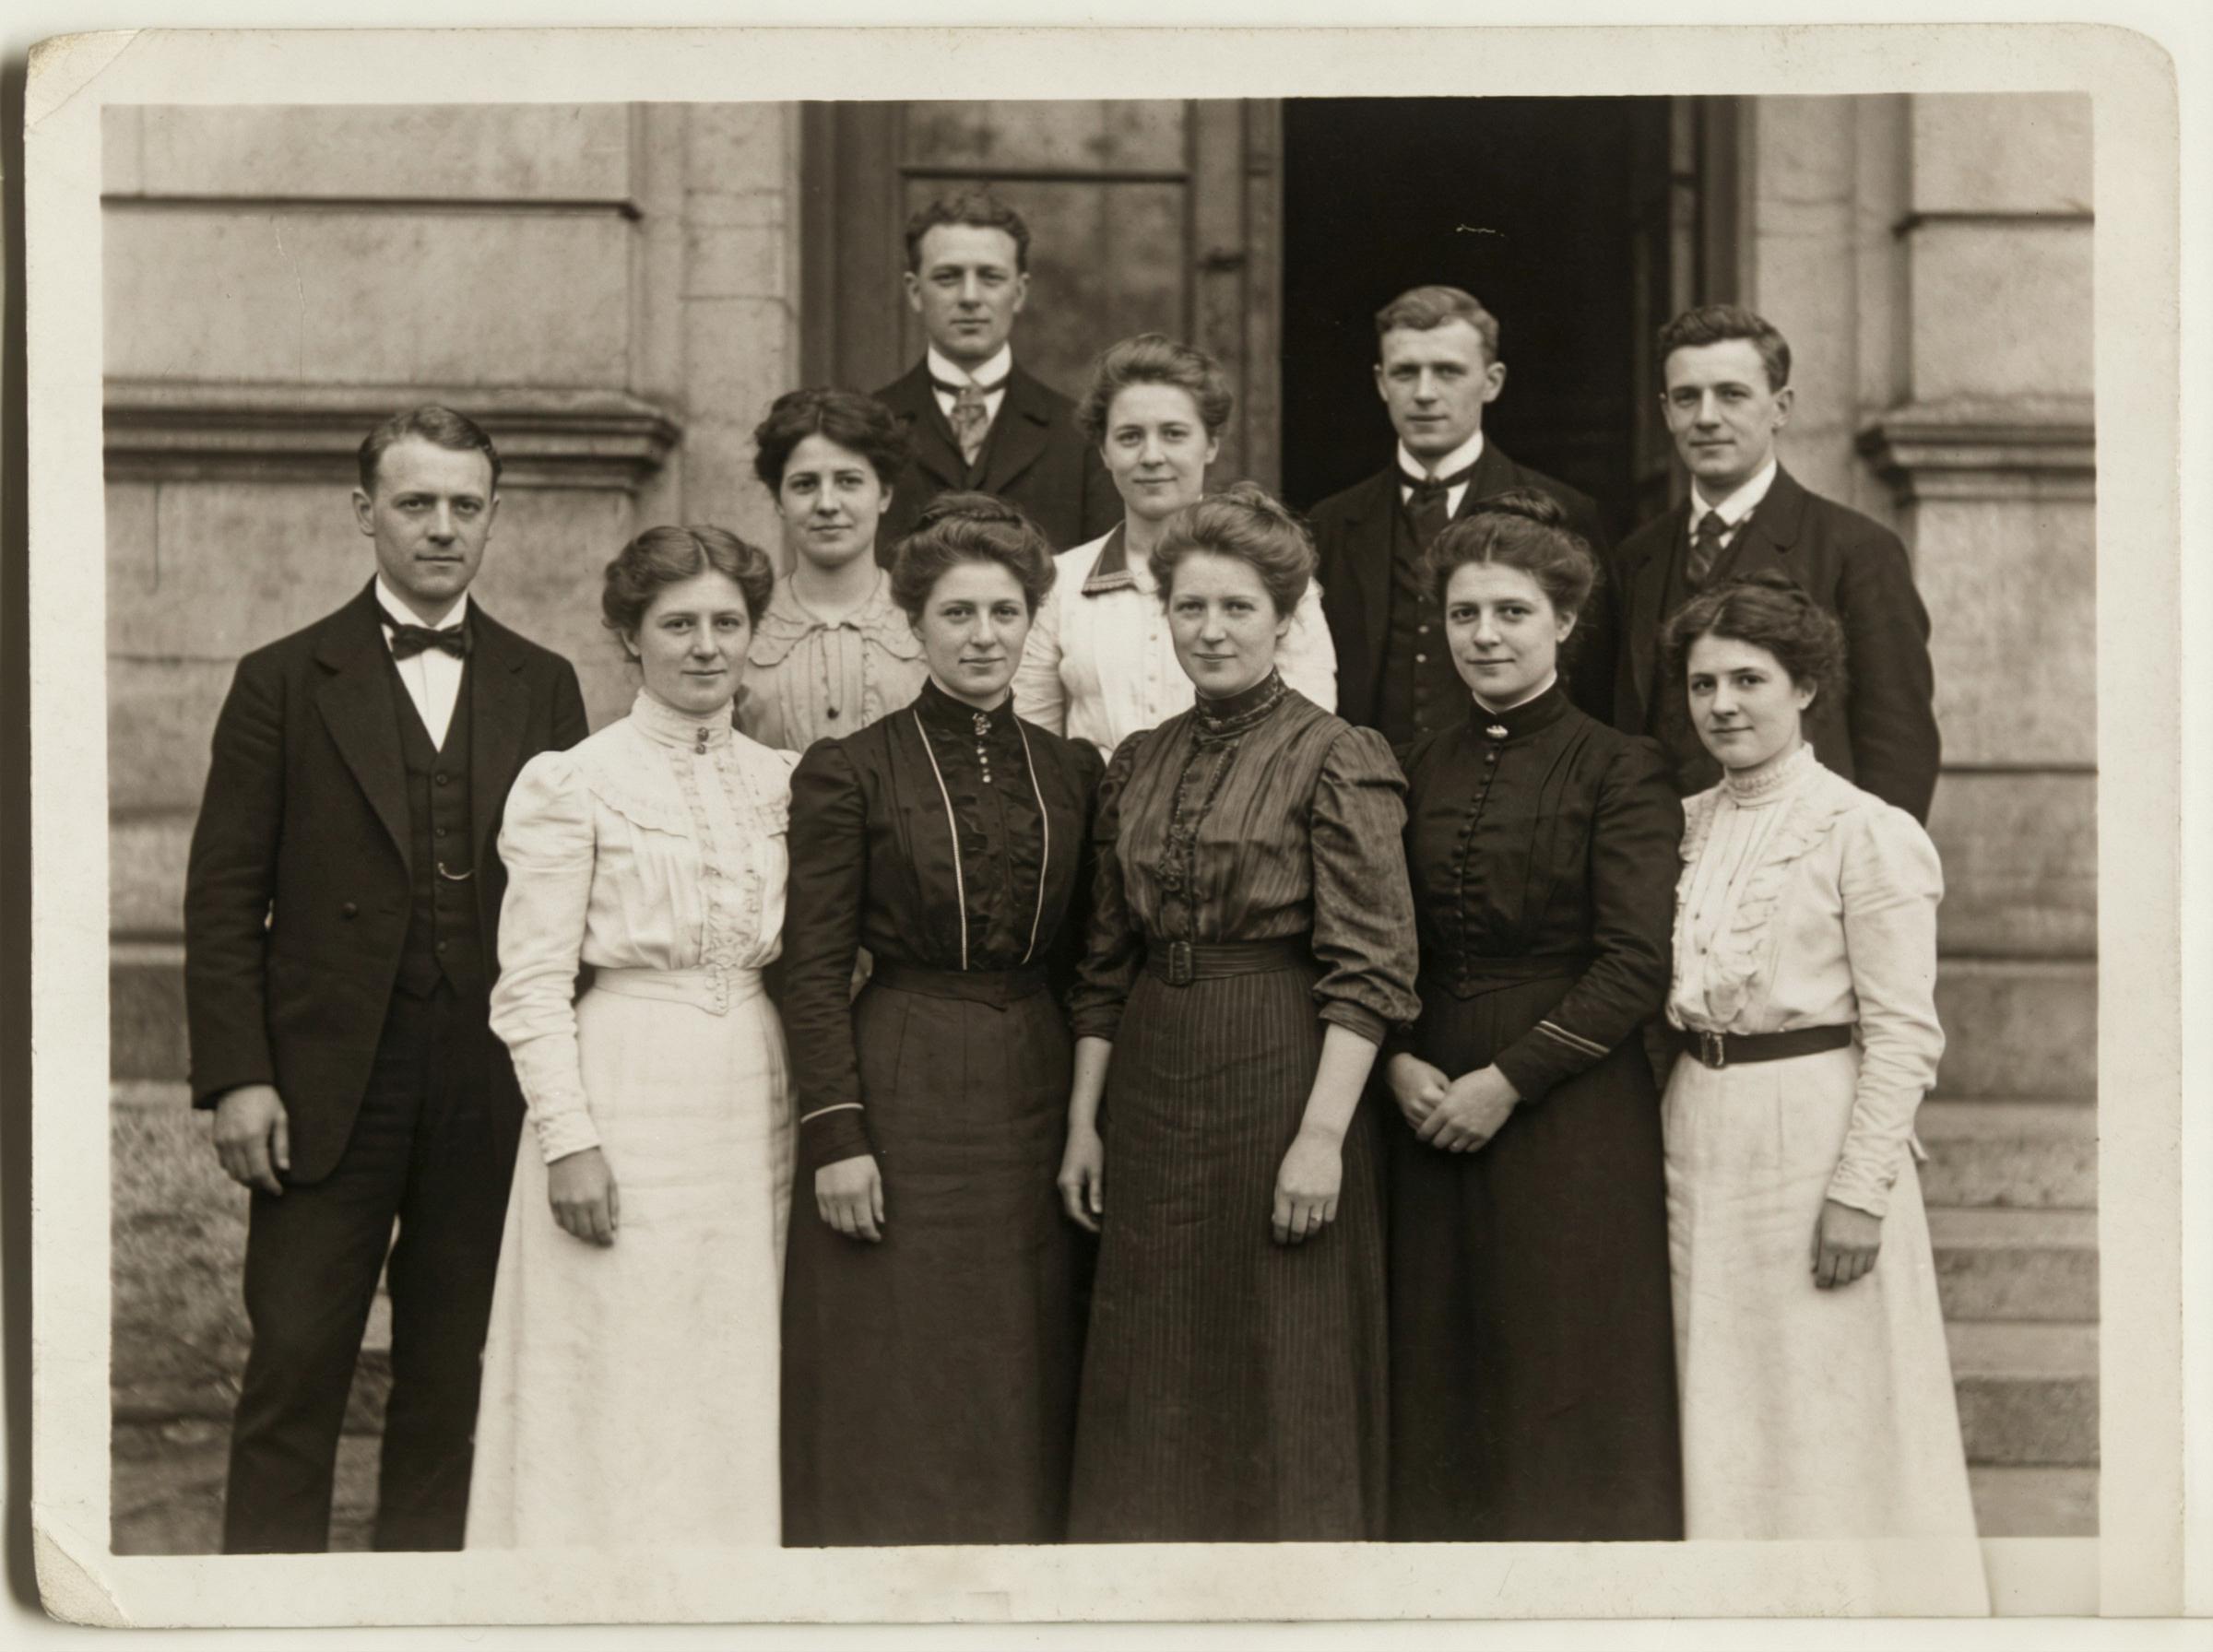
Left: Original low-resolution image | Right: AI-enhanced with preserved natural texture
The Science Behind AI Photo Enhancement: Residual Learning and the Overcorrection Trap
Modern AI photo enhancers use residual learning networks — architectures like ESRGAN and Real-ESRGAN — that learn the mathematical relationship between low-resolution and high-resolution image pairs. The network doesn’t “add detail” in any meaningful sense. It predicts what high-frequency information (edges, textures, fine patterns) should exist based on the low-frequency information it can observe.
The overcorrection problem emerges from the training objective itself. Most networks optimize for a combination of pixel-level accuracy (L1/L2 loss) and perceptual quality (GAN loss). When the GAN component dominates, the network hallucinates textures that look impressive at first glance but collapse under scrutiny — pores that form impossible geometric patterns, fabric weaves that repeat with mechanical precision, hair strands that follow suspiciously parallel paths.
Why Some Tools Produce “AI Feel” While Others Don’t
The critical difference lies in how the model balances reconstruction fidelity against perceptual quality. Tools that lean heavily on adversarial training produce outputs that score well on perceptual metrics like LPIPS but fail the human eye test. The solution isn’t less AI — it’s better-calibrated AI that treats enhancement as a constrained optimization problem: maximize clarity while minimizing deviation from the source image’s natural characteristics.
Technical Frontiers: Diffusion-Based Super-Resolution
The latest generation of enhancers uses diffusion models rather than GANs. Instead of generating the entire high-resolution image in a single forward pass, diffusion-based approaches iteratively refine the image through a denoising process. Each step adds a controlled amount of high-frequency detail. The result: enhancement that preserves the photographic quality of the original because the refinement process is inherently conservative — it adds detail gradually rather than hallucinating it wholesale.
Engineering Challenges: The Resolution-Artifact Tradeoff
Every 2× increase in resolution requires the network to predict 4× more pixels. At 4× upscaling (the sweet spot for most practical applications), the network generates 16 pixels for every 1 pixel in the input. The challenge is ensuring those 16 predicted pixels maintain spatial coherence — edges must continue smoothly, textures must tile naturally, and color gradients must remain perceptually uniform. Failure at any of these produces the characteristic “AI enhanced” artifacts that plague lower-quality tools.
The skin rendering in this enhanced portrait reveals the kind of output possible when the algorithm correctly balances sharpening against texture preservation. Individual pores remain visible at full resolution without the waxy smoothness that characterizes over-processed enhancement. The fabric of the garment maintains its weave pattern without repeating artifacts — a strong indicator that the underlying network is reconstructing rather than hallucinating.
Actionable Scene Guide: Getting Natural Results From AI Photo Enhancement
Portrait Enhancement: The Skin Texture Test
Before committing to any AI enhancer for portraits, run a simple diagnostic: enhance a well-lit face photo at 2× and zoom to 100% on the cheek area. If you see uniformly sized, evenly spaced pores — the output is hallucinated. Real skin texture is irregular: pores vary in size, spacing is uneven, and fine lines cross the surface at unpredictable angles. Tools that preserve this irregularity are performing genuine super-resolution. Tools that regularize it are generating synthetic texture.
Product Photography: Background Consistency Check
E-commerce product images often have clean, uniform backgrounds — white, grey, or gradient. These backgrounds are the first place enhancement artifacts appear. Look for subtle banding (horizontal or vertical lines in what should be a smooth gradient), color shifting in supposedly neutral areas, and edge halos around the product boundary. A good enhancer treats the background as a smooth signal and concentrates its reconstruction effort on the product itself.
Low-Light Recovery: Noise vs. Detail Separation
Photos shot in low light contain a mixture of genuine detail and sensor noise. The best AI enhancers can distinguish between the two: they suppress noise while amplifying detail. Lesser tools treat noise as detail and amplify both, producing outputs that are simultaneously smoother (noise reduced) and more artificial (noise patterns converted into fake textures). Test with a dimly lit indoor photo and check shadow areas for this tell-tale pattern.
Print-Ready Upscaling: DPI Requirements
For print output, you need 300 DPI minimum. A smartphone photo at 4032×3024 pixels prints well at roughly 13×10 inches. If you need larger prints, AI upscaling at 2× gives you 26×20 inches at print quality. The key: enhance once at 2× rather than twice at 2× (which compounds artifacts). Single-pass upscaling at a moderate factor consistently outperforms multi-pass upscaling at lower factors.
Expert Consulting FAQ
Q1: Why does AI enhancement make my photos look worse than the original?
The most common cause is over-sharpening combined with aggressive denoising. The AI removes the natural film grain or sensor noise that your eye interprets as “photographic,” then replaces it with synthetically sharpened edges. The result is technically higher resolution but perceptually less natural. The fix: use tools that offer adjustable enhancement strength, and stay at 60-80% rather than maximum. Or use tools that auto-calibrate — they analyze the input and adjust processing intensity based on the source image’s characteristics.
Q2: Is there a quality difference between free and paid AI photo enhancers?
Significant differences exist, but not always in the direction you’d expect. Some free tools use the same open-source models (Real-ESRGAN, SwinIR) as paid services and simply wrap them in a different interface. The real differentiator is post-processing: better services apply color correction, artifact suppression, and adaptive sharpening after the neural network pass. These post-processing steps are where the “natural look” is preserved or destroyed.
Q3: Can AI enhancement restore detail that was never captured by the camera?
No — and any tool that claims otherwise is marketing fiction. AI enhancement predicts plausible high-frequency detail based on patterns learned from millions of training images. The pores, textures, and fine edges in an enhanced image are statistically likely given the input, but they are not the actual detail that existed in front of the lens. For forensic or scientific applications, this distinction matters enormously. For social media, marketing, and personal photography, the predicted detail is more than sufficient.
Q4: What’s the maximum upscaling factor before results become unusable?
For photographic content with moderate initial quality (smartphone photos, compressed web images), 4× is the practical ceiling. Beyond 4×, even the best models begin hallucinating textures and producing spatial inconsistencies visible to untrained observers. For extremely low-resolution sources (thumbnails, heavily compressed screenshots), 2× is safer. The rule of thumb: if the source image is below 500 pixels on its longest edge, expect diminishing returns beyond 2× regardless of the tool.
Q5: Should I enhance before or after editing my photos?
Enhance first, edit second. AI enhancement works best on unprocessed images because it can more accurately distinguish signal from noise. If you apply contrast curves, saturation adjustments, or color grading before enhancement, the AI must work with an already-manipulated signal, which increases the likelihood of artifacts. The optimal workflow: enhance the raw or minimally processed image, then apply your creative edits to the high-resolution result.
Published by the WeShop Visual Intelligence Team
© 2026 WeShop AI — Powered by intelligence, designed for creators.


