







MiniMax H3 Video-to-Video: Add AE Effects to Existing Footage
Learn how to use MiniMax H3 video-to-video on WeShop AI to add red and cyan tracking rectangles and subtle brightness effects to existing footage.
Creating motion-tracking graphics in After Effects normally involves tracking points, keyframes, masks, and compositing. With MiniMax H3 Video-to-Video, you can instead upload existing footage and describe the AE effects you want to add with a detailed prompt.
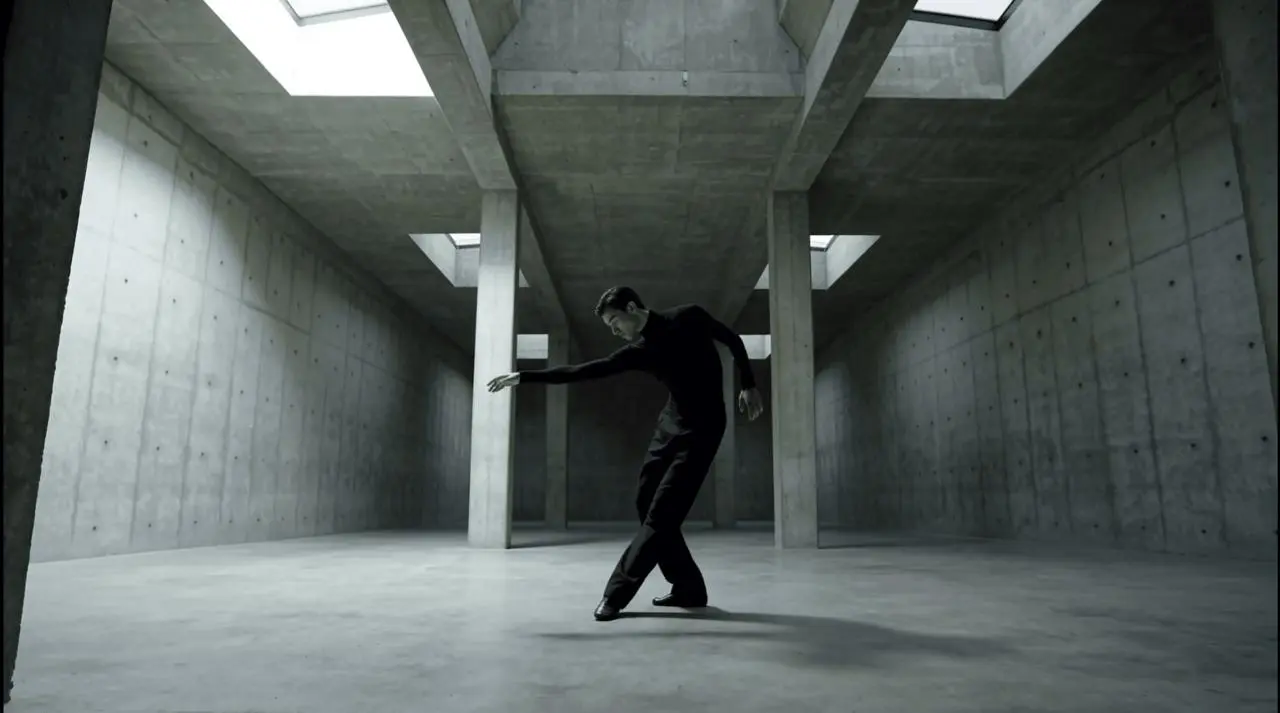
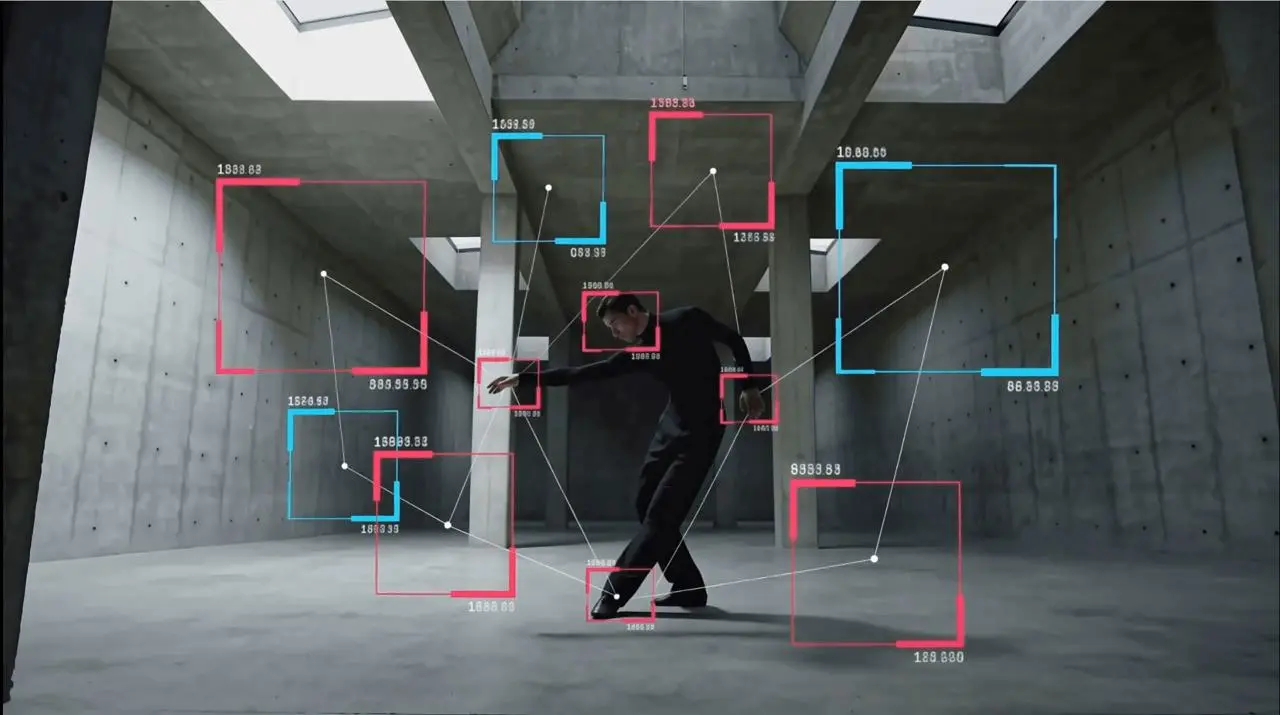
This workflow has one specific goal: add red and cyan motion-tracking rectangles and localized brightness effects without intentionally changing the person, movement, setting, or camera work in the source video.
| Original footage | AE effects reference |
|---|---|
 |  |
Prepare the Base Video
This example uses a single continuous shot of a dancer inside a concrete architectural space. The clear silhouette, controlled camera movement, and visible structural lines give MiniMax H3 useful features to follow when adding motion graphics.
Watch the original input video
Before uploading your footage, check that:
- The subject and primary movement are clearly visible.
- The clip does not contain frequent cuts.
- There is enough negative space for tracking rectangles.
- You have permission to upload and transform the footage.
The source clip in this example is slightly longer than 15 seconds. MiniMax’s documentation currently lists a 15-second maximum for each reference-video input, so trim the clip to 15 seconds or less if the upload is rejected. See the current MiniMax H3 video-generation documentation for supported inputs and limits.
Open MiniMax H3 on WeShop AI
Go to MiniMax H3 on WeShop AI and start a new generation.
Use the workflow that accepts an existing or reference video:
- Open the MiniMax H3 generation tool.
- Upload the source footage as Video 1.
- Use it as the only video reference.
- Do not add extra character, environment, or style references.
- Paste the prompt from the next section.
MiniMax officially categorizes video inputs under reference generation and multimodal reference workflows. In this tutorial, the process functions as Video-to-Video editing: the uploaded clip supplies the subject, action, setting, and camera foundation, while the prompt defines the AE effects added to it.
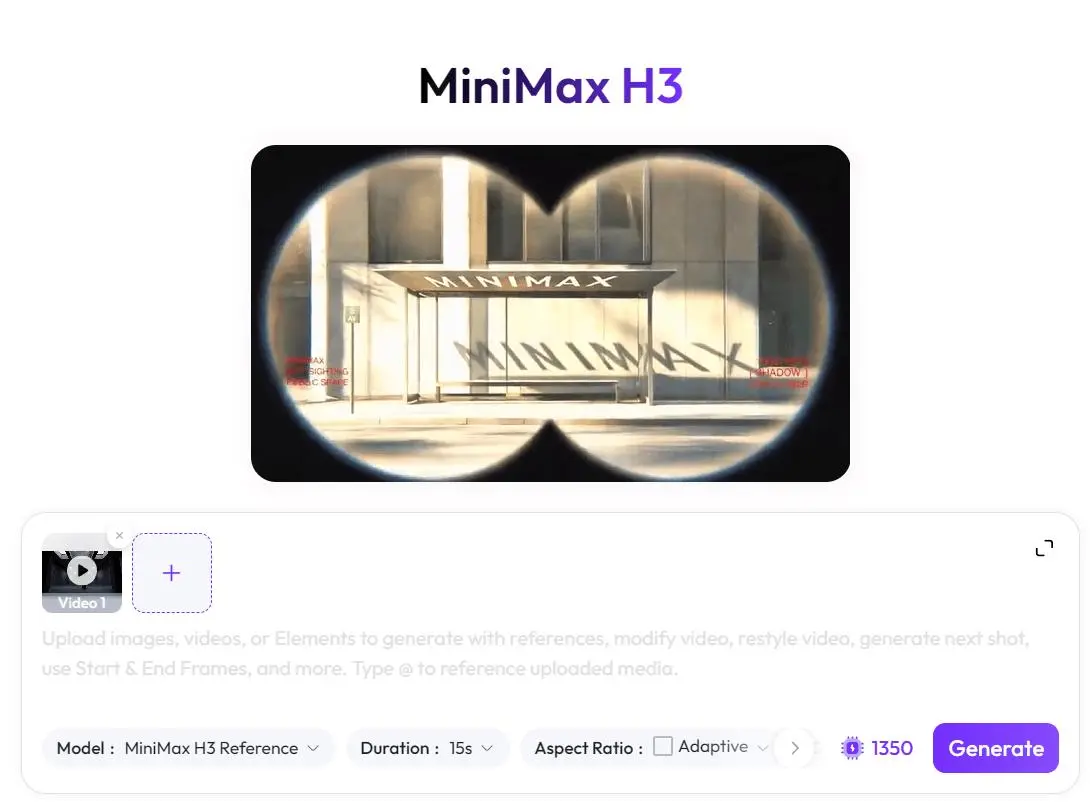
Upload the original clip as the only base video before entering the effect prompt.
Use This MiniMax H3 Video-to-Video Prompt
Make sure @Video 1 points to the uploaded source footage, then copy the following prompt:
TouchDesigner-inspired AE motion graphics effect.

@Video 1 is the only base video and the absolute visual source for the entire result.

Preserve the original video:
- Keep the same person, identity, facial features, hairstyle, body proportions, clothing, and accessories.
- Keep every original pose, gesture, movement path, movement speed, and timing.
- Keep the original architecture, floor, walls, lighting environment, shadows, composition, and overall color palette.
- Keep the original camera position, focal length, perspective, camera movement, shot duration, frame rate, and editing rhythm.
- Preserve the original audio without modification.
- Do not replace, redraw, restyle, or regenerate the person, clothing, background, or camera movement.

Only add clean, two-dimensional, AE-style motion-tracking graphics over the original footage.

Tracking rectangles:
1. Add a restrained number of simple motion-tracking rectangles around selected body areas and architectural features.
2. Every rectangle must track its selected feature smoothly and consistently throughout the shot.
3. Every rectangle must be a complete, simple, continuous, closed rectangle.
4. Rectangle outlines may use only pure red or pure cyan.
5. Every rectangle must have exactly four plain corners.
6. Do not add corner brackets, tracking points, anchor points, handles, dots, circles, or decorative vertices.
7. Do not add text, numbers, coordinates, labels, interface elements, charts, connecting lines, or HUD graphics.
8. The colored fill opacity of every rectangle must be exactly 0%.
9. Do not place any red, cyan, or other colored mask inside a rectangle.
10. Do not use colored glow, translucent panels, solid color blocks, or gradient fills.
11. One rectangle must never fully contain another rectangle.
12. Rectangles must not overlap, intersect, merge, or transform into nested frames.
13. Keep the rectangles visually separated and avoid covering the subject’s face.

Inside each rectangle:
- Only modify the brightness, grayscale, exposure, contrast, and light-dark relationship of the original pixels at that exact location.
- Preserve the original texture, structure, edges, and image content.
- Use subtle monochrome luminance changes only.
- Do not replace the content with abstract textures or generated imagery.
- Do not apply red, cyan, or other colored tinting.
- Do not turn the person into a white silhouette.
- Do not create full negative inversion or posterization.

Animation behavior:
- The rectangles should appear, move, and disappear with smooth AE-style keyframe animation.
- Use stable motion tracking with no jitter, flicker, drifting, sudden jumps, or shape deformation.
- Keep line thickness consistent.
- Do not let the graphics alter the underlying movement or timing.
- The first and final frames must remain visually consistent with the source footage except for the permitted outline graphics and subtle local luminance treatment.

The result should look like restrained TouchDesigner-inspired motion graphics composited over the unchanged original video, not a newly generated scene.
The preservation instructions tell the model which parts of the source should remain stable. The rectangle rules then define the permitted graphic treatment and exclude unwanted HUD elements, masks, labels, and nested shapes.
Generate and Inspect the AE Effects
Submit the generation and inspect the returned video in three areas.
1. Source-video consistency
Compare the output with the input. Check the subject’s identity, clothing, dance movement, architecture, framing, and camera motion for unintended changes.
2. Tracking-rectangle design
The target treatment uses only complete red or cyan rectangular outlines. The frames should not contain numeric labels, tracking nodes, decorative corners, connecting lines, nested rectangles, or colored fills.
3. Local brightness treatment
The pixels inside a rectangle may receive a restrained grayscale, exposure, or contrast adjustment. The model should not replace the original image content, apply colored masks, or turn the dancer into a solid white silhouette.
This supplied result demonstrates the intended red-and-cyan motion-graphics direction, but it also contains extra labels, nodes, connecting lines, bright fills, and a temporary white silhouette. Treat those elements as prompt deviations rather than part of the strict target design.
If a generation introduces these elements, append the following correction and generate another version:
No colored fill, no colored mask, no text, no numbers, no tracking points, no corner decorations, no connecting lines, no nested rectangles, and no white silhouette. Use only simple, complete red or cyan rectangular outlines with 0% fill opacity.
You can try it directly using the tool on the right.
Watch the final video
Keep the AE Effects Attached to the Original Motion
The strongest result should still feel like the original shot. The dancer, architecture, and camera establish the movement; the added rectangles simply reveal relationships between the subject and the surrounding space.
Use the corrected result as an experimental dance visual, a social-media edit, or a motion-design layer for a larger production.