





Create On-Model Dress Photos for Shopify with AI
Learn how to turn a clean dress image into an AI-generated on-model photo, preserve key garment details, and add it to a Shopify product gallery.
Shopify AI Product Photography: Turn One Dress Image Into an On-Model Photo
For many Shopify sellers, getting good product images is less about creativity and more about cost and speed. A traditional photoshoot often means finding a model, booking a studio, preparing samples, coordinating styling, and shooting again whenever a new color, product, or campaign is added. AI helps reduce that workload by turning existing product photos into new ecommerce-ready images, so sellers can test different models, backgrounds, and visual styles without organizing a new shoot each time.
This tutorial shows Shopify fashion sellers how to turn one clean dress image into an on-model product photo with WeShop AI Virtual Try-On, then add the approved result to a Shopify product page.
| Input product image | Generated on-model result |
|---|---|
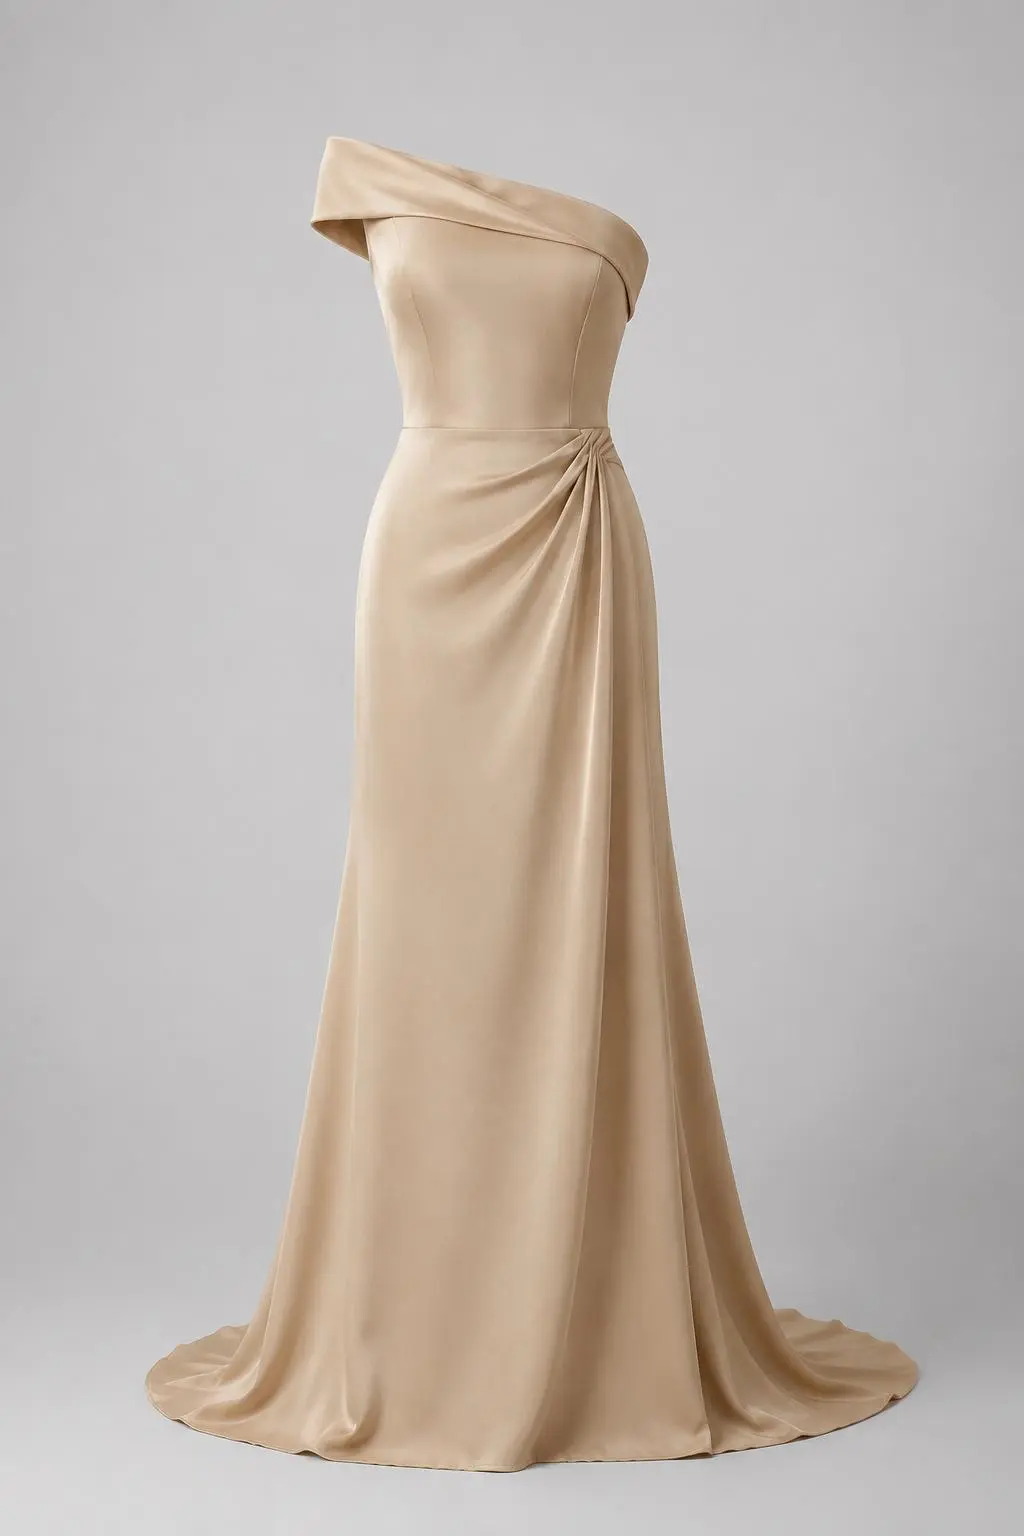 | 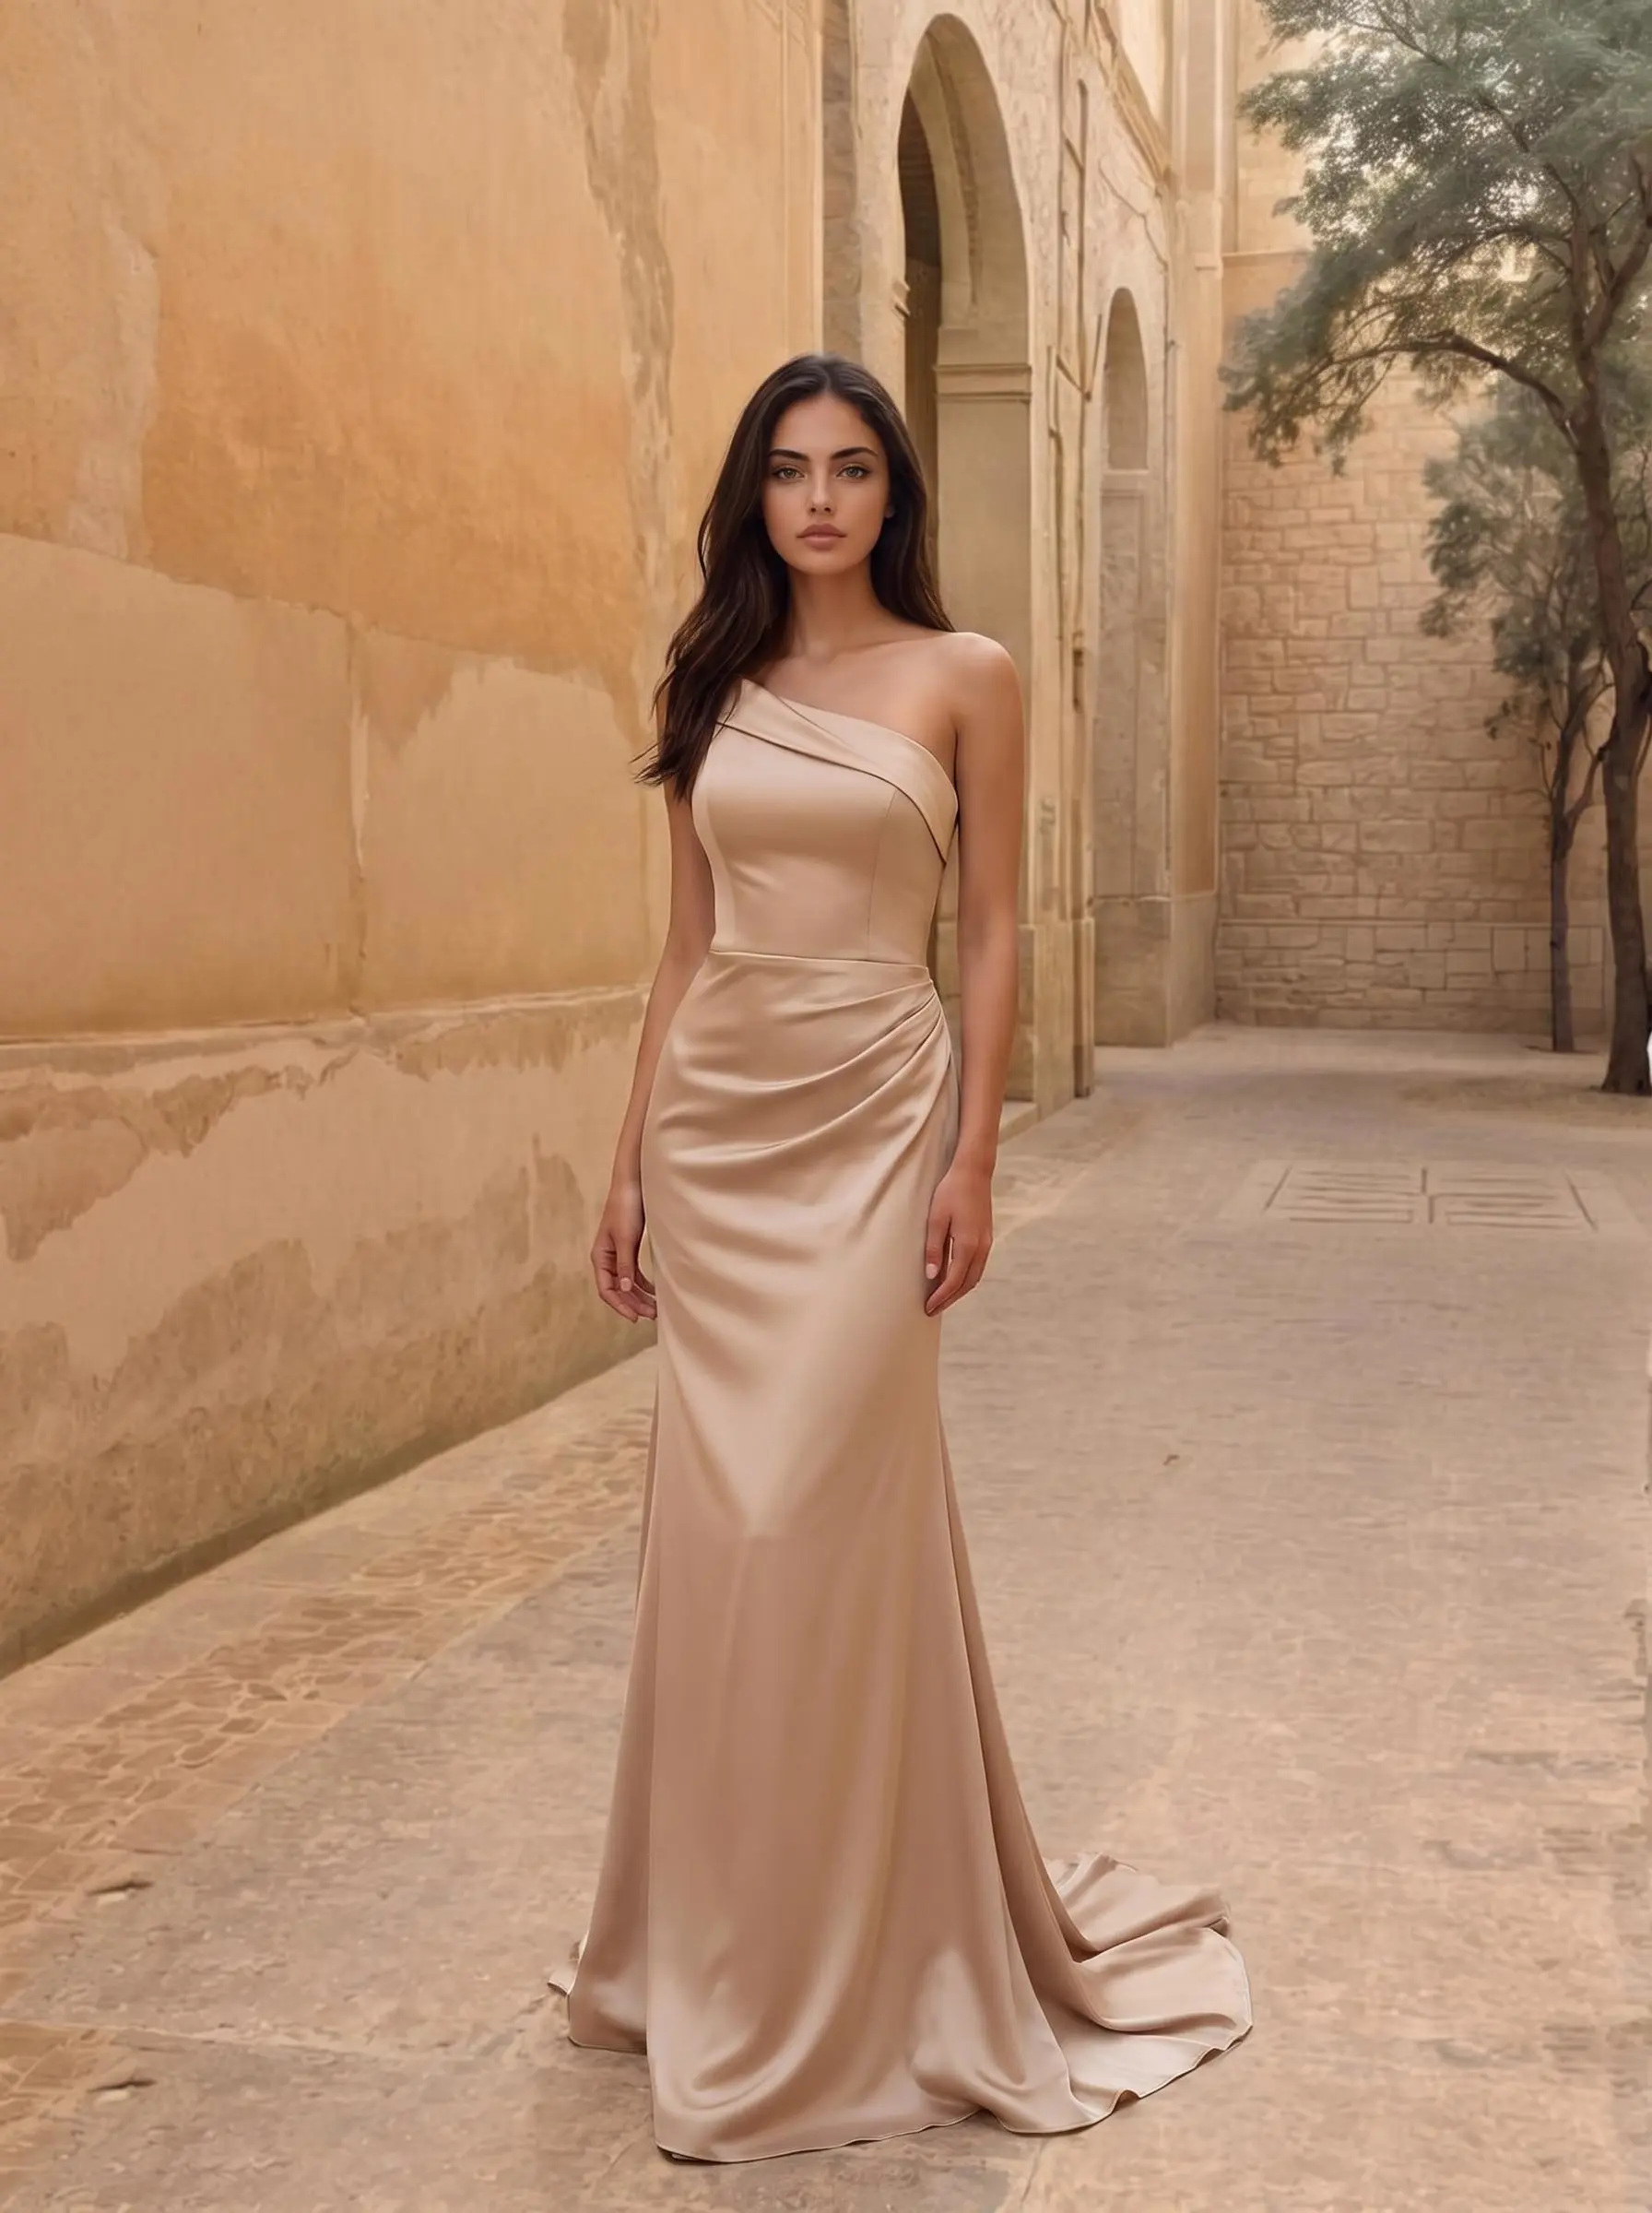 |
| The clean reference shows the asymmetric neckline, side draping, satin finish, full-length skirt, and subtle train. | The AI-generated image adds a model and warm architectural setting while keeping the champagne evening-gown concept recognizable. |
What You Need
Prepare:
- One product image you own or have permission to use
- A complete, unobstructed view of the garment
- Clearly visible color, fabric, neckline, waist, and hem details
- Access to WeShop AI Virtual Try-On
- The Shopify product page where the final image will appear
A simple background is helpful because it gives the AI a clear garment boundary. The complete dress should remain inside the frame, from neckline to hem.
Step 1: Upload the Dress
Open WeShop AI Virtual Try-On and select Product in the creation panel.
Upload the dress as the original product image. Use a clear source that keeps the complete garment visible from neckline to hem.
| Step 1 — Upload the Product Image |
|---|
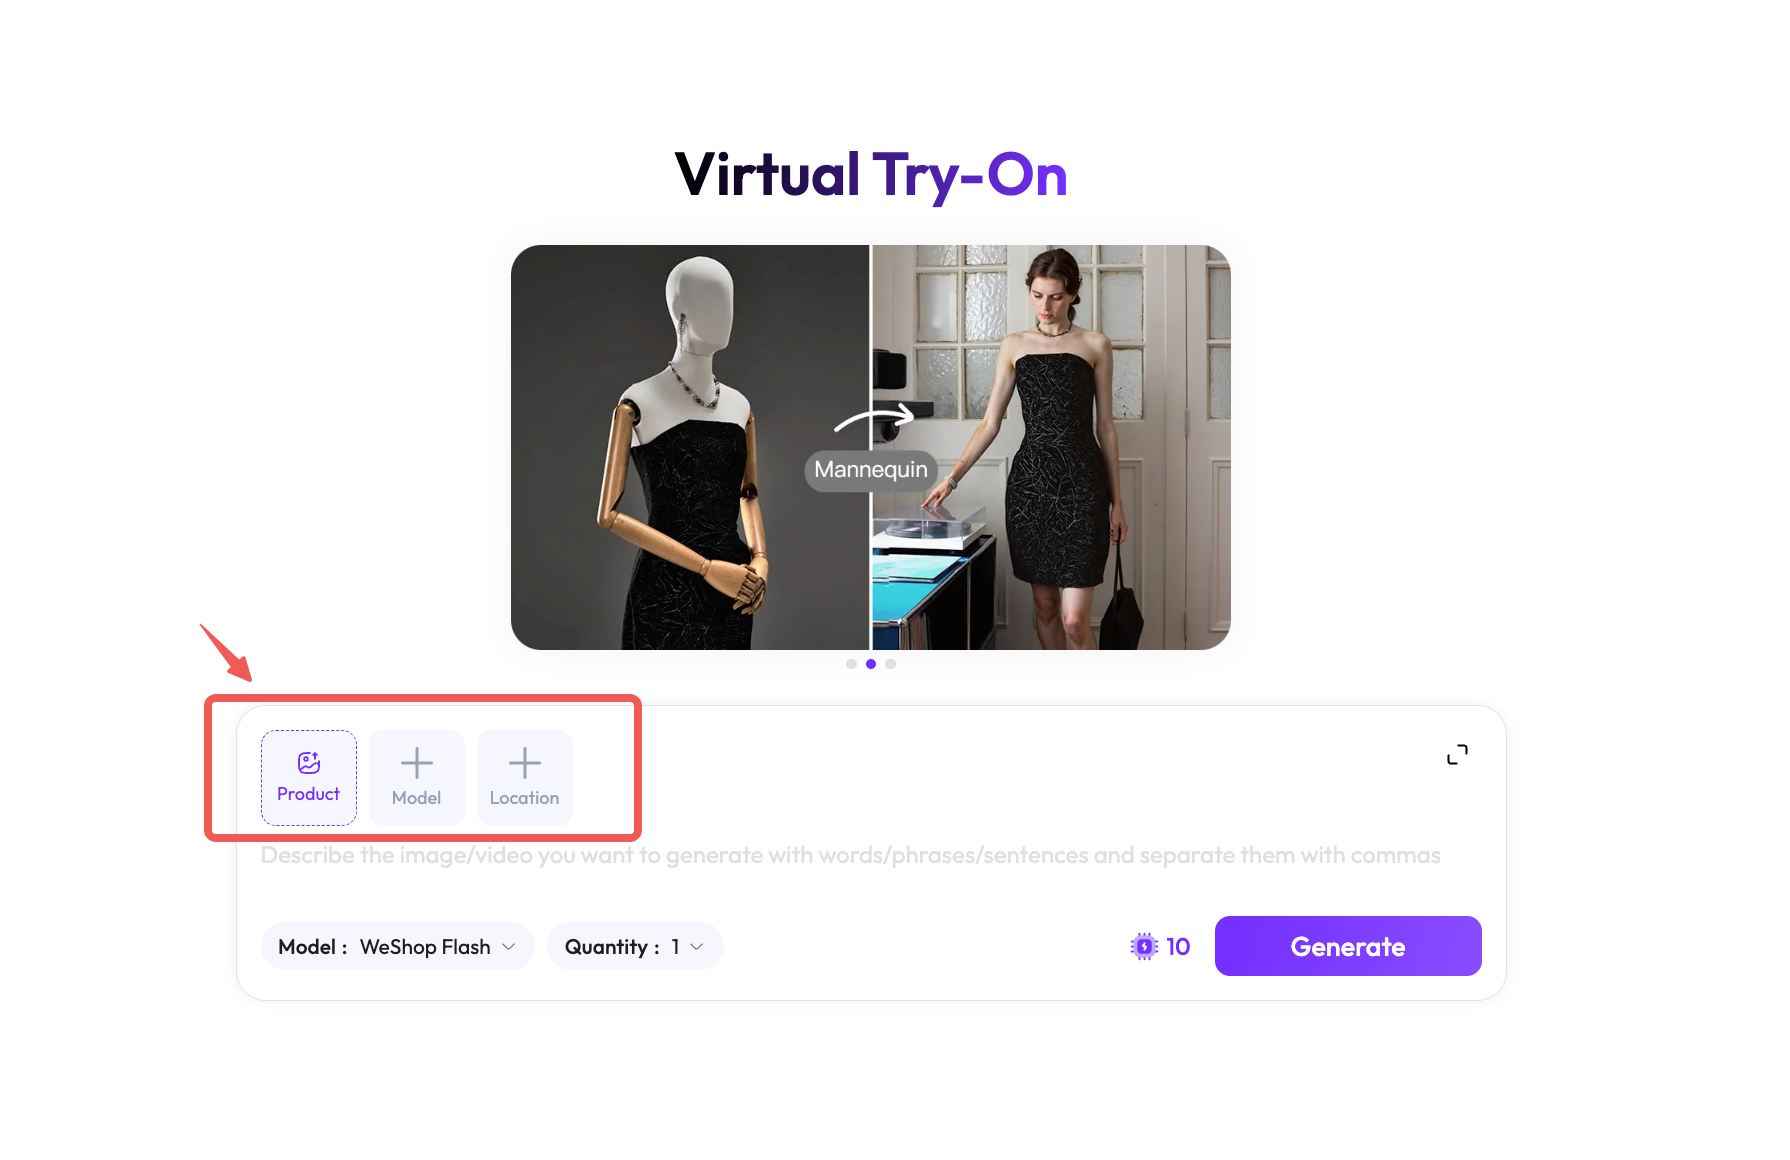 |
| Select Product to upload the garment that will be placed on the AI model. A clean, complete product image gives the tool a clearer reference for the neckline, waist, fabric, and hem. |
Step 2: Choose an AI Model
Select Model to open the AI model library. Choose a model whose pose and presentation suit the garment.
For a floor-length evening gown, use a full-body model and a natural standing pose so the neckline, waist, skirt, and train remain visible. You can also upload your own full-body model reference when you have permission to use it.
| Step 2 — Choose an AI Model |
|---|
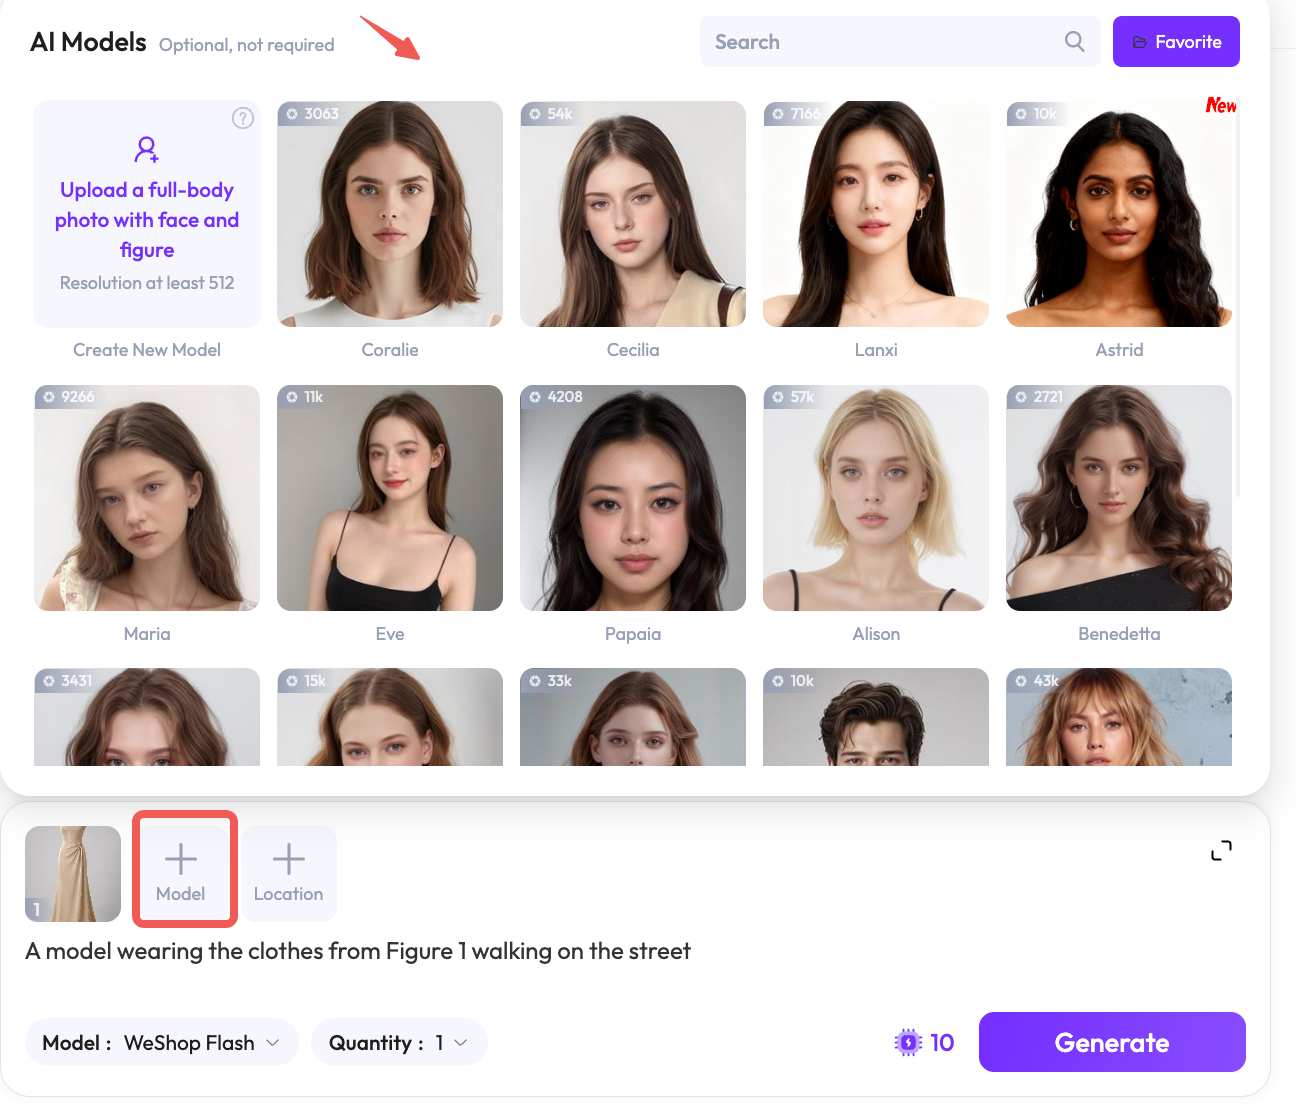 |
| Choose an existing AI model or upload an authorized full-body model reference. Select a model that can present the complete garment without obscuring important product details. |
Step 3: Choose a Location or Describe the Scene
You can define the background by choosing an AI Location, writing a scene description, or combining both options.
Option A: Choose an AI Location
Select Location to open the AI Locations library. Choose a setting that supports the product without hiding or distracting from it.
For this champagne evening gown, a warm architectural location complements the satin color while keeping the dress visually prominent.
| Step 3A — Choose an AI Location |
|---|
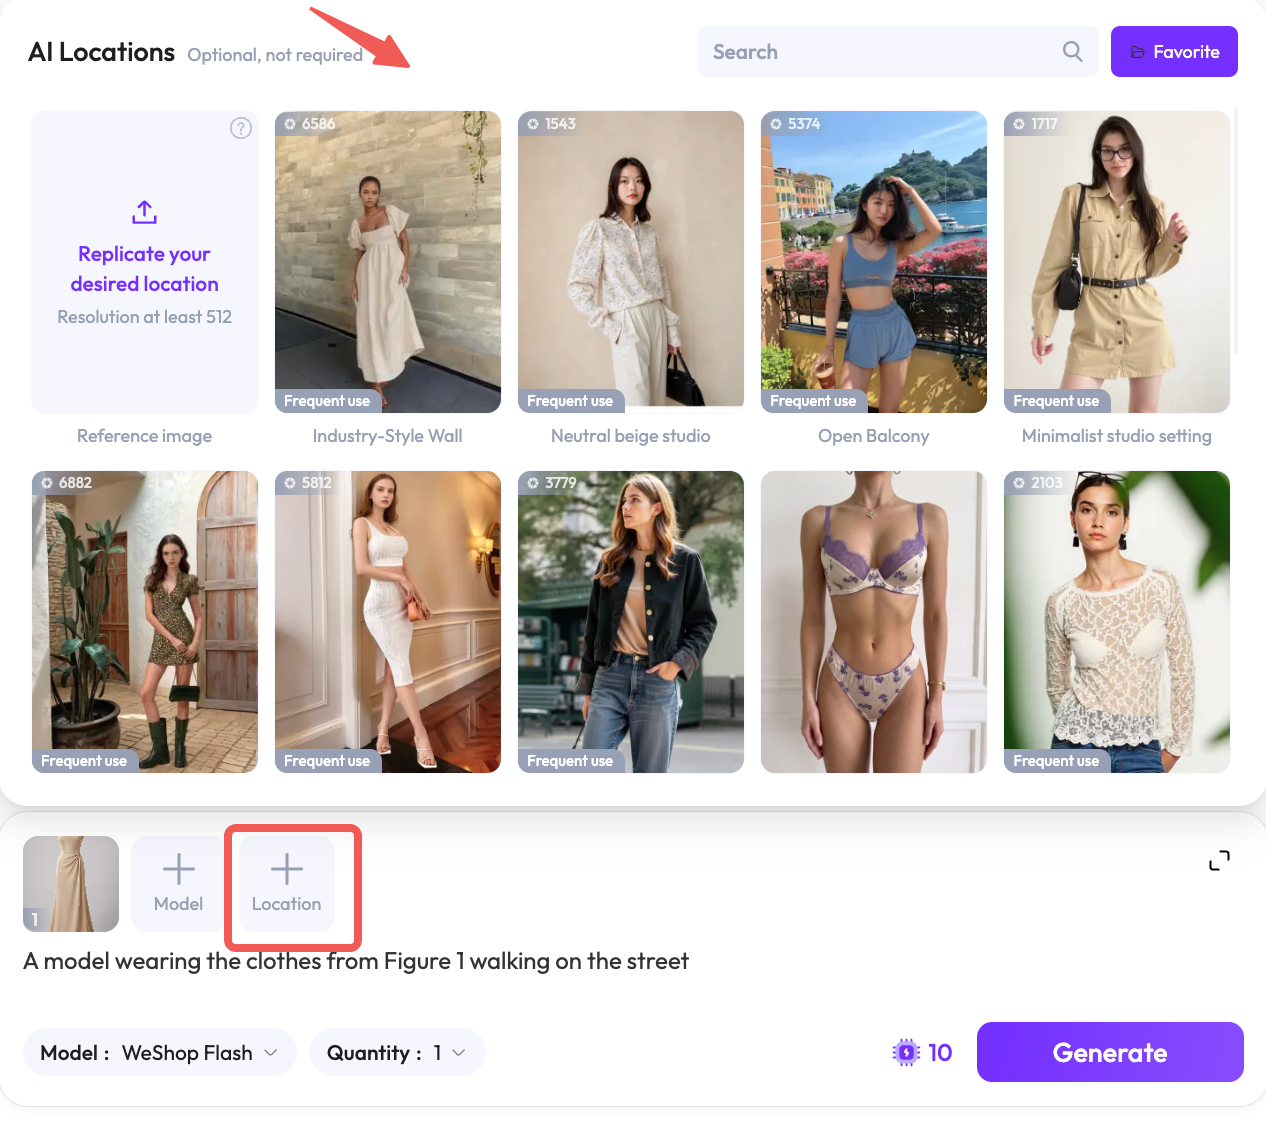 |
| Choose a preset AI location or upload an authorized reference image of the desired setting. Keep the background visually compatible with the garment and intended campaign. |
Option B: Describe the Scene
Instead of selecting a preset location, enter a written description in the prompt field. Specify the setting, lighting, pose, composition, and garment details that should remain visible.
| Step 3B — Describe the Scene |
|---|
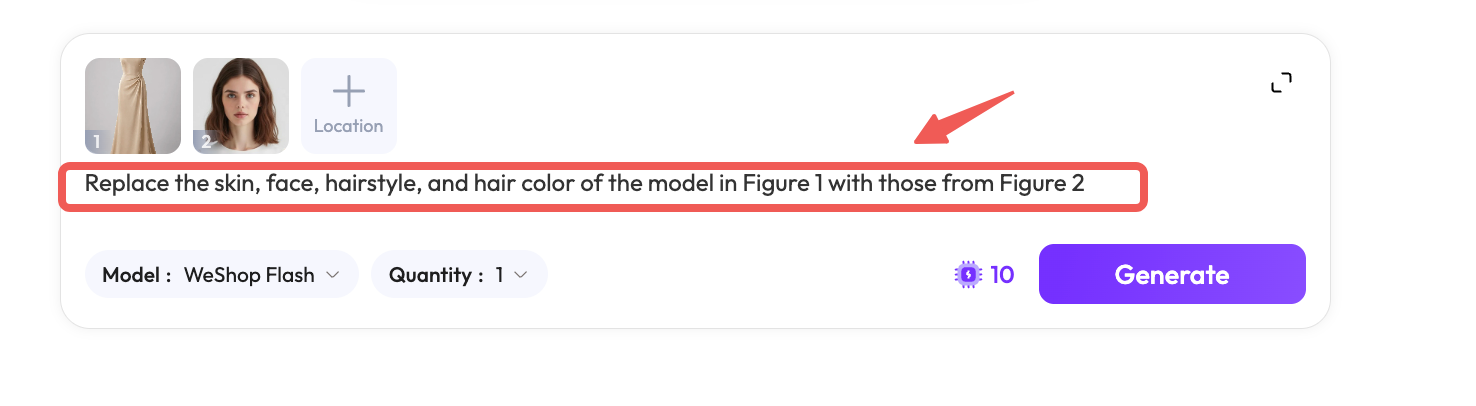 |
| Describe the intended model, location, lighting, composition, and product-preservation requirements, then review the selected inputs before generating. |
COPY-READY PROMPT
Copy the complete prompt below into WeShop AI Virtual Try-On.
Create a full-length ecommerce fashion photograph of an adult female model wearing the champagne one-shoulder satin evening gown from the input image.

SCENE
A warm sandstone architectural walkway with arches and soft natural daylight.

MODEL AND COMPOSITION
Use an adult female model in a natural, front-facing standing pose. Create an elegant editorial mood with a vertical composition. Keep the entire dress visible from neckline to hem.

PRESERVE
- Asymmetric one-shoulder neckline
- Fitted waist
- Gathered side draping
- Champagne color
- Satin sheen
- Floor-length skirt
- Subtle train

AVOID
- Added straps or sleeves
- Belts, patterns, or beading
- New garment details
- Changes to the dress color
- Changes to the original silhouette
Specific instructions help the tool distinguish between what it may create—the model, pose, lighting, and setting—and what it should retain from the product reference.
Step 4: Generate the On-Model Product Photo
Select Generate and compare the available outputs. Choose a result that presents the full garment clearly and does not introduce details that could misrepresent what the customer will receive.
In this example, the selected image places the gown on a standing model and adds a warm stone walkway. The result supplies the scale and setting missing from the isolated product photo while keeping the dress visually central.
You can try it directly using the tool on the right.➡️
Step 5: Add the Image to Shopify
After approving the result, open your Shopify admin and go to:
Products → Select the product → Media → Upload new
Shopify also supports dragging the image into the Media section or selecting an existing file. The first media item becomes the product’s featured media, so arrange the gallery deliberately. Shopify documents these options in its official guide to adding product media.
For this type of gallery, use the original product image to document the item accurately and the AI-generated image to add on-model context. Include real detail photos when customers need a closer view of the neckline, fabric, construction, or draping.
Add descriptive alt text to the generated image:
Follow the disclosure rules that apply to your market and sales channels when using an AI-generated model or setting.
Give the Product a Setting Without Losing the Product
The original image answers, “What is the dress?” The on-model image adds, “How can this dress look in a complete fashion scene?” Used together, they create a more informative Shopify product gallery without asking one generated image to serve as proof of every product detail.