









How to Animate Static Game UI with MiniMax H3: AI Image-to-Video for Game Animation
Learn how to turn a static game menu or product interface into an AI UI animation with hover states, clicks, panels, and motion using MiniMax H3.
If you only have a static game menu or interface design, how can you quickly turn it into an AI UI animation that shows menu selection, hover effects, button changes, and simple interface motion?
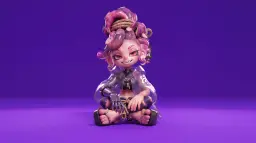
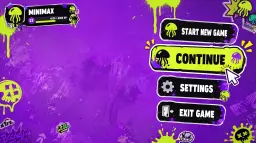
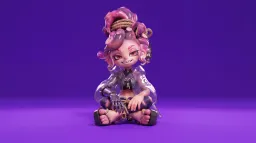
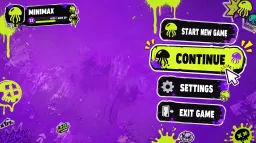
This guide uses a more specific case based on the two images above: a stylized purple game menu UI is paired with a matching 3D game character visual to create a short animated result. The UI includes options such as Start New Game, Continue, Settings, and Exit Game, while the character image helps define the overall game style, mood, and identity. The goal is to create one clear AI UI animation that can show menu hover effects, selection changes, and a stronger game-presentation feel for product demos, social posts, or early concept promotion.
|
Show Case
|
How do you implement this using Minimax H3?
Step 1: Prepare the UI Image
- Start with two clear screenshot or exported UI design.
Image 1
|
Image 2
|
- For the case in this guide, we will use one static product-page interface as the starting image and animate only the interactions that matter.
Step 2:Upload the UI Design
Open the MiniMax H3 video tool in WeShop AI and upload the UI image as your main visual reference.【You can also upload and generate directly on the right side.➡️】
In this case, the product-page screenshot controls the layout, typography, card positions, colors, and overall composition. When using reference assets with MiniMax H3, it helps to clearly explain what each uploaded image should control rather than leaving its role unclear.
You can keep the instruction simple:
@Image1 is the exact UI layout and visual-style reference. Keep the page structure, typography hierarchy, buttons, card positions, colors, and overall composition consistent.Keep the page structure, typography hierarchy, buttons,card positions, colors, and overall composition consistent.
- This gives the AI UI animation a clear boundary: animate the interface, but do not redesign it.If you are creating a website UI demo, app interaction video, or ecommerce product-page animation, the same approach works. Start with the clearest UI image you have and tell the model what should remain consistent.
Step 3:Describe the Interaction
For AI UI animation, precise instructions are more useful than a complicated prompt. Focus on three questions:
- What must stay unchanged?
- What action should happen?
- What visual response should follow?
@Image1 is the character reference image. @Image2 is the UI style reference image. [0s–2s] Use a high-angle overhead shot. The character is sitting on a highly saturated bright purple ground, as shown in Image1, looking up at the camera. Display the game menu UI on the right side: "Start New Game", "Continue Game" (highlighted), "Settings", and "Exit Game". Show the player profile "MINIMAX" in the upper-left corner. Click "Continue Game".
[2s–4s] Smoothly zoom in toward her right arm. A UI panel slides in from the right, and the "Right Arm EQUIPMENT" panel appears. Select the highlighted "Phantom Grap", then switch to "Chronos Claw". Her right hand mechanically reconfigures: the fingers spread, new claw-like knuckles lock into place, and the cyan LED lights flash brighter.
[4s–7s] The camera smoothly moves to her left side. A new UI panel slides into view, showing the "ARMAMENT CUSTOMIZATION" grid with hand, forearm, elbow, and upper arm components. The selections quickly cycle through these parts. Her left arm is disassembled and upgraded piece by piece: the forearm plate detaches, new armor slides in, the elbow joint is replaced, and the hand is reconfigured. Exposed wiring and pistons are visible during the replacement process.
[7s–8.5s] The camera pulls back to a medium shot. The "CONFIRM CONFIG" button flashes. Click it. All UI panels shrink inward and disappear. The character’s legs loosen, she adjusts her posture, and now sits in a more relaxed pose with one knee raised. Her prosthetic hand lifts naturally, showing a subtle post-configuration movement.
[8.5s–10s] A loading bar appears at the bottom of the screen and quickly fills from 0% to 100%. The highly saturated bright purple environment begins to darken. Shadows spread inward from the edges, and a warm golden light gradually appears.
[10s–15s] As she stands up, the full environment loads around her. A dense cyberpunk slum appears, with flashing neon lights, wet streets reflecting the glow, crowds moving through the space, motorcycles weaving past, and tangled overhead wires. Stacked buildings extend upward toward futuristic skyscrapers in the distance. The camera stabilizes in a third-person view behind her, showing her back. HUD elements fade in: a minimap appears in the upper-right corner, and health and ammo counters appear in the lower-left corner. A mission marker appears. She takes a step forward into the street.
❗️Do not try to include too many interactions at once. A short AI UI animation with one hover, one click, and one scroll is easier to review and refine than a long sequence containing many different page states.
Step 4:Generate Your First AI UI Animation
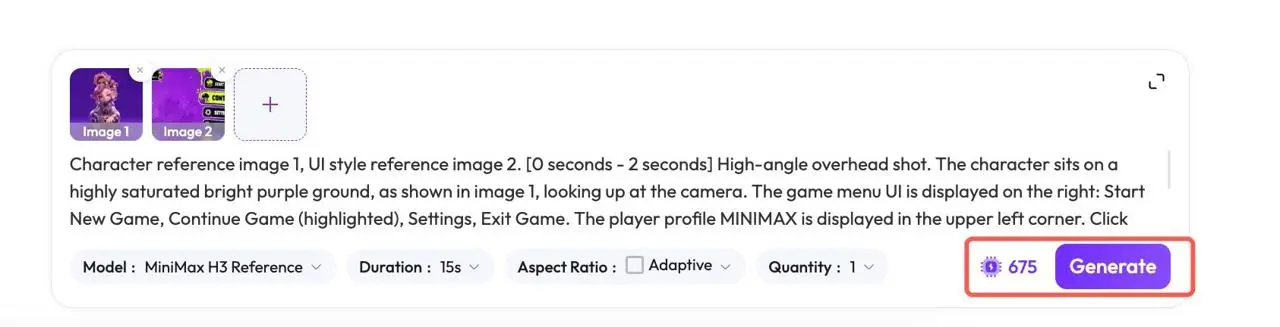
Once the image and prompt are ready, start generating your first AI UI animation. Parameters can be adjusted before generation.
| Duration:15s |
| Aspect Ratio:Adaptive |
| Quantidy:1 |
After generation, watch the full MiniMax H3 result once before changing the prompt. First check whether the overall interaction matches what you expected.
Generate
|
Step 5: Check the MiniMax H3 Result
Image 1
|
Image 2
|
Generate video
|
In the product-page case from this guide, one static UI image is enough to create a simple hover-click-scroll demonstration. The same AI UI animation workflow can be adapted to a website, app, ecommerce page, game menu, or product concept. If the first result looks good, keep the visual setup and create more versions for other buttons, cards, pages, or platform formats. Now upload your UI image to the MiniMax H3 tool on the right and create your first AI UI animation with WeShop AI.