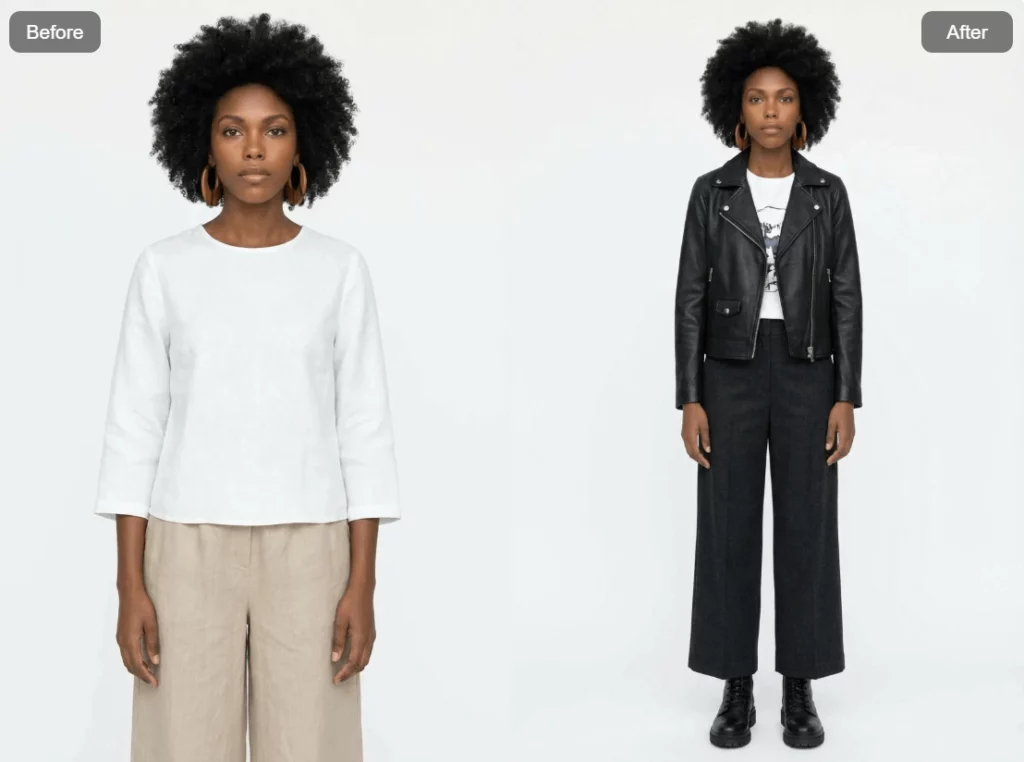
An AI outfit generator is most useful when you need more than a random clothing swap. A believable look needs internal logic. Its shape, fabric, color, shoes, and details should suit the same person and occasion.
WeShop AI’s Outfit Generator can create a new look from an uploaded person, model, or mannequin image. You can describe a style, color, or fabric direction. The tool then builds a new outfit on the subject. However, treat the first result as a draft. It is not a fixed final asset.
The practical question is not simply, “Can AI change this outfit?” Ask what should change. Then decide what must stay the same and where the final image will be used. Once those choices are clear, the output is easier to direct and review.
An Outfit Is a System, Not a Filter
A filter changes the surface of an image. Styling changes how its parts work together. For example, a cropped jacket affects the waistline. Wide trousers change the balance of the shoes. A heavy fabric also needs different folds from a soft knit.
Before opening an AI outfit generator, define four parts of the look:
| Styling layer | The decision to make | A useful direction |
|---|---|---|
| Silhouette | How the outfit sits around the body | Relaxed upper layer with a clean straight leg |
| Material | How the clothes should fold and reflect light | Matte wool, structured cotton, or washed denim |
| Palette | How the pieces relate in color | Charcoal, slate blue, and one muted silver accent |
| Context | Why the person is dressed this way | Creative office, airport travel, evening event, or street content |
This approach prevents a common failure. The coat, trousers, shoes, and extras may look fine alone but fail as one outfit. Instead of asking for “a fashionable look,” give the model a reason for each major choice. handles the logic for you.
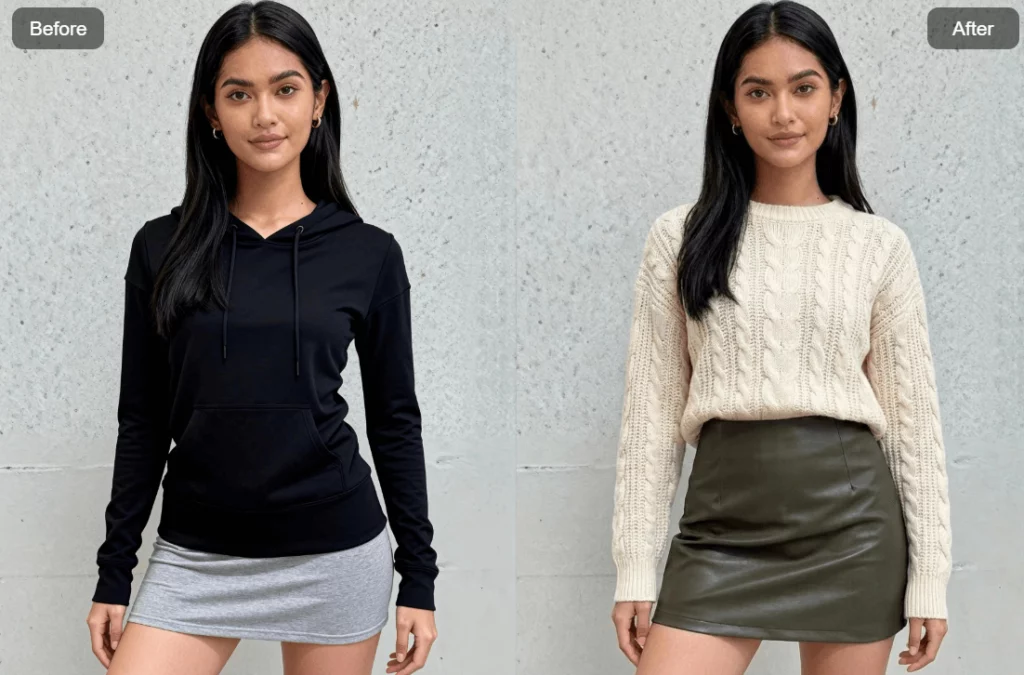
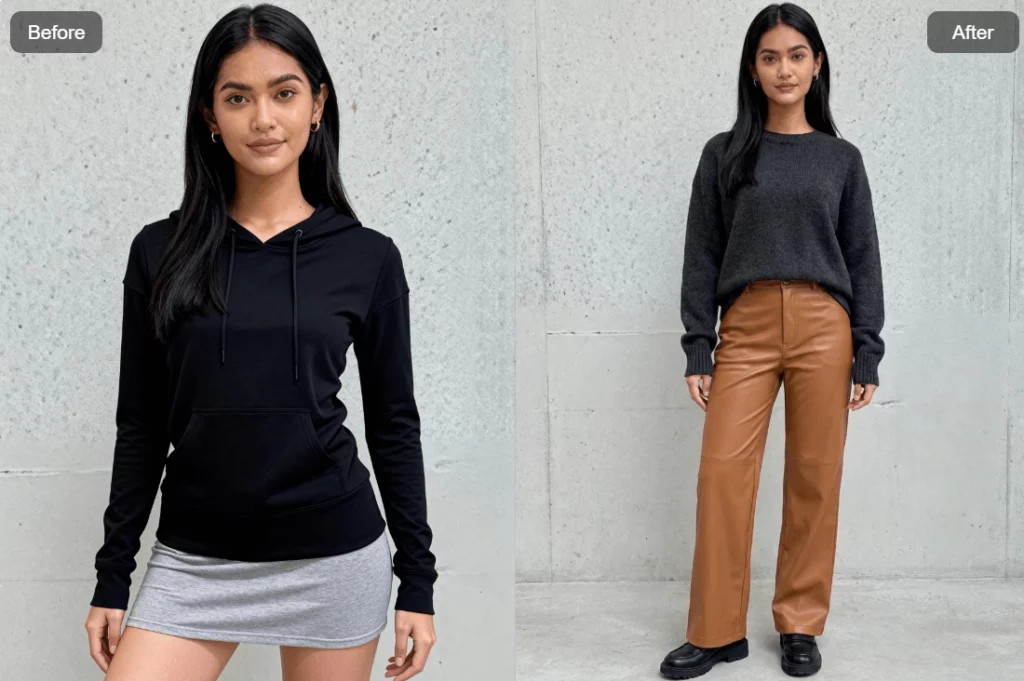
A Better Brief for an AI Outfit Generator
The strongest prompt reads like a stylist’s note, not a pile of trend words. It should set a boundary first. Then it can describe the new wardrobe direction.
Use a compact brief with these fields:
Preserve
Name the subject and scene details that should stay the same.
Redesign
State whether the full outfit or only selected clothing categories may change.
Coordinate
Describe the overall shape, palette, fabric behavior, and occasion as one system.
Avoid
List details that would make the result unusable, such as logos, extra bags, dramatic jewelry, or a changed pose.
Destination
Say whether the result is for a styling board, social post, campaign draft, or ecommerce concept.
Here is a complete example:
Create a complete smart-casual outfit for a creative office. Preserve the person’s face, hairstyle, body proportions, pose, camera angle, and background. Use a charcoal cropped jacket, a fine-knit slate top, straight dark trousers, and simple black leather shoes. Keep the fabrics matte and the palette low-saturation. Do not add logos, a hat, a handbag, jewelry, or text. The result will be used as a vertical campaign concept.
This prompt does not ask the AI to guess what “good style” means. Instead, it defines the job, the visual order, and the limits.
The Preserve Line Is More Useful Than Another Trend Word
Words such as “luxury,” “chic,” or “editorial” can point in many ways. A preserve line is more direct. It tells the AI which parts are not open to change.
Still, a written limit is not a guarantee. After generation, compare the face, body shape, pose, hands, scene, and crop with the source. If one area has drifted, revise that area alone or return to the source. Do not polish a result that has already lost the subject.
The Source Photo Sets the Ceiling
An AI outfit generator can invent clothing details. However, it cannot recover every detail hidden in the source. The input controls how clearly the tool can read the body, clothing edges, and scene.
Green-light input: The person is sharp, the pose is stable, and the main clothing areas are visible. The hands do not cover the waist. Also, the legs and shoes are not cut off without a reason.
Yellow-light input: One arm crosses the torso, a bag covers the hip, or strong shadows hide the body shape. The image may still work. However, expect more drift around blocked areas.
Red-light input: The subject is blurred, heavily cropped, hidden behind objects, or mixed with several overlapping people. In this case, choose another source instead of trying to repair every uncertainty through a longer prompt.
In addition, image quality is only one factor. The crop must match the final use. A full-body source is useful for testing shoes and body balance. By contrast, a waist-up image works when the campaign only needs upper-body styling.
Four Decisions That Give the Outfit a Point of View
Start With the Destination
A product listing, mood board, and social post do not need the same outfit. A listing concept needs clear clothing edges. Meanwhile, a campaign image can support stronger layers or extras. Decide the final use before choosing the styling language.
Direct the Silhouette Before the Details
Silhouette controls the first impression. Choose fitted, straight, oversized, cropped, elongated, or layered before naming buttons and trims. Otherwise, small details may compete with an unclear overall shape.
Describe Fabric as Behavior
Do not stop at “silk” or “denim.” Explain how the fabric should behave. You can ask for crisp cotton with clean folds, washed denim with a dry surface, or fluid satin with soft highlights. As a result, the fabric choice becomes clear, not vague.
Set a Styling Boundary
Say whether the AI may add footwear, outerwear, jewelry, or a bag. If you want a clothing-only concept, state that clearly. Likewise, if one accessory is essential, name it and exclude the rest.
AI Outfit Generator Prompt Pattern for a Coherent Look
You can reuse this sentence pattern without turning every prompt into the same outfit:
Create a complete [occasion] look with a [silhouette] shape. Use [main piece], [supporting piece], and [footwear] in [palette]. Render the clothing in [fabric behavior]. Preserve [subject and scene details]. Avoid [unwanted additions]. Prepare the image for [destination].
In fact, the brackets are not a keyword exercise. They make you choose what affects the result. Therefore, each version can serve a different purpose while the source stays the same.
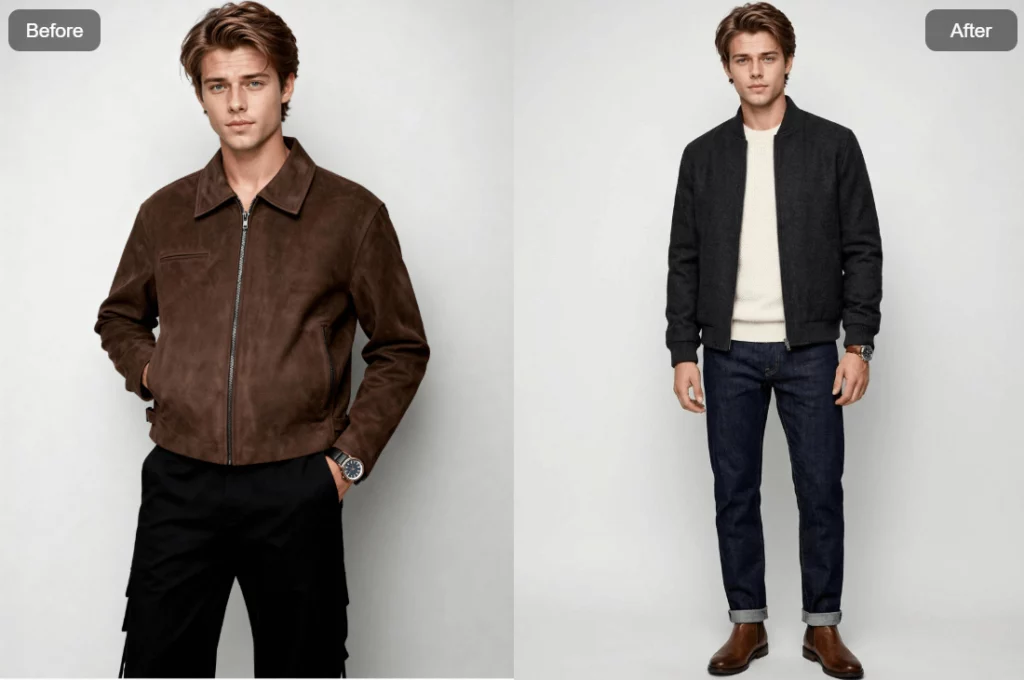
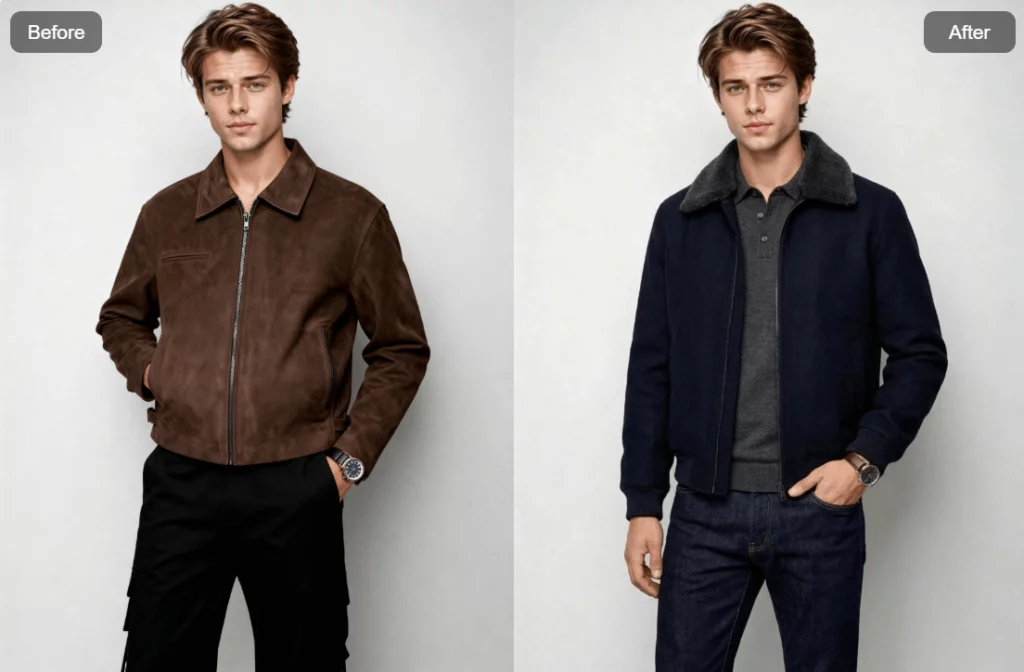
Review AI Outfit Generator Results Like a Stylist
Do not judge an image only by whether the new clothes look attractive. Instead, read it from top to bottom. Ask whether the outfit behaves like clothing on a body.
- Shoulder line: Does the jacket or top sit on the actual shoulders, or does it widen the body without structure?
- Closures and layers: Do collars, lapels, buttons, waistbands, and hems connect in a believable order?
- Contact points: Are hands, sleeves, pockets, bags, and crossed limbs separated cleanly?
- Fabric logic: Do folds follow the pose, gravity, and material weight?
- Footwear: Do both shoes share the same design, scale, and perspective?
- Subject fidelity: Are the face, proportions, posture, and crop still suitable for the intended use?
Next, zoom out. The full outfit should have one main shape and a controlled palette. If every item demands attention, simplify the brief. On the other hand, if the look feels generic, change one useful layer. Try the outerwear shape or fabric contrast.atural, not stitched together.
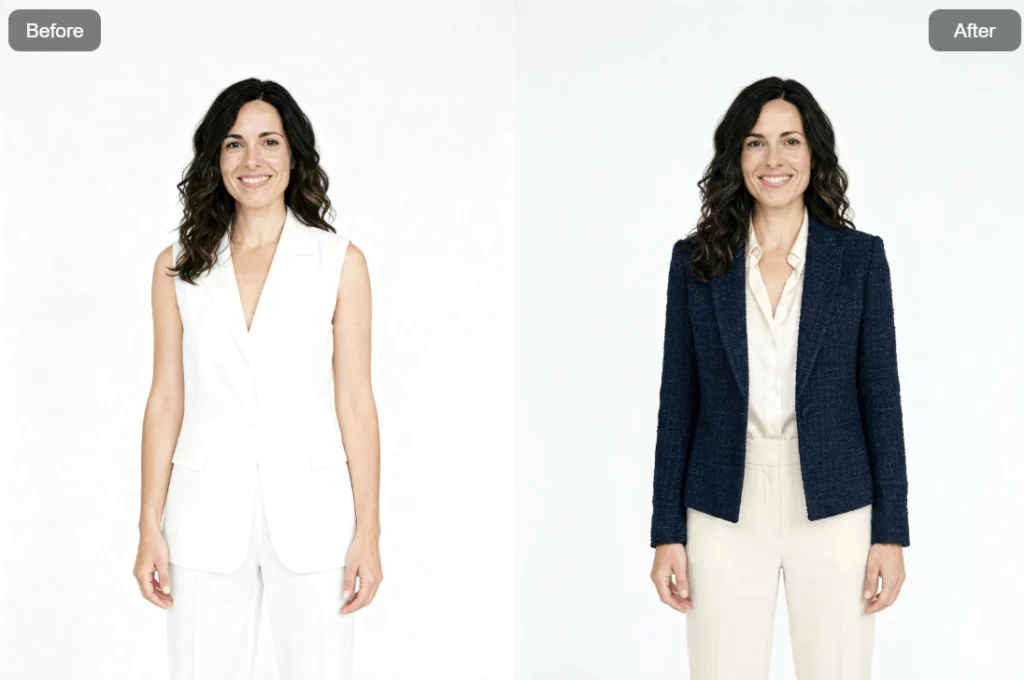
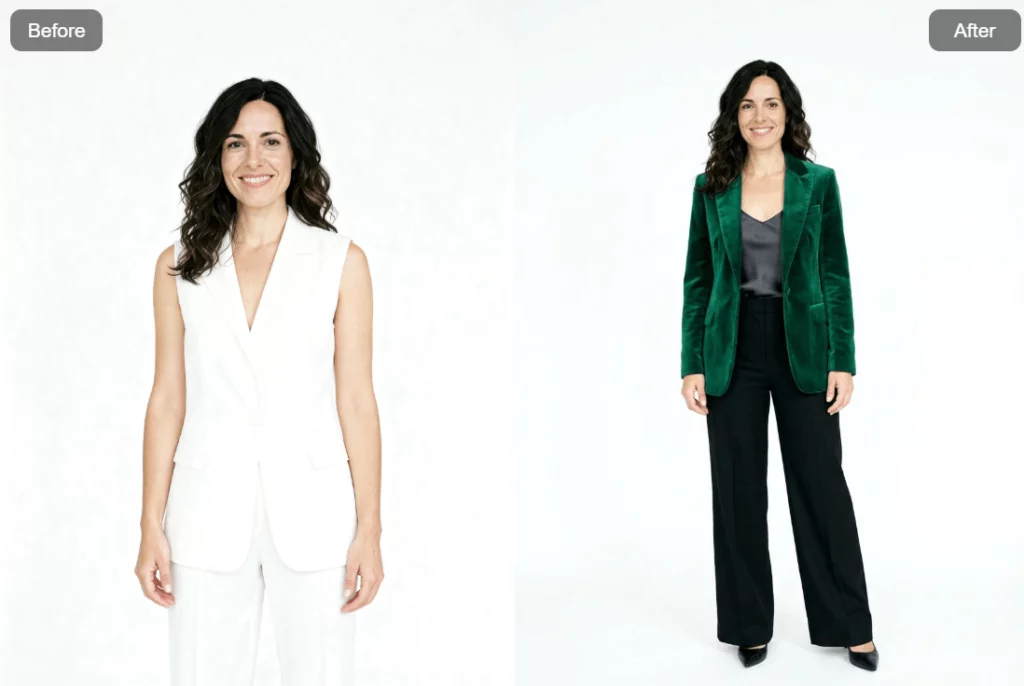
Where an AI Outfit Generator Earns Its Place
An AI outfit generator is strongest during early idea work. It helps teams compare looks before they commit to a shoot, sample, or full campaign.
For fashion concept work, one source can support several shape and fabric ideas. These images can make a direction clear during a team review. However, they are not production specs.
For ecommerce teams, the tool can explore looks around a product group or collection mood. It can test whether a story should feel minimal, formal, sporty, or seasonal. Still, do not present an AI-made garment as a real SKU unless it has been matched and checked against stock.
For social content, one subject can anchor several looks while the campaign keeps the same visual base. The versions work best when each has a clear role, such as weekday officewear, weekend travel, or an evening launch.
For personal styling, the result can act as a visual suggestion. It may reveal a useful shape or palette. Yet fit, comfort, and real product choice still need human judgment.
When an AI Outfit Generator Is Not the Right Tool
Outfit Generator and Virtual Try-On solve different problems. Therefore, choosing the correct tool protects the final asset.
| Your real need | Better starting point |
| Invent a complete new styling direction | Outfit Generator |
| Explore silhouettes, colors, or fabrics | Outfit Generator |
| Put a specific real garment on a model | Virtual Try-On |
| Show an exact SKU for a product page | Virtual Try-On, followed by a fidelity review |
| Change the person and the setting together | Swap Model & BG |
This difference matters. Ideas allow creative freedom. Product claims need proof. Therefore, use the AI outfit generator for concept work and a garment-specific workflow when the real item must stay exact.
Put One Photo Through a Real Styling Test
Choose a source image with a clear subject and a useful crop. Then write one outfit brief around a real use. Keep the preserve line visible. Generate the first look and review it like a stylist, not a spectator.
If the shape, fabrics, and context agree, the look has a reason to exist. If they do not, revise the choice that broke the system. Do not add more fashion adjectives.
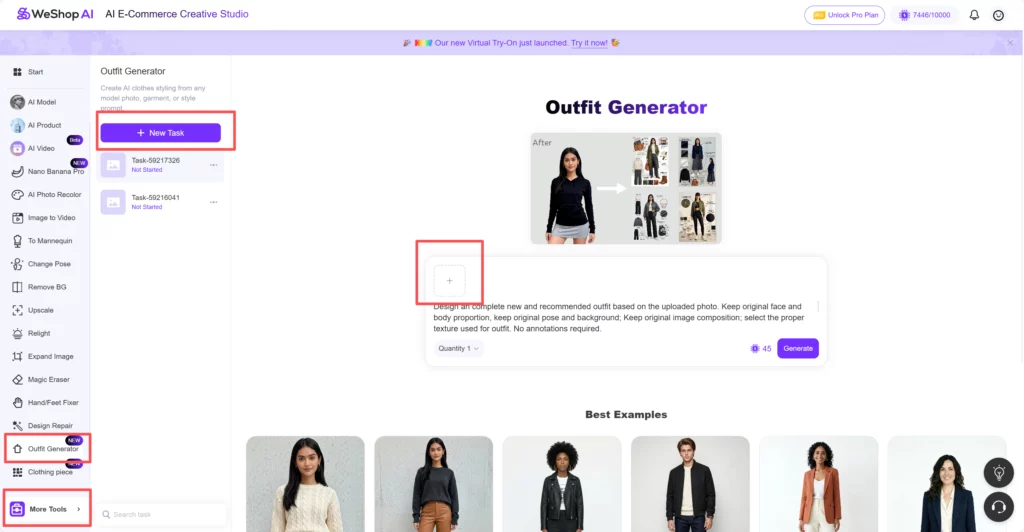
Finally, open Outfit Generator in WeShop AI when you are ready to turn one photo into a focused look draft. Let the AI suggest the wardrobe. Keep the creative limits and final choice in human hands.
Short excerpt: Use WeShop AI’s Outfit Generator to create coherent fashion concepts from one image with clearer prompts, stronger styling logic, and practical review controls.