

An AI skin tone editor can help correct uneven lighting, adjust visible skin tone more naturally, and create cleaner portrait results without heavy manual retouching. For ecommerce teams, content creators, photographers, and marketers, the real goal is not simply to make skin lighter or darker. It is to create a result that still looks believable, balanced, and consistent with the original image.
This guide shows how to use WeShop AI’s Skin Color Changer in a practical way. It explains what the tool does, when to use it, how to write better prompts, what to review before publishing, and how to avoid unnatural edits.

If your source image is already strong but the skin tone looks uneven because of exposure, lighting, or color cast, an AI skin tone editor can save time. It can also help teams test controlled tonal variations while keeping texture, clothing, and facial details more stable.
At the same time, good results depend on restraint. A strong AI skin tone editor workflow should improve the image without making the editing obvious.
What an AI Skin Tone Editor Actually Does
An AI skin tone editor changes visible skin tone in a photo while trying to preserve the person’s identity, facial details, lighting structure, and overall realism. In WeShop AI, the Skin Color Changer workflow is designed for users who want a cleaner and more controlled result without manually painting masks or adjusting multiple retouching layers.
In practical terms, an AI skin tone editor can help you:
- adjust visible skin tone more evenly
- correct color casts caused by mixed lighting
- keep face, neck, and hands more consistent
- preserve natural-looking skin texture
- create cleaner portrait or ecommerce visuals faster
The best use case is not dramatic transformation. It is controlled correction.
Why Natural Skin Tone Editing Matters
Skin tone is one of the first things people notice in a portrait. If the face is warmer than the neck, if the hands appear gray, or if strong light washes out some areas and leaves other areas too dark, the whole image can feel less polished.
This matters even more in ecommerce and branded content. If a campaign image looks over-processed, trust drops. If a product photo with a model looks unrealistic, it becomes harder for viewers to focus on the product itself.
Typical problems include:
- mismatched face and neck tone
- uneven tone caused by shadows or indoor lighting
- overexposed skin that loses natural depth
- retouching that becomes too smooth or artificial
- edits that spill into lips, hairline, or clothing
A good AI skin tone editor solves these issues by making controlled changes instead of applying a blunt beauty filter.



AI Skin Tone Editor Workflow in WeShop AI
The most effective AI skin tone editor workflow is simple: start with a clean image, make one focused change, check the result carefully, and refine only if needed.
AI Skin Tone Editor Step 1: Start with a Clean Source Image
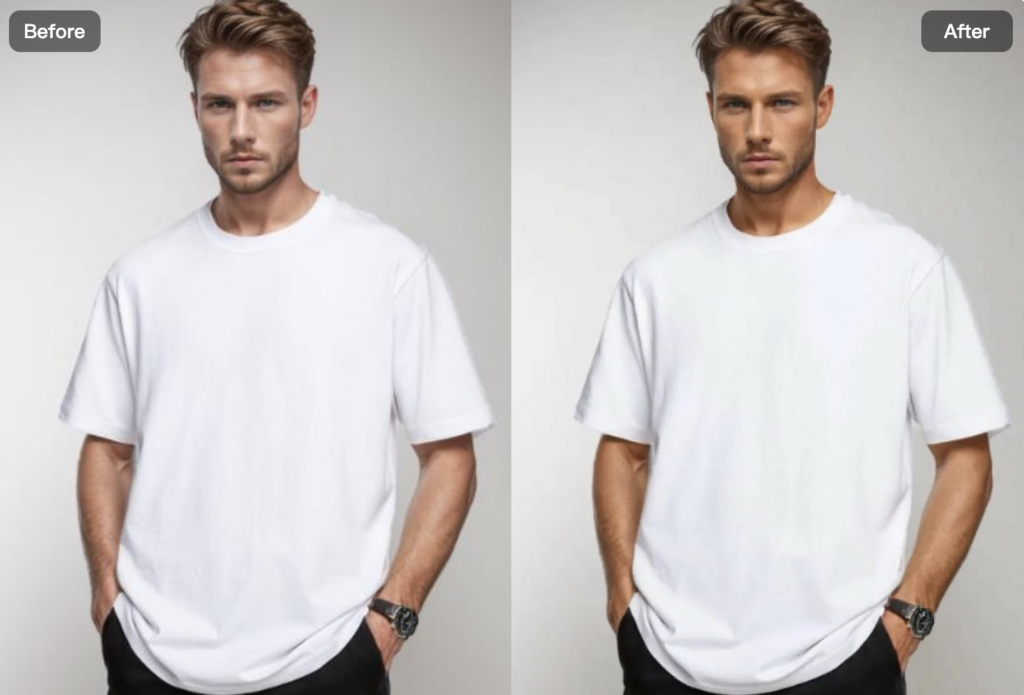
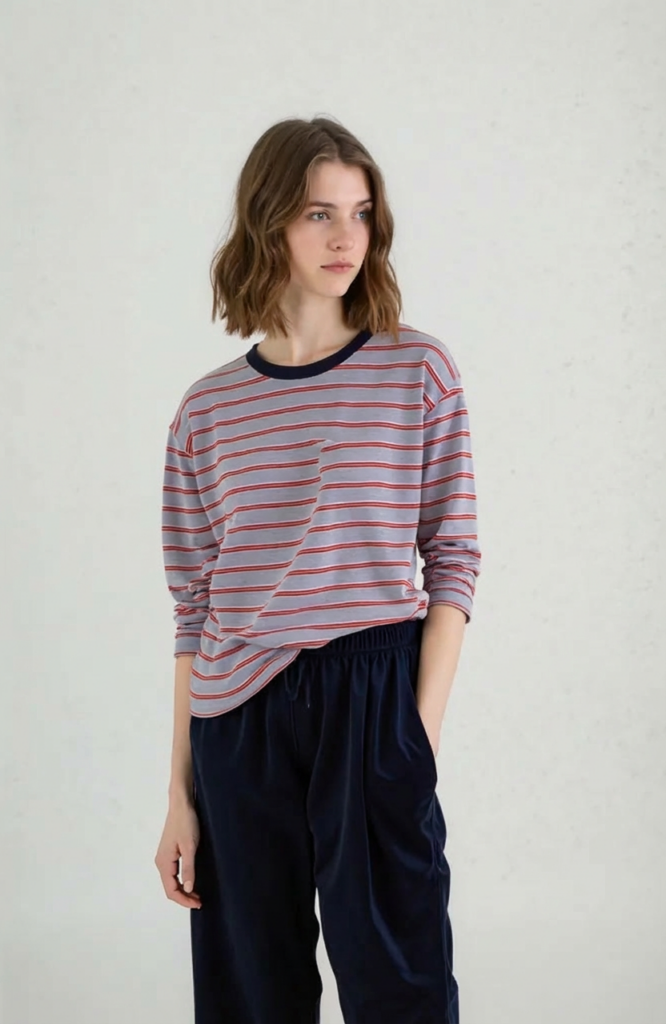
Upload a clear portrait, half-body, or full-body image with visible skin areas. Avoid heavily filtered photos, extreme makeup looks that hide the skin, or low-resolution images where texture is already lost.
Before you generate anything, check these details:
- face, neck, and hands are visible
- the original lighting direction is clear
- hair, clothing, and accessories are recognizable
- the image is not overly blurred or overexposed
If you are editing an ecommerce image, also check product details. Clothing color, print, logos, and textures should remain unchanged. An AI skin tone editor result is not useful if the skin looks better but the product changes.
AI Skin Tone Editor Step 2: Upload and Write a Specific Prompt
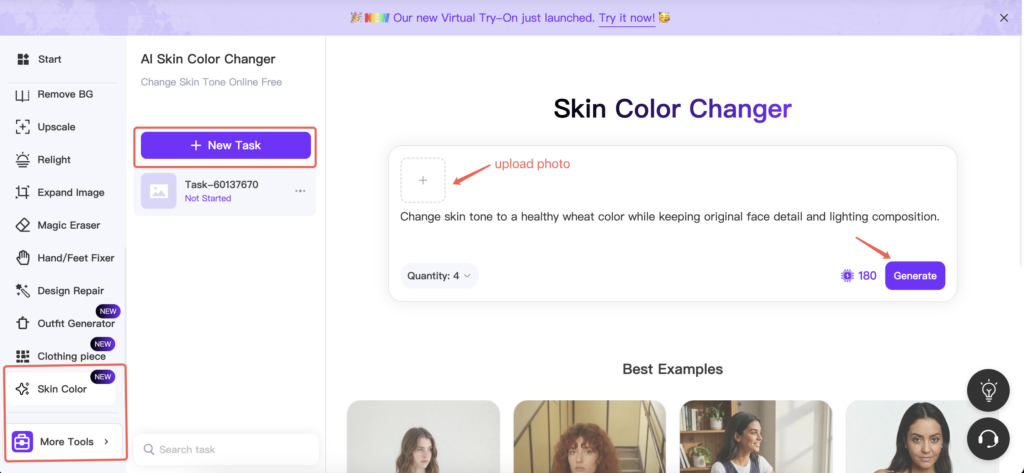
The quality of the prompt matters. A weak prompt such as “make skin darker” or “change skin tone” gives the system too little control. A stronger AI skin tone editor prompt should explain:
- what tone you want
- which visible skin areas should change
- what details should stay unchanged
- what kind of result to avoid
A simple prompt structure is:
Target tone + skin coverage + preserve identity + preserve texture + preserve lighting + do-not-change details
For example:
Prompt example 1
Adjust the visible skin tone across the face, neck, and hands to a warmer golden-brown tone. Preserve facial identity, hair, clothing, and original lighting. Keep natural skin texture and smooth transitions.
Prompt example 2
Even out the visible skin tone and remove the cool gray cast caused by indoor lighting. Keep the face, makeup, hairline, background, and clothing unchanged. Preserve realistic shadows and natural texture.
A better AI skin tone editor prompt usually improves the first result more than repeated random regeneration.
AI Skin Tone Editor Step 3: Generate One Controlled Version First
Do not try to change everything at once. If you also want a new background, a different crop, or stronger beauty retouching, do those in separate steps.
A controlled AI skin tone editor workflow should test one main change first. That makes it easier to see whether the issue is truly fixed and whether the tool preserved the original realism.
Once the first version is generated, compare it with the source. Ask:
- does the face still look like the same person?
- do face, neck, and hands match more naturally?
- did the edit affect hair, lips, teeth, or clothing?
- is the result still believable under the original lighting?
AI Skin Tone Editor Step 4: Review the Result at Normal Size and at Zoom
Some edits look fine at first glance but show clear problems when you zoom in. A good AI skin tone editor review should include both normal-size inspection and close review.
Check these areas carefully:
- skin edges around the jawline and hairline
- under-eye areas and forehead highlights
- hands, fingers, and wrists
- lips, teeth, and eye makeup
- neckline, shoulders, and exposed arms
- garment edges close to skin
You should also check whether the result becomes too orange, too red, too gray, or too flat. Natural tone editing should keep highlight and shadow structure intact.

What Makes a Strong AI Skin Tone Editor Result
A strong AI skin tone editor result does not just “look different.” It looks consistent.
The best results usually have four qualities:
Natural Texture Preservation
Skin should still show natural detail. It should not turn into a plastic, blurred, or over-smoothed surface.
Even Tone Without Hard Edges
The transition between edited and non-edited areas should remain smooth. You should not see obvious borders around the jaw, ears, or neckline.
Identity Preservation
The person should still look like the same person. Facial structure, expression, and small recognizable details should stay stable.
Stable Surrounding Details
Hair, eyebrows, makeup, clothing, jewelry, and background should remain consistent unless you explicitly change them.
These checks matter because an AI skin tone editor is only helpful when the overall image still feels trustworthy.
Common AI Skin Tone Editor Problems and How to Fix Them
Even a good AI skin tone editor can produce weak results if the prompt is vague or the source image is difficult.
Here are the most common issues:
The Result Looks Too Warm or Too Orange
Use a softer description. Instead of “deep bronze skin tone,” try “subtle warm golden tone” or “even the visible skin tone with neutral warmth.”
The Face and Neck Still Do Not Match
Ask specifically for the face, neck, and hands to be adjusted together. Mention “even visible skin tone across all exposed skin.”
Texture Looks Too Smooth
Tell the AI skin tone editor to preserve natural texture, pores, and realistic lighting. Avoid combining heavy beauty language with a tone adjustment request.
Non-Skin Areas Also Change
Add a do-not-change instruction. Name the elements that must remain stable, such as hair, lips, eyes, clothing, jewelry, and background.
Who Should Use an AI Skin Tone Editor
An AI skin tone editor is useful for more than one type of user.
It is especially helpful for:
- ecommerce sellers working with model images
- fashion and beauty teams creating campaign content
- portrait photographers doing light correction
- social media managers improving visual consistency
- designers who need clean, realistic human images
- everyday users who want a more balanced portrait without advanced retouching
For ecommerce teams, the tool can be useful when product images need cleaner visual balance but must still keep clothing details accurate.


Responsible Use of an AI Skin Tone Editor
Because this is a human-attribute edit, it should be used carefully. A responsible AI skin tone editor workflow should improve the image without making misleading claims about a person’s real identity or ethnicity.
Use images you have permission to edit. Avoid using the tool to create deceptive identity changes. For commercial work, use tone editing to solve a visual problem or create a controlled creative variation, not to replace authentic representation.
Tips for Better AI Skin Tone Editor Results
To get stronger results from an AI skin tone editor, follow these practical tips:
- start with a well-lit image
- make subtle changes before stronger ones
- preserve identity, texture, and lighting in the prompt
- review face, neck, and hands together
- keep clothing and product details unchanged
- compare source and output side by side
- create variations only after one version passes review
In most cases, the most believable result is not the strongest edit. It is the one that looks natural enough that people focus on the image, not on the retouching.
Final Takeaway
A useful AI skin tone editor should help you make skin tone adjustments that still look realistic, balanced, and commercially usable.
With WeShop AI’s Skin Color Changer, the best workflow is to use a clean source image, write a specific prompt, generate one controlled version first, and inspect the result carefully before publishing. When identity, skin texture, surrounding details, and product fidelity remain stable, the edit is much more likely to feel natural.
If you want a cleaner portrait or a more balanced model image without heavy manual retouching, an AI skin tone editor can become a practical part of your workflow.
Go to WeShop AI For Exploration:


