An AI hands and feet fixer should not be treated as a “make everything perfect” button. It is a local repair tool. Its job is to correct a defined hand or foot flaw while leaving the rest of the image stable. That distinction matters in fashion, footwear, jewelry, and accessory images.
Hands and feet are often product-contact zones. Fingers may hold a bag, touch a sleeve, or frame a ring. Feet may sit inside sandals, press against an insole, or cast a shadow beside a shoe. Therefore, a repair can affect both anatomy and product truth.
The safest workflow starts with diagnosis. First, decide whether the flaw is local. Then, repair only the failed area. Finally, compare the result with the source at full size. This guide uses a six-point anatomy gate to make that review clear and repeatable.

AI Hands and Feet Fixer: Repair or Regenerate?
Not every bad hand or foot is a good repair target. A local fix works best when the pose, limb direction, scene, and product are already sound. In contrast, a full regeneration may be safer when the whole limb is wrong or the body has no believable balance.
Use this triage table before editing:
| Decision | Typical signal | Best response |
|---|---|---|
| Local repair | One extra digit, fused toes, a blurred joint, or a small shape error | Mask or select only the failed area and generate a repair. |
| Repair with caution | The hand holds a bag, the foot sits in a shoe, or jewelry crosses the skin | Repair locally, then compare product shape, contact, and branding. |
| Regenerate the base | The wrist, ankle, arm, or leg points in the wrong direction | Return to the earlier generation and use a simpler pose. |
| Reject the image | Hands or feet are too small, hidden, cropped, or low-detail to assess | Choose another base image instead of inventing missing anatomy. |
The current WeShop AI Hands & Feet Fixer is designed for flaws such as extra fingers, fused digits, odd joint bends, missing toes, and distorted proportions. Its current guide describes an upload, mask, and generate workflow. However, that does not mean every image needs a repair or that one repair will solve every defect.
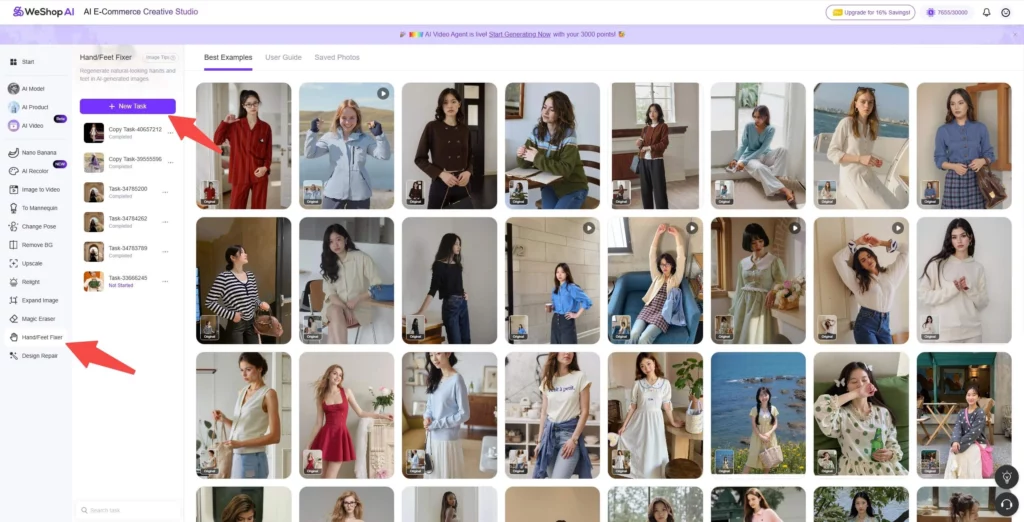
Use the AI Hands and Feet Fixer on a Local Defect
Upload the image only after the base result passes a full-body check. Then select or mask the smallest area that contains the flaw. Include enough wrist, ankle, shoe, or nearby skin to rebuild a clean transition. Yet avoid a mask so large that it changes clothing, products, or the full pose.
After the repair, compare three views:
- Close view: digit count, joint shape, skin edge, and product contact;
- Full image: body balance, hand or foot scale, light, and visual focus;
- Final crop: what buyers will see on the product page, ad, or social post.
The Six-Point Anatomy Gate
The six checks below turn “this looks strange” into a useful diagnosis. They also give each before-and-after image a clear job.
1. Count: Are the Digits Complete and Separate?
Start with the simplest test. Count the visible fingers or toes. Then inspect the spaces between them. Extra digits, merged toes, repeated nails, and unclear gaps are common local defects. However, do not force a full count when the pose hides part of the hand or foot. Occlusion must still make sense.
The first foot pair focuses on toe clarity. Judge the result by structure, not sharpness alone. Cleaner detail is useful only when the toe count, spacing, and direction look natural.
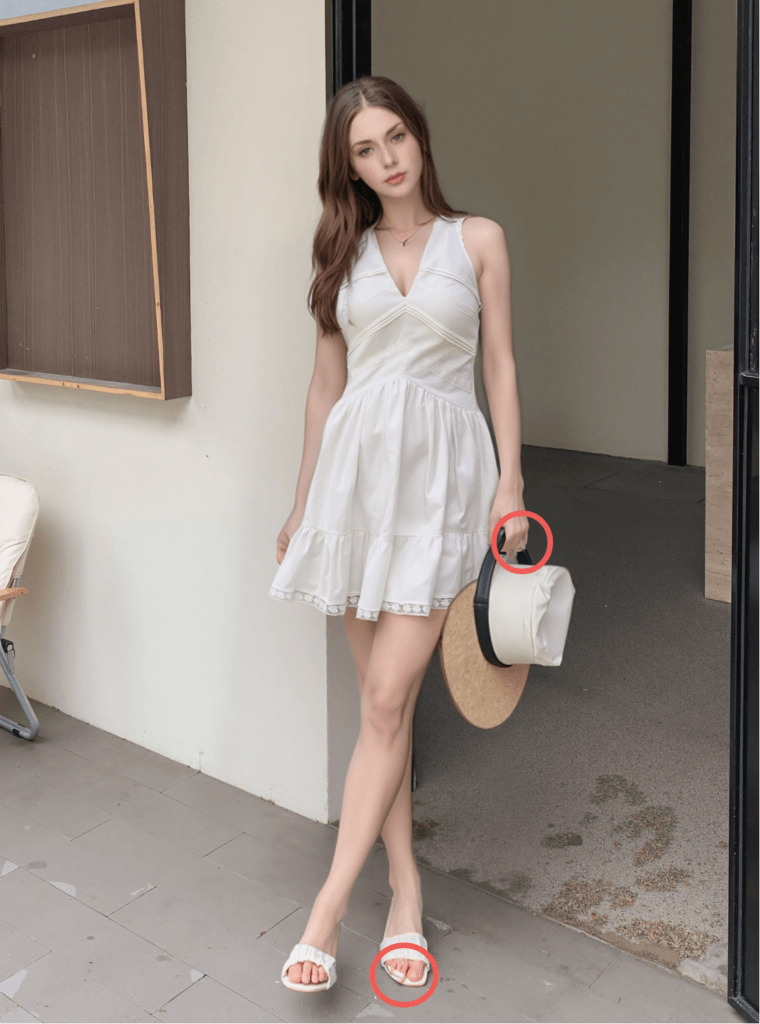

2. Joint: Does the Bend Follow the Pose?
A correct digit count can still look wrong. Next, trace the line from wrist to palm or from ankle to foot. Check whether the joints bend in the same direction as the pose. Also, compare the size of the repaired area with the opposite hand or foot when both are visible.
Small or distant feet require extra care. A repair may create crisp toes that feel too large for the body. Therefore, review scale at full-image size, not only in a zoomed crop.
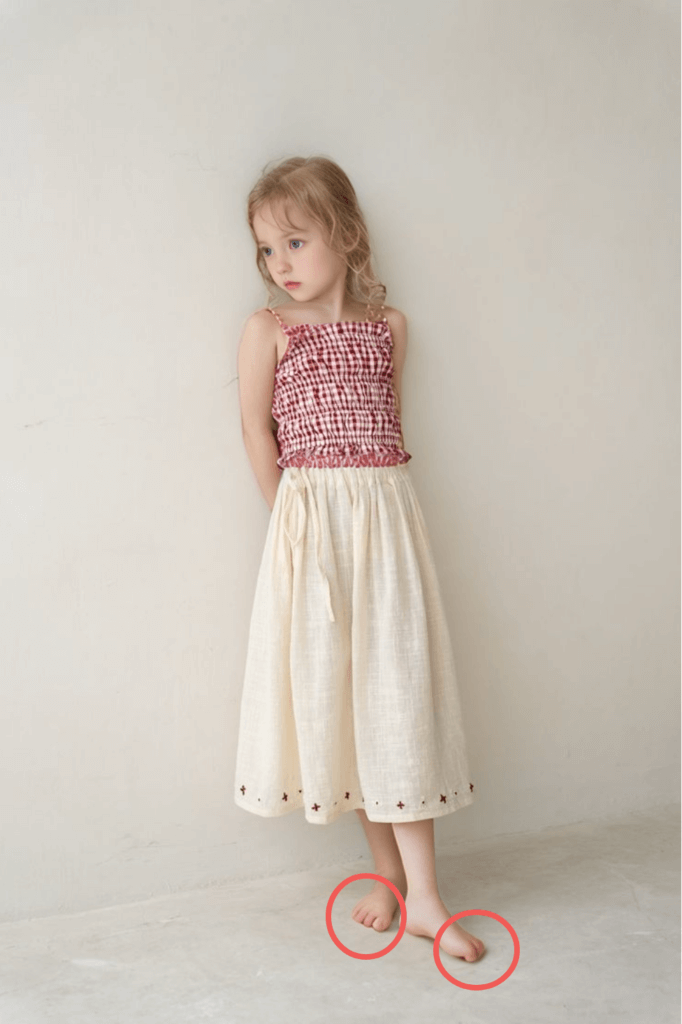
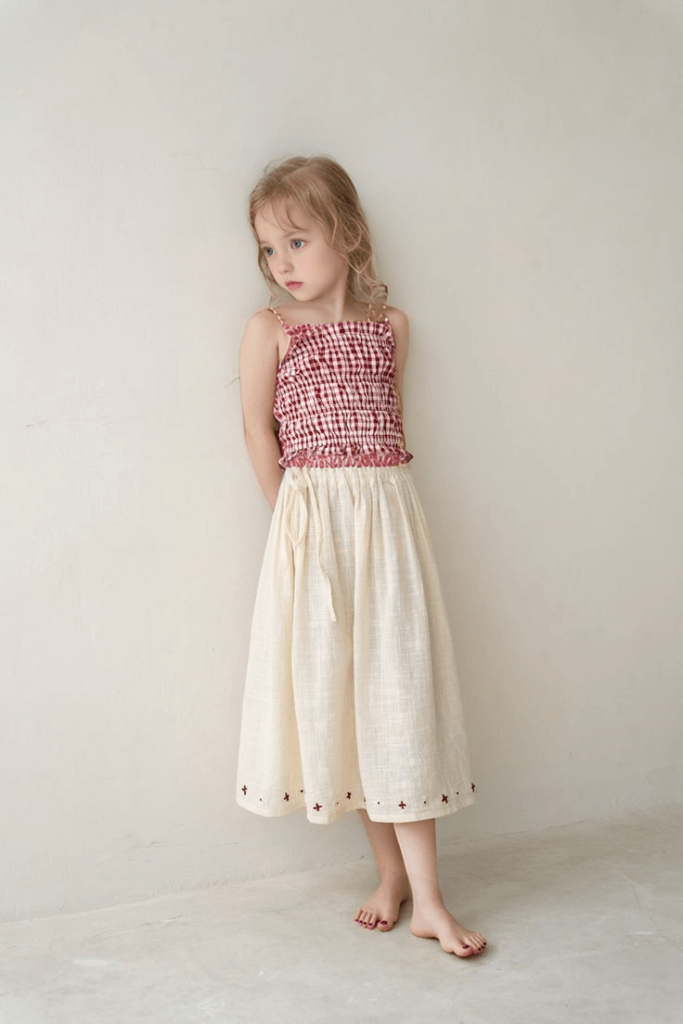
3. Contact: Where an AI Hands and Feet Fixer Can Affect the Product
Contact errors matter most when anatomy meets a product. A finger may pass through a ring or bag handle. A foot may float inside a sandal. A shoe strap may merge with skin. In these cases, the repair area includes both the body and the item.
Before editing, list the product details that must not change. For footwear, check the sole shape, heel, strap path, buckle, stitching, logo, and color. For jewelry, check the stone, metal edge, chain, clasp, and scale. Then compare those details after the repair.
The next pair should be judged as a contact test. A natural-looking foot is not enough if the shoe changes shape or loses a strap.
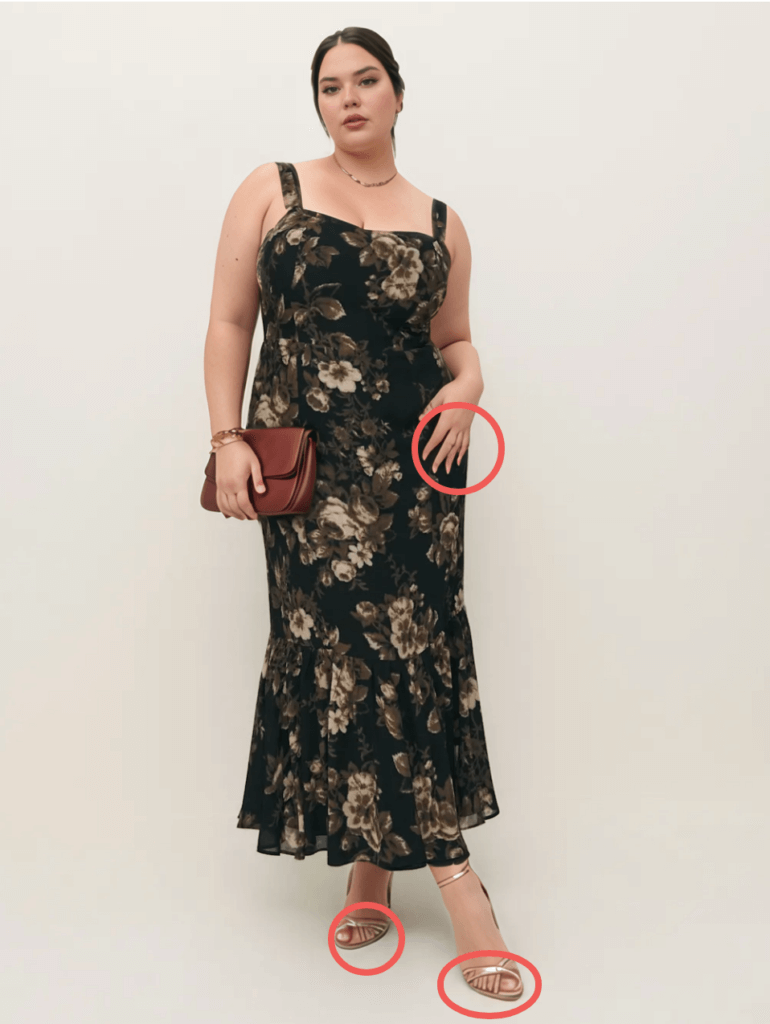

4. Weight: Does the Foot Belong on the Ground?
A foot can have the right number of toes and still appear to float. Check where the heel, sole, or toes meet the floor. Then inspect the contact shadow. The shadow should follow the scene light and sit under the correct part of the foot or shoe.
Weight also affects the ankle and leg. If the repaired foot points one way while the knee points another, the defect is not local. In that case, return to the base image and use a more stable pose.
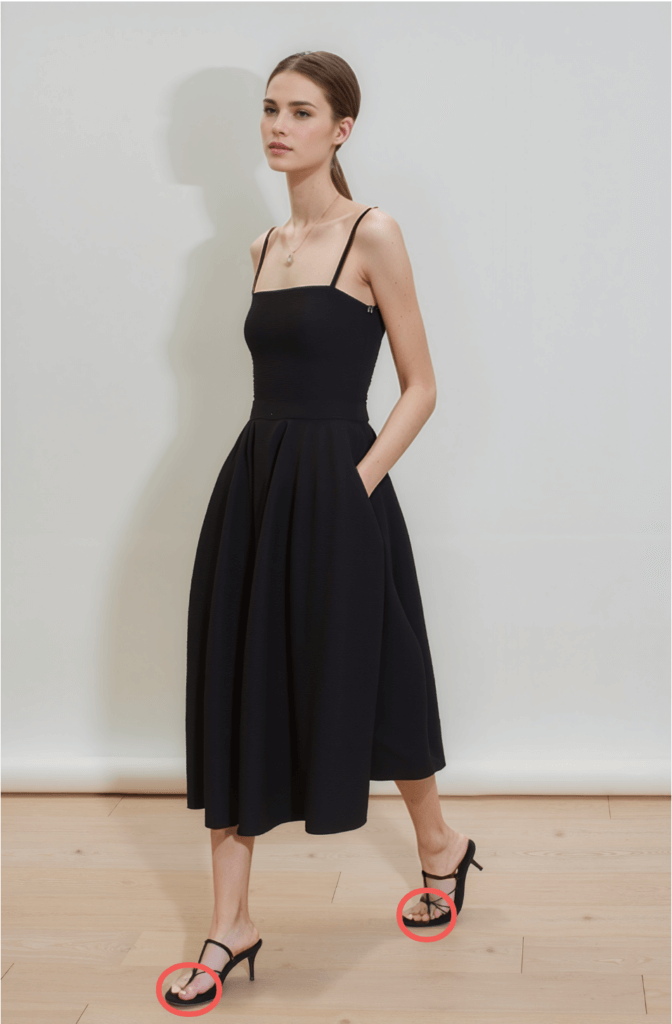

5. Edge: Is the Anatomy Complete Without Inventing the Frame?
Missing toes and cut edges may look like easy repair targets. Yet the crop can limit what the tool can infer. If the source image ends at the foot, there may be no room to build a full shape. Likewise, a heavy foreground object can hide the very anatomy that needs repair.
Use local repair when enough surrounding image remains. Otherwise, expand the canvas first or choose another base. Do not approve a new foot only because it fills the gap. Its angle, size, ground plane, and link to the ankle must still work.
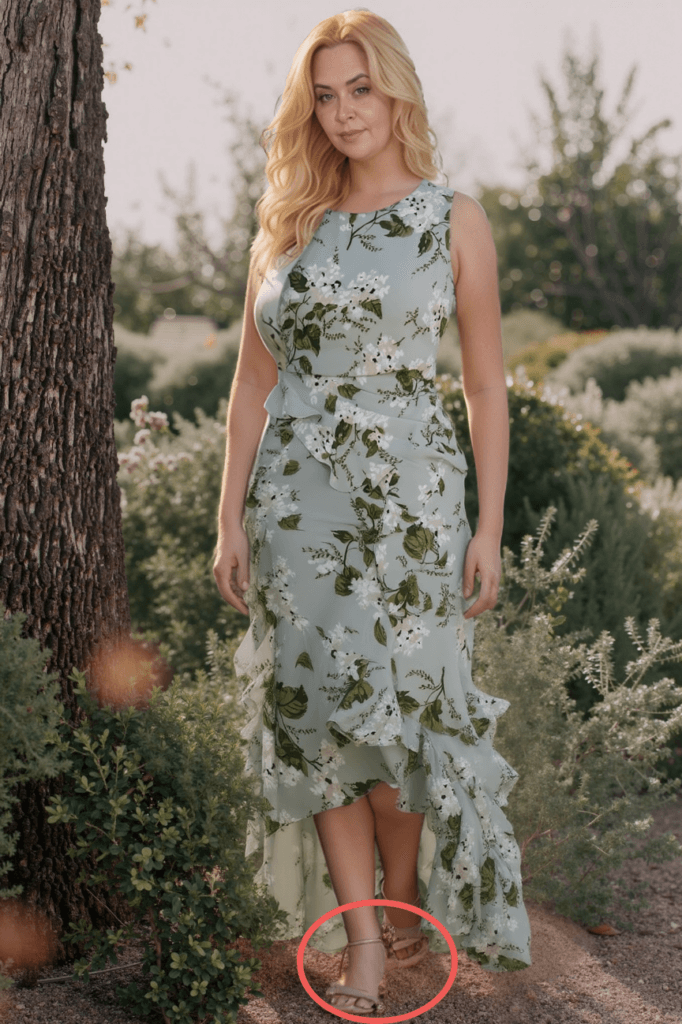

6. Surface: Final AI Hands and Feet Fixer Check
Texture is the last check, not the first. Smooth skin can hide a bad joint. Sharp nails can distract from the wrong scale. Therefore, confirm structure and contact before judging pores, skin tone, polish, or small highlights.
The repaired area should match nearby skin. Check color, grain, light, shadow softness, and edge sharpness. Also, watch for a visible patch around the mask. A technically clean hand or foot can still look pasted into the image when its texture is too sharp or too soft.
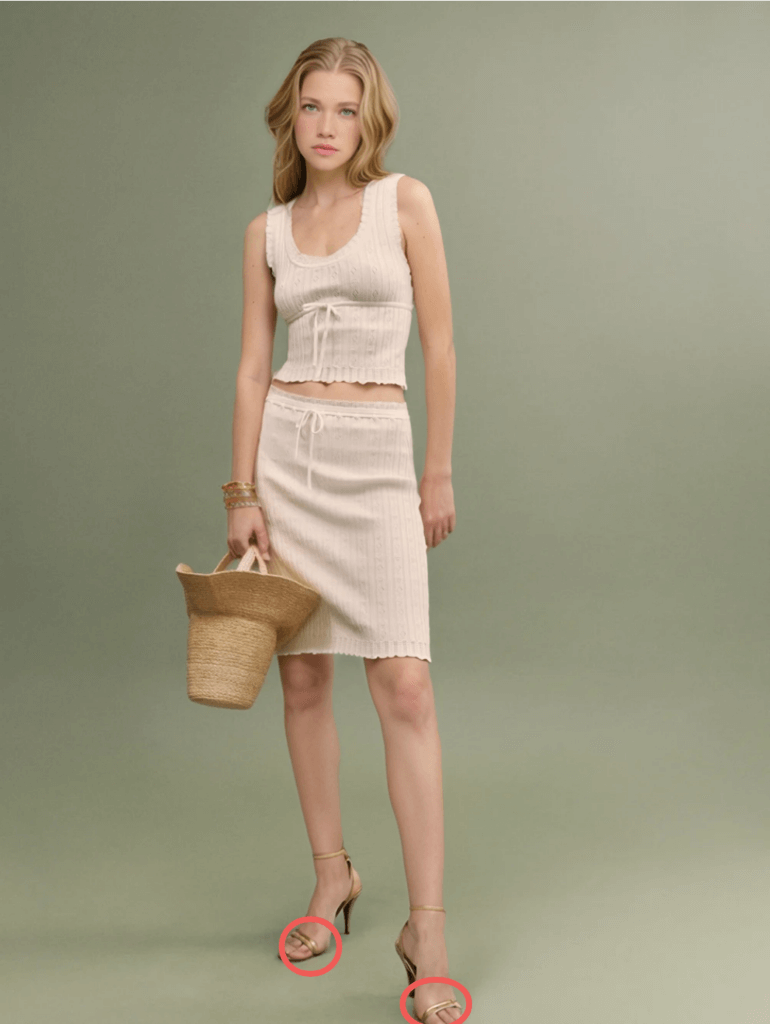

When Repair Can Damage the Product
Local anatomy repair deserves extra review in four product groups:
| Product group | Main risk | Required comparison |
| Footwear | Straps, heels, soles, and logos may shift | Compare the shoe outline and every contact point. |
| Rings and bracelets | Metal edges may merge with fingers or wrists | Compare stone count, setting, clasp, and scale. |
| Bags | Handles and fingers may cross in the wrong order | Check grip, handle shape, seams, and hardware. |
| Sleeves and gloves | Fabric edges may change with the wrist or hand | Check cuff shape, print, stitching, and material. |
If the product changes, the repair has failed even when the anatomy looks better. Use a smaller mask or return to the source. For a complex product contact, Design Repair may be more suitable when a reference image is available. However, use the narrowest tool that addresses the actual defect.
AI Hands and Feet Fixer Review for Ecommerce
The final decision depends on where the image will appear. A small social thumbnail may hide a minor skin detail. A footwear product page will not. A jewelry close-up needs stricter hand and product checks than a wide lifestyle banner.
Before publishing, record one of three outcomes:
- Pass: anatomy, product, light, and crop are sound at the final display size.
- Repair again: the base image works, but one defined local flaw remains.
- Regenerate: the pose, limb direction, product contact, or body balance is wrong.
This simple record prevents endless touch-ups. It also helps a team explain why an image was approved or rejected.
A Good Fix Is a Boring Fix
The best repair should not call attention to itself. Viewers should notice the model and product, not the edited hand or foot. That is why “perfect” is the wrong promise. A better goal is a plausible, stable result that protects the item and passes a clear review.
Use the AI hands and feet fixer after the main image already works. Keep the repair area small. Then run the six-point gate: count, joint, contact, weight, edge, and surface. If the fix passes all six, it is ready for the next stage of the ecommerce workflow.
WeShop AI Hands & Feet Fixer can help correct local defects in AI model and virtual try-on images. Still, it should sit inside a quality process, not replace one. Diagnose first, repair second, and approve only after the product and full image remain true.
Go to WeShop AI For Exploration: