A Photo Dress Changer can replace a dress in an existing portrait while keeping the person, pose, and scene familiar. However, a good result depends on much more than whether the new dress appears in the image.
A dress changes a large part of the body outline. The neckline, waist, sleeves, skirt shape, hem, folds, and fabric all need to work together. If one area breaks, the whole swap can feel off.
So this guide focuses on the generation itself. It looks at source images, dress references, silhouette, length, fabric, pattern, lighting, and the small errors that are easy to miss at first glance.

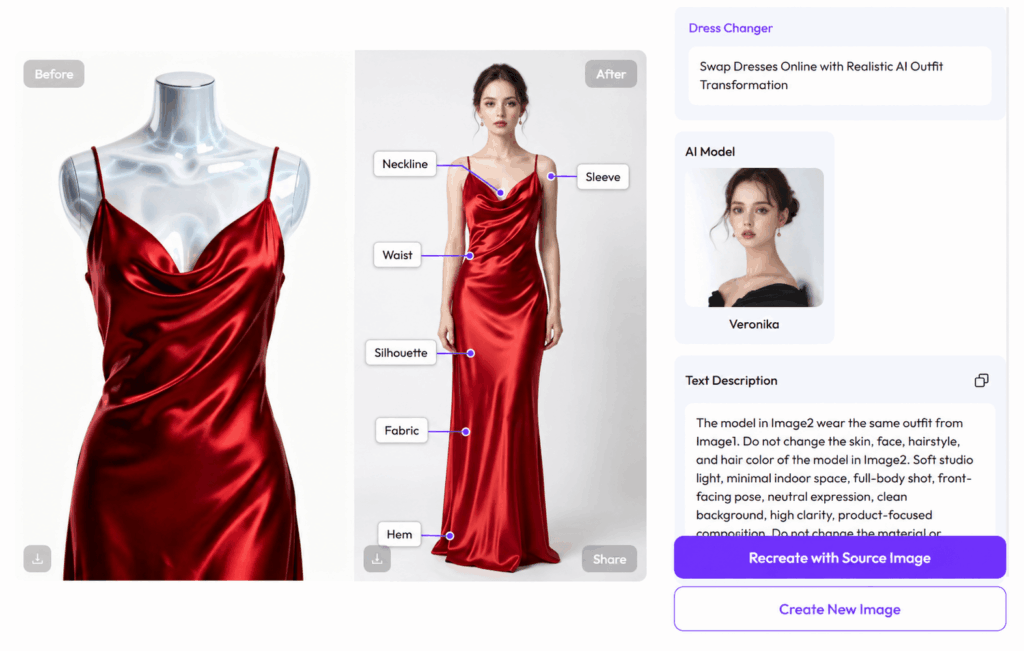
A Dress Swap Has to Hold Together From Neckline to Hem
Changing a top affects a fairly small part of the body. A dress is different.
Depending on the design, the generation may need to rebuild the visible shape from the shoulders to the knees or ankles. Therefore, several areas need to stay consistent at the same time.
| Dress area | What to check | Common generation problem |
|---|---|---|
| Neckline | shape, depth, position | neckline changes or merges into hair |
| Waist | height and fit | waist moves too high or too low |
| Sleeves | length and volume | sleeves blend into the arms |
| Skirt shape | fitted, A-line, straight, flared | silhouette changes into another style |
| Hem | intended length | mini, midi, and maxi lengths drift |
| Pattern | scale and direction | prints stretch, repeat, or disappear |
| Fabric | weight and drape | stiff fabric looks too soft, or vice versa |
This is why a polished face does not automatically mean the dress generation is good.
Instead, read the result from top to bottom.

Photo Dress Changer Inputs Decide How Hard the Generation Will Be
A better result often starts before you press Generate.
The model photo and dress reference need to give the system enough visual information. If either image hides important areas, the generation has to guess more.
Start With a Model Photo That Shows the Dress Area
The model does not need a perfect studio pose. Still, the body should be easy to read.
For most dress swaps, look for:
- visible shoulders and waist
- enough lower body to judge dress length
- arms that do not cover most of the torso
- a clean outline around the body
- lighting that makes the pose easy to see
Crossed arms can hide the waist. Long hair may cover the neckline. A large bag can block the skirt. Meanwhile, a tight crop can make hem length harder to control.
None of these problems guarantees a bad result. However, each one adds more uncertainty.
Use a Dress Reference That Explains the Design
A useful dress reference should make the important features easy to see.
Check the neckline, waist, sleeves, skirt shape, hem, pattern, and fabric. If you cannot describe those parts after looking at the image for a few seconds, the reference may be too unclear.
For example, a clean product image can be easier to interpret than a small dress inside a busy lifestyle photo. Likewise, a full garment view is more useful than a crop that cuts off the hem.
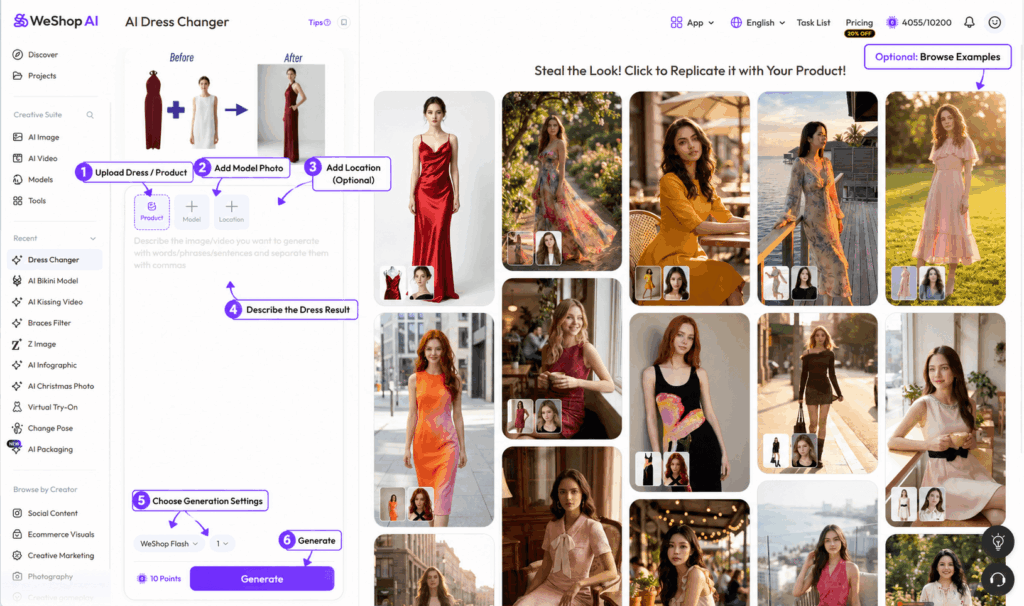
Read the Dress Before You Generate
Before using the Photo Dress Changer, take ten seconds to inspect the garment.
Ask yourself:
- Where does the neckline start?
- Is the waist natural, high, or dropped?
- Are the sleeves fitted or loose?
- Is the skirt straight, fitted, A-line, or flared?
- Where should the hem end?
- Is the fabric structured or soft?
- Which pattern or trim must stay recognizable?
This quick check gives you a reference for later review.
It also helps you write a better instruction. Instead of asking for a “realistic dress,” you can tell the generation which features actually define that dress.
Three Existing Dress Cases Show Three Different Problems
The original article already has three useful dress examples. Keep them, but give each one a clear generation lesson instead of treating them as generic examples.
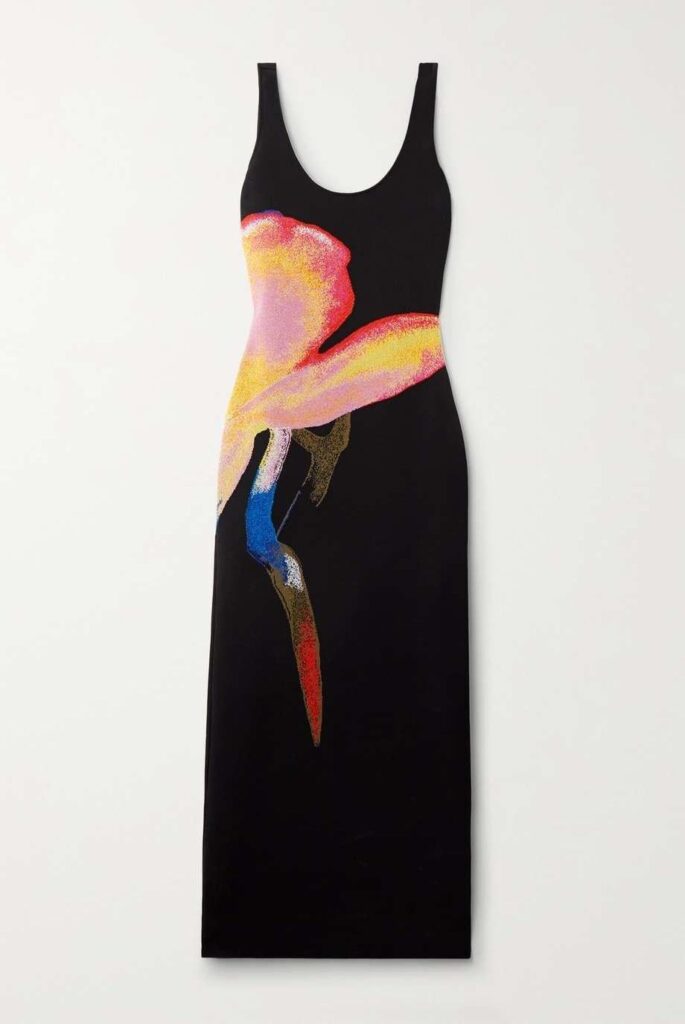
Photo Dress Changer Floral Dress Test Needs Pattern Control
A floral dress is not only a color change. The print has to move with the fabric.
Check the pattern around the waist, side folds, sleeves, and skirt. Also look at areas covered by the hands. If the print suddenly changes scale or direction, the dress may look convincing from far away but fail under closer review.
For a creative styling image, a small pattern change may be acceptable. However, a product-led image needs stricter checking.
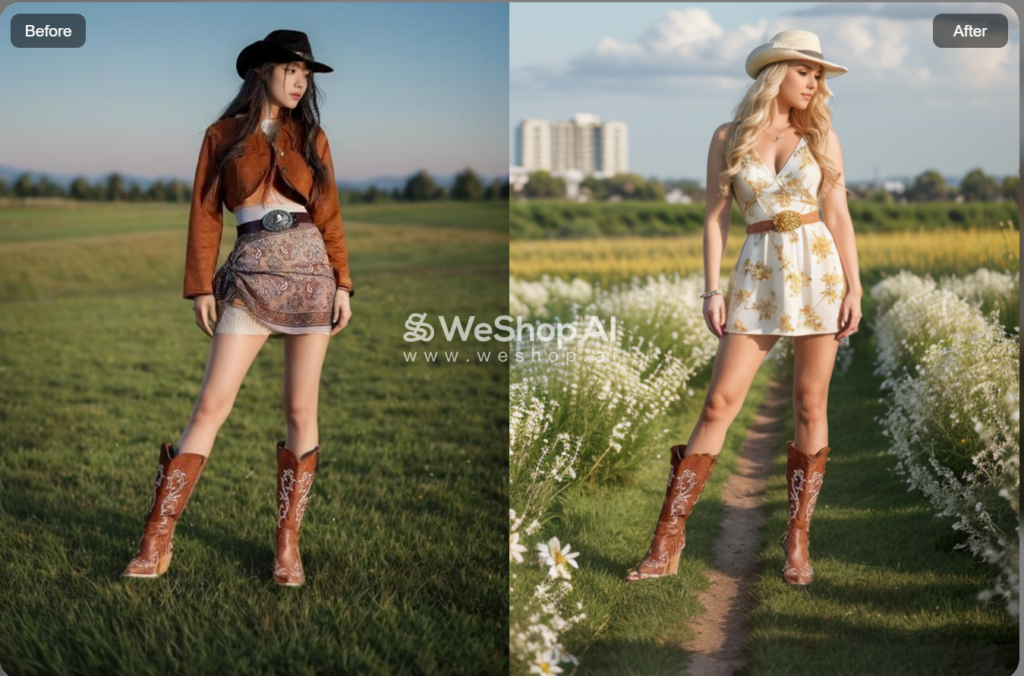
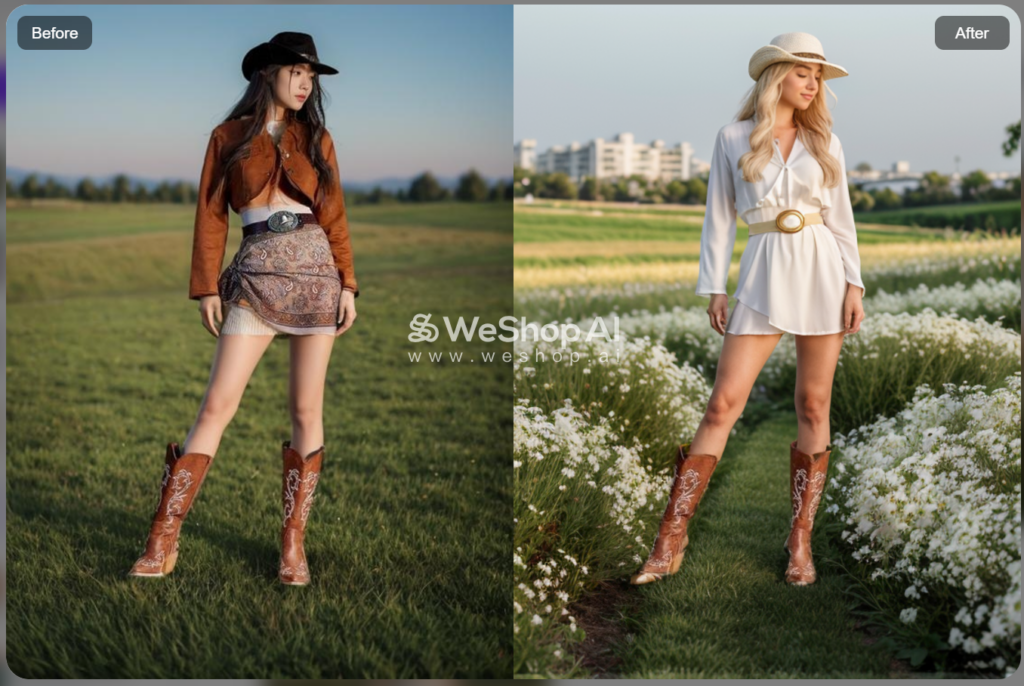
Photo Dress Changer White Dress Test Depends on Shape and Shadow
A plain white dress gives the eye fewer patterns to follow. As a result, shape becomes more important.
Look at the shoulder line first. Then check the waist, folds, and hem. Shadows should also make sense for the original scene.
If the model is lit from one side, the new dress should not look evenly lit from every direction. Likewise, folds should follow the body rather than appearing at random.
Green Dress Generation Needs Color and Fabric to Agree
Matching the color is only half the job.
A green dress can keep the right general shade while losing the original fabric character. For example, a soft knit should not suddenly look glossy. A structured dress should not drape like very thin fabric.
Therefore, compare color and fabric together. Also inspect the edges around the sleeves, waist, and hem.
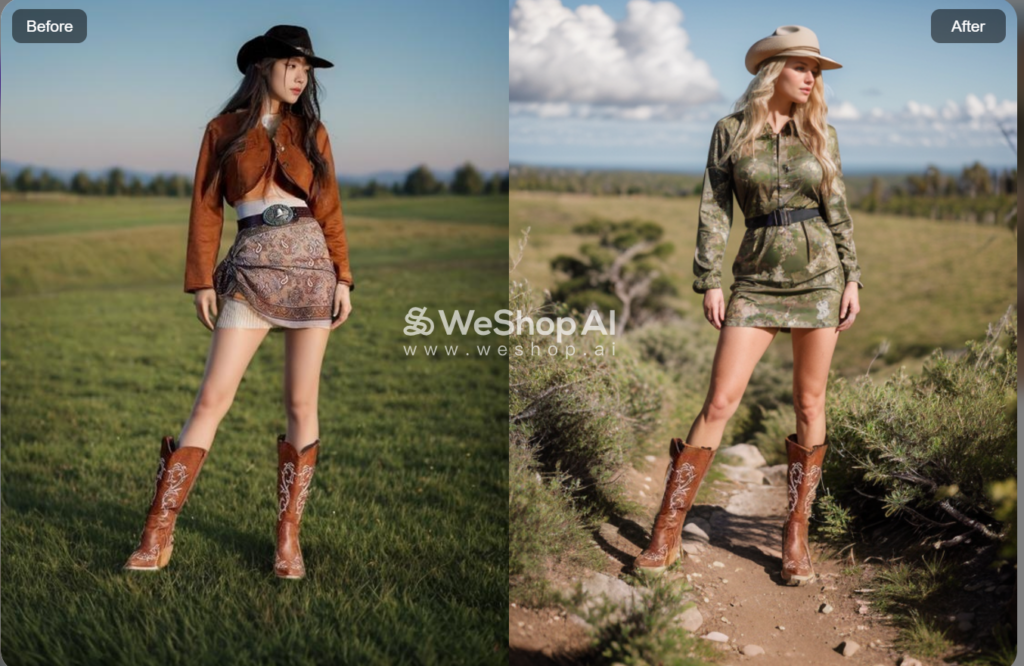
Photo Dress Changer Instructions Work Better When They Describe Structure
If the current creation interface gives you a description or prompt field, a longer prompt is not always a better prompt.
For dress generation, start with the parts that define the garment. A useful order is:
what to keep → dress structure → length → fabric → pattern → lighting
A balanced base instruction can look like this:
Keep the adult model, pose, face, hands, and background unchanged. Replace the current outfit with the reference dress. Preserve the neckline, waist position, sleeve length, skirt shape, and hem length. Keep the fabric drape and lighting consistent with the original photo.
If the dress has a strong print, add:
Keep the pattern scale and direction close to the reference, especially around the waist and skirt folds.
For a structured office dress:
Keep a clean fitted silhouette with a defined waist, straight hem, and structured fabric. Preserve the original pose and natural body proportions.
For a softer day dress:
Keep a relaxed dress silhouette with natural folds through the skirt. Preserve the original body position and scene lighting.
These instructions are more useful than stacking vague words such as “perfect,” “stunning,” or “ultra realistic.”
The generation needs design information, not praise.
Run One Controlled Photo Dress Changer Test
Random variations make it hard to learn from the result.
Instead, keep most variables stable and change only one thing at a time.
A simple dress-length test works well because the difference is easy to see.
Generation A — Mini
Keep the dress above the knee.
Generation B — Midi
Keep the same neckline, waist, sleeves, color, and fabric. Change only the hem to mid-calf.
Generation C — Maxi
Keep the same design again, but extend the hem close to the ankles.
Then compare all three.
A longer dress gives the generation more fabric to build. It also covers more of the legs. Meanwhile, a shorter dress exposes more of the lower-body pose.
If the neckline, waist, sleeves, and fabric all change at the same time, the test has lost its value. You are no longer comparing dress length.You are comparing three different dresses.
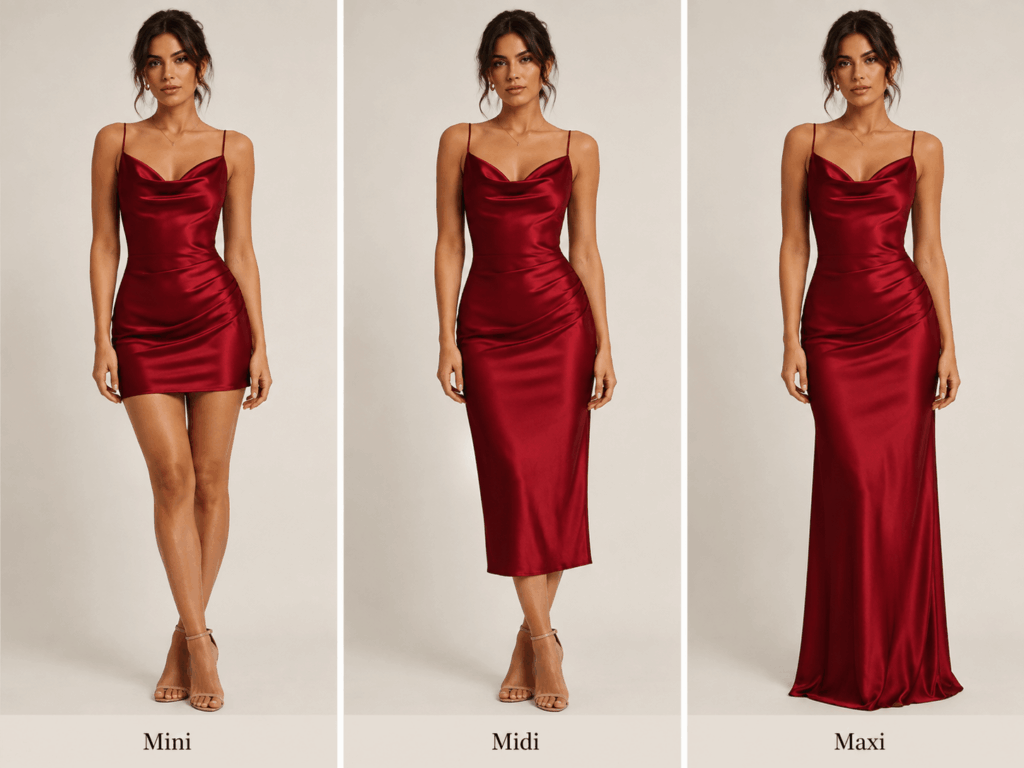
Prompt suggestion:
Keep the same adult model, pose, background, neckline, sleeves, waist, color, and fabric. Change only the dress length. Create one above-knee version, one mid-calf version, and one ankle-length version. Keep the lighting and silhouette consistent.
Photo Dress Changer Quality Check in 20 Seconds
A Photo Dress Changer result can look polished at thumbnail size and still contain small structural errors.
Before keeping it, zoom in once and check:
- neckline shape
- waist position
- sleeve length
- pattern continuity
- hand and hair overlap
- skirt silhouette
- hem length
- fabric texture
- fold and shadow direction
For casual content, small variations may be fine. However, product pages and campaign images need a stricter review when the dress represents a real item.
The goal is not pixel perfection. It is to catch changes that alter the dress itself.
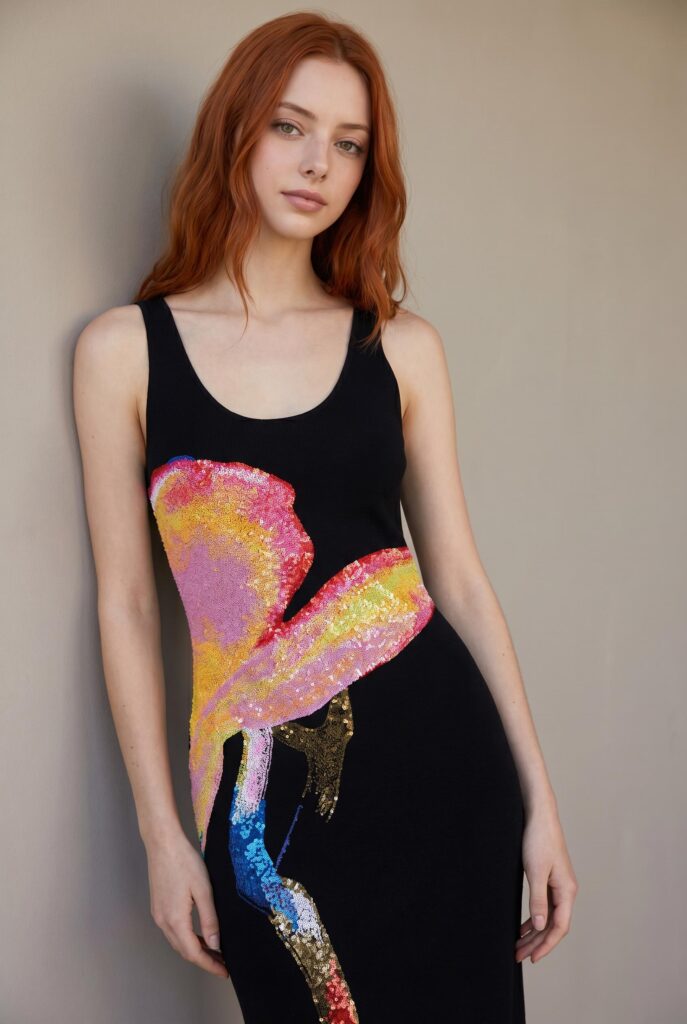
Fix the Source When the Same Error Keeps Coming Back
When a generation fails, adding more adjectives is often the wrong response.
First, identify the part that keeps breaking.
| Problem | Likely cause | Better next move |
|---|---|---|
| neckline keeps changing | dress reference is small or partly covered | use a clearer garment image |
| waist looks misplaced | body shape is hidden | use a cleaner model pose |
| sleeves merge into arms | arms cover too much of the garment area | choose a pose with clearer arm separation |
| floral pattern breaks | print is too small or unclear | use a sharper dress reference |
| maxi dress becomes too short | lower body is cropped | use a fuller body image |
| hem bends strangely | floor contact or leg position is unclear | choose a source with more visible lower body |
| fabric looks wrong | texture is hard to read | use a garment image with clearer material detail |
If the same problem appears two or three times, stop repeating the same setup.
Change one meaningful input instead.
For example, keep the model and replace only the dress reference. If the result improves, the first garment image was probably the weak point.
Or keep the dress and switch to a cleaner pose. That tells you whether the model photo was creating the problem.
This is more useful than generating five unrelated versions and hoping one works.
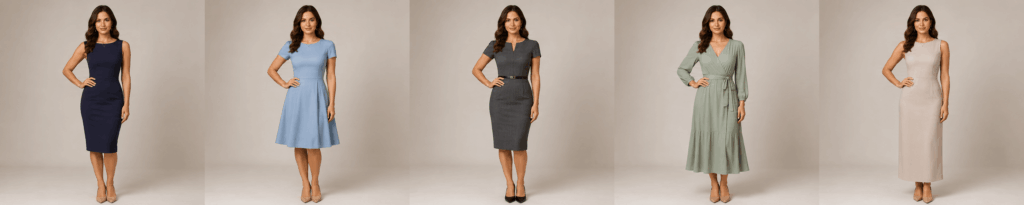
Build a Small Dress Set Instead of Random Variations
Once one generation passes review, then it makes sense to explore a small set.
Keep the same adult model and background. Change one dress direction at a time.
For example:
- fitted day dress
- A-line dress
- structured office dress
- soft midi dress
- long straight dress
Now compare the same areas across all five images:
shoulders → waist → skirt volume → hem → fabric behavior
Because the model stays stable, differences in the dress are easier to judge.
This is also useful for a lookbook or design review. Instead of showing five unrelated fashion images, you get a controlled visual set built around one person and one scene.
Stop When the Dress Is Consistent
A useful Photo Dress Changer result does not need to be the most dramatic version.
It needs to hold together from neckline to hem.
Before keeping the final image, ask:
- Does the dress still match the reference?
- Is the waist in a believable position?
- Does the skirt shape make sense?
- Are the hands and hair layered correctly over the fabric?
- Does the material behave like the intended fabric?
- Is the hem the length you asked for?
- Are important colors and patterns still usable?
If the answer is yes, stop generating.
If one important detail keeps failing, change the source rather than making the prompt longer.
That is where a Photo Dress Changer becomes useful. The strongest workflow is not endless variation. It is a controlled process where you know what should stay, what should change, and what needs another pass.
Go to WeShop AI For Exploration: